In this blog post, I will go over managing users in an Active Directory environment.
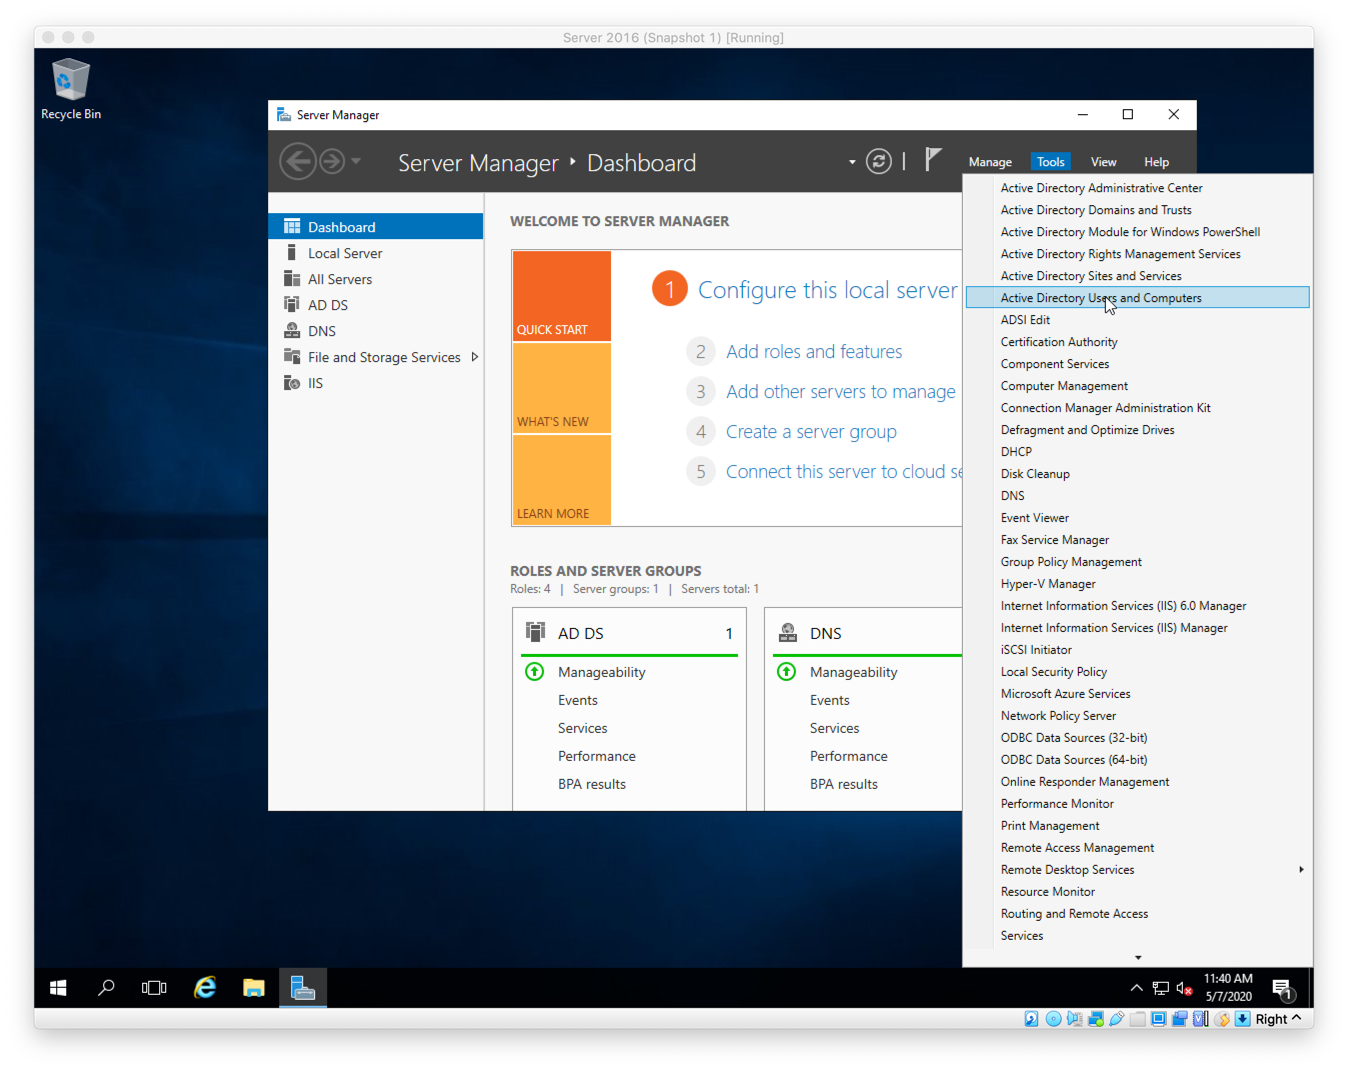
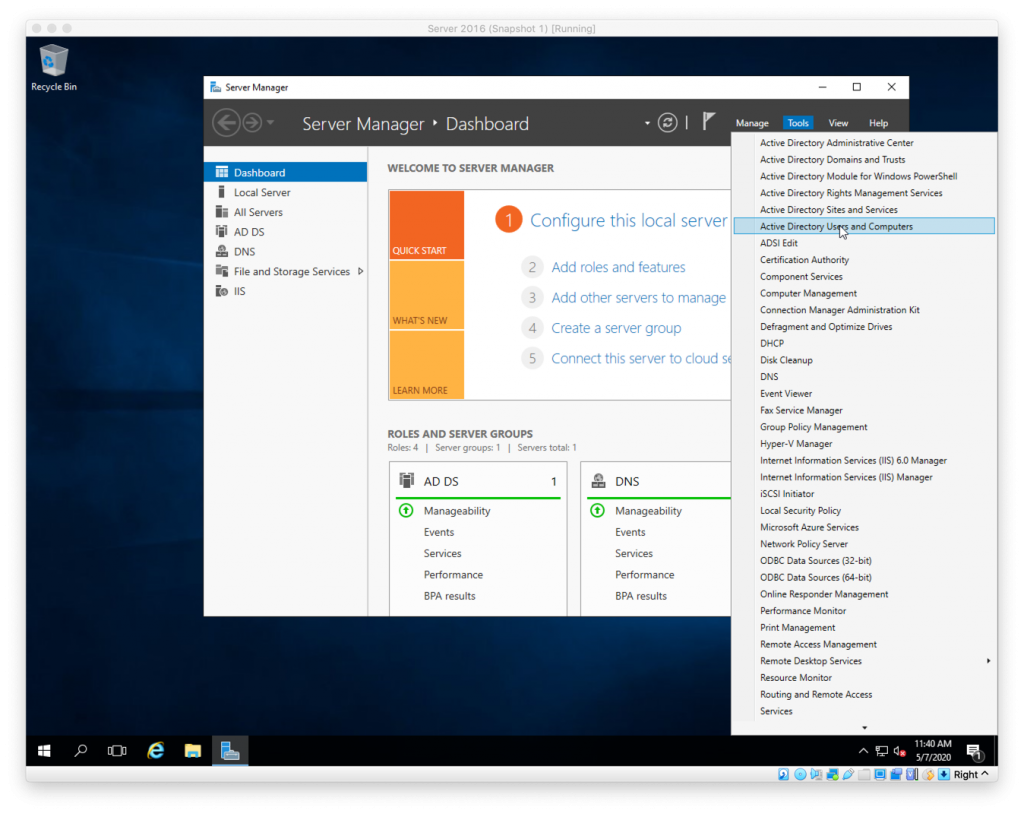
Figure A. From the Server Manager, select Tools. Under tools, select Active Directory Users and Computers.
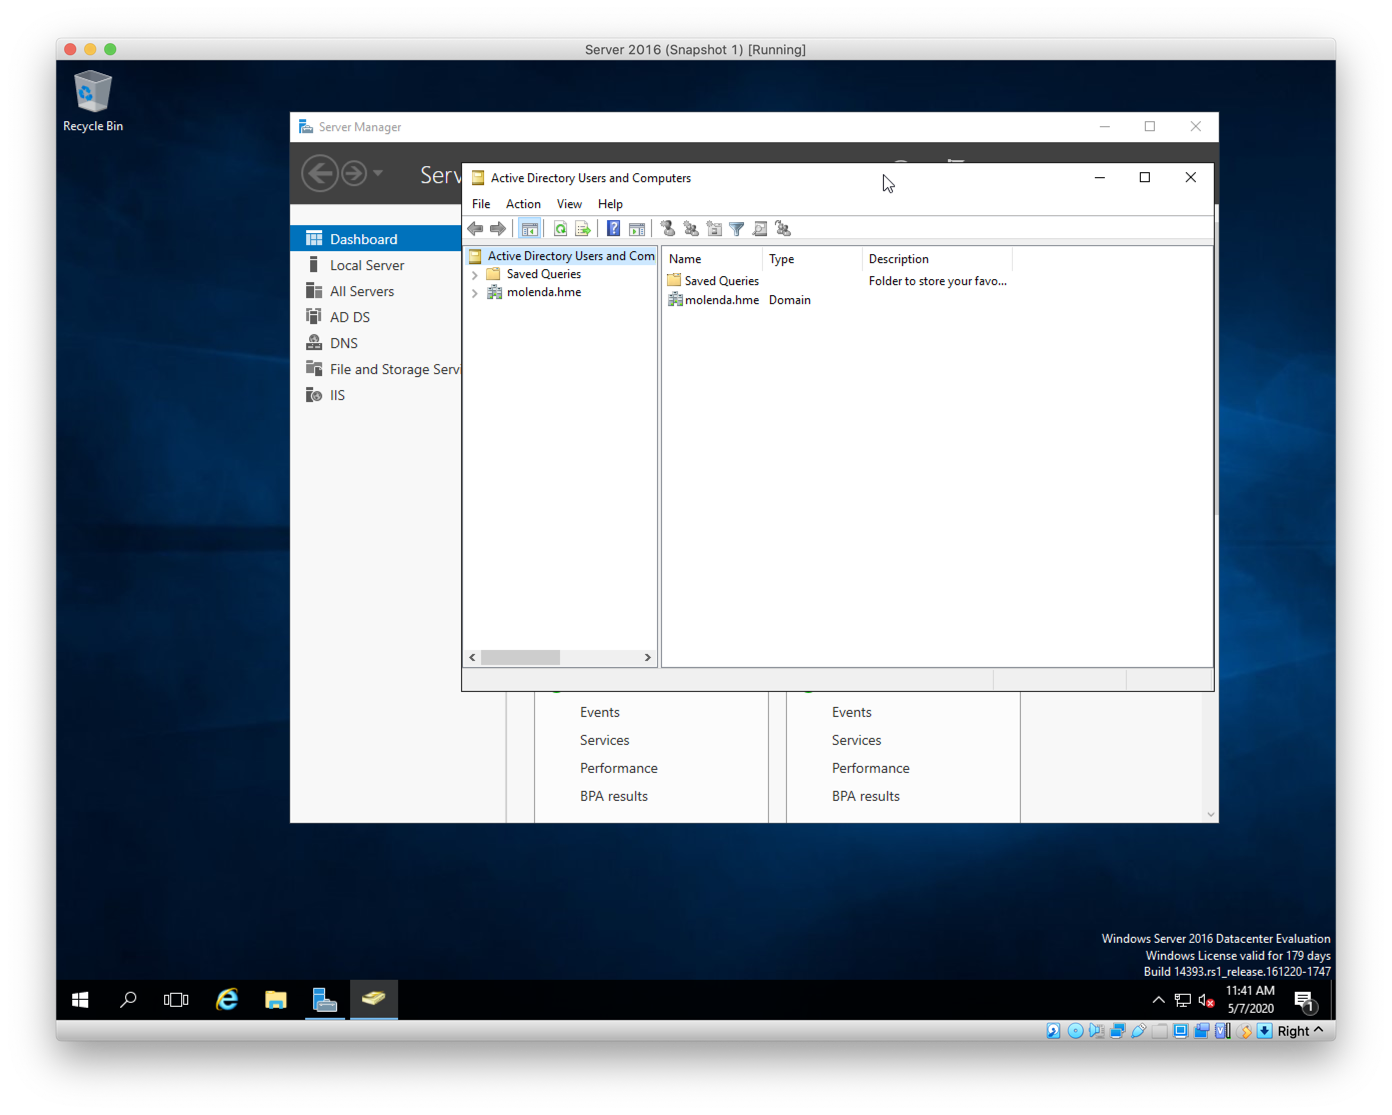
Figure B. Active Directory Users and Computers Dialog. Here you can see my created domain, molenda.hme. This is where the users and computers will be located
.
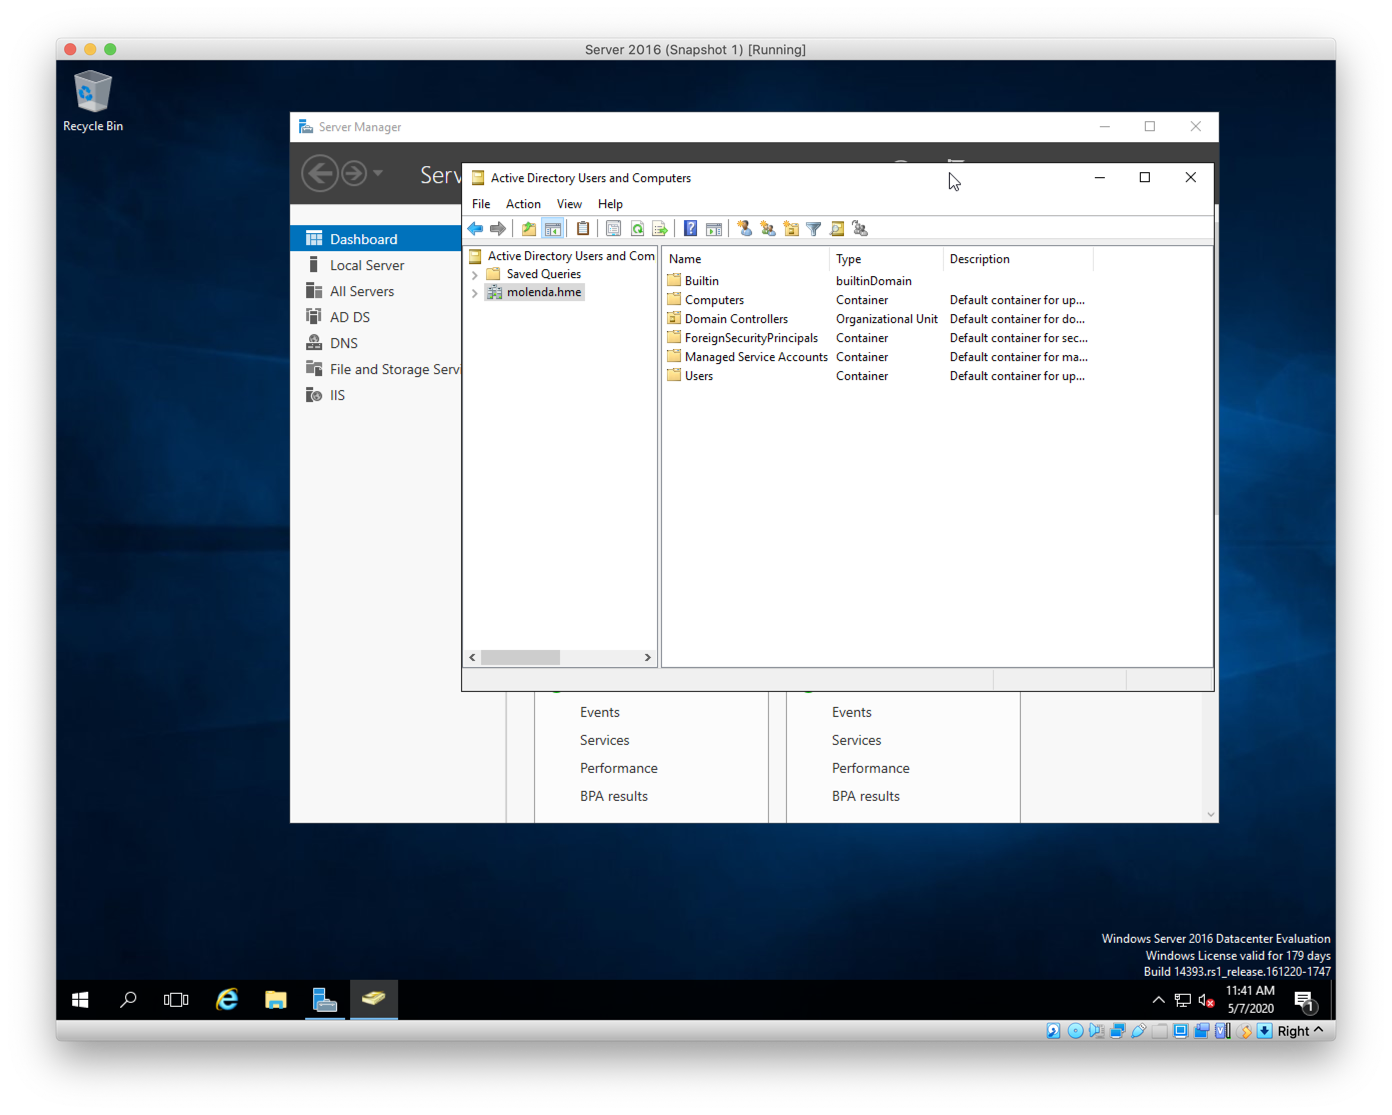
Figure B. Active Directory Users and Computers Dialog. Clicking on my domain, you can see all of the built-in containers and organizations units. This is where design of Active Directory is realized. Going beyond the built-in units.
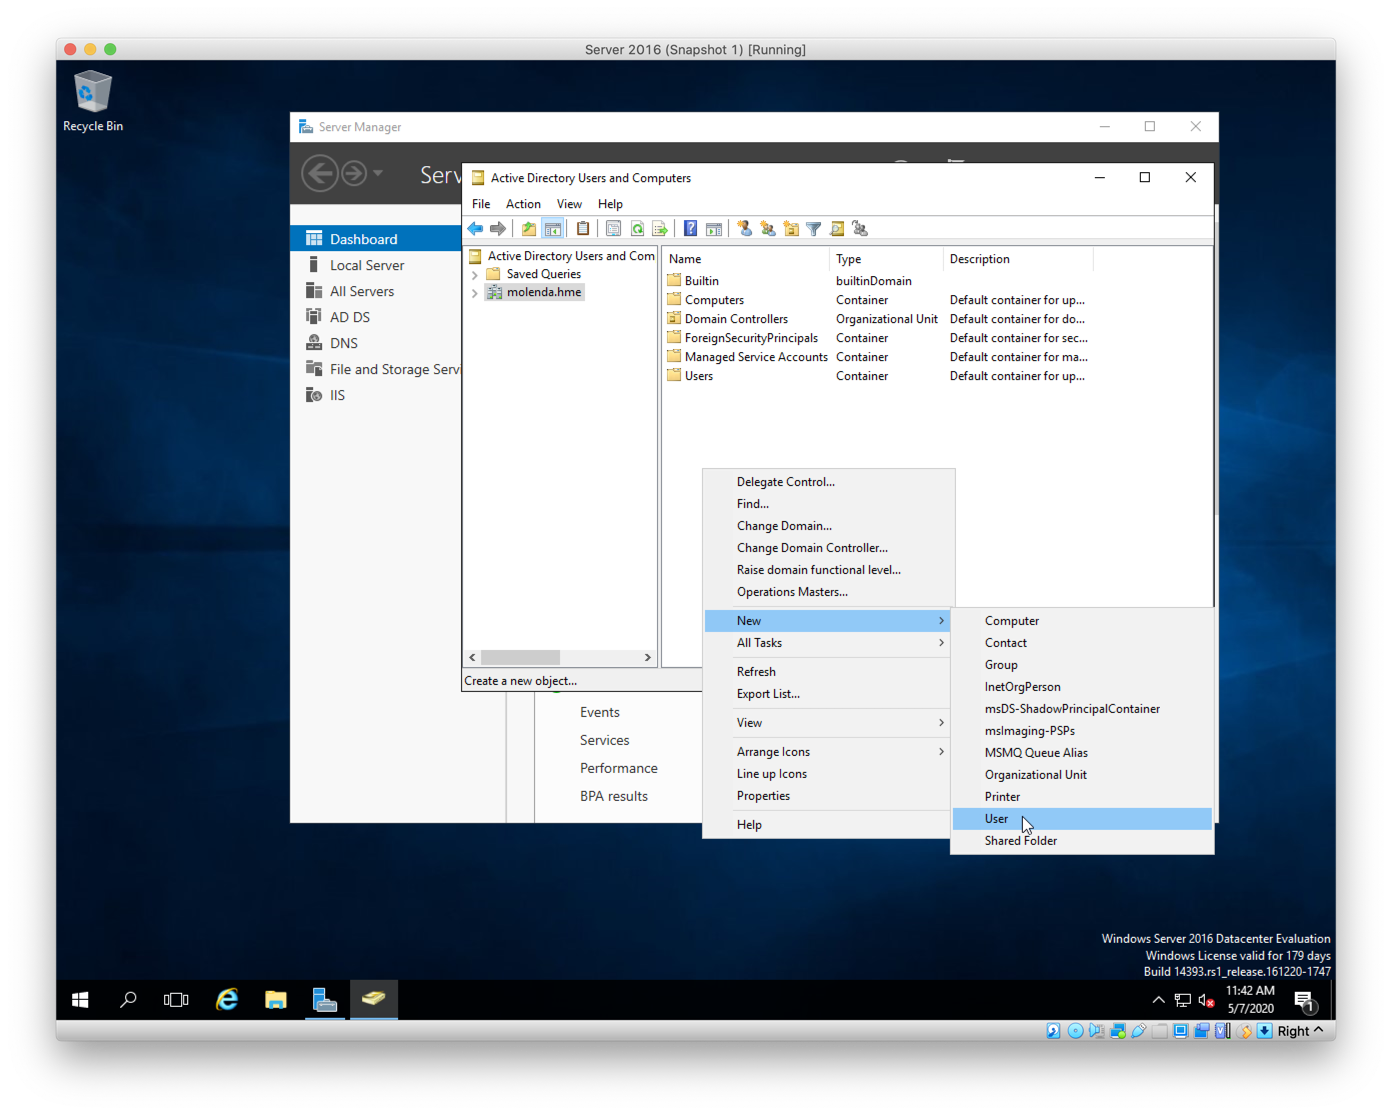
Figure C. Active Directory Users and Computers Dialog. From here, right click anywhere in the right pane, select New, then User. I am going to create a new user for my domain.
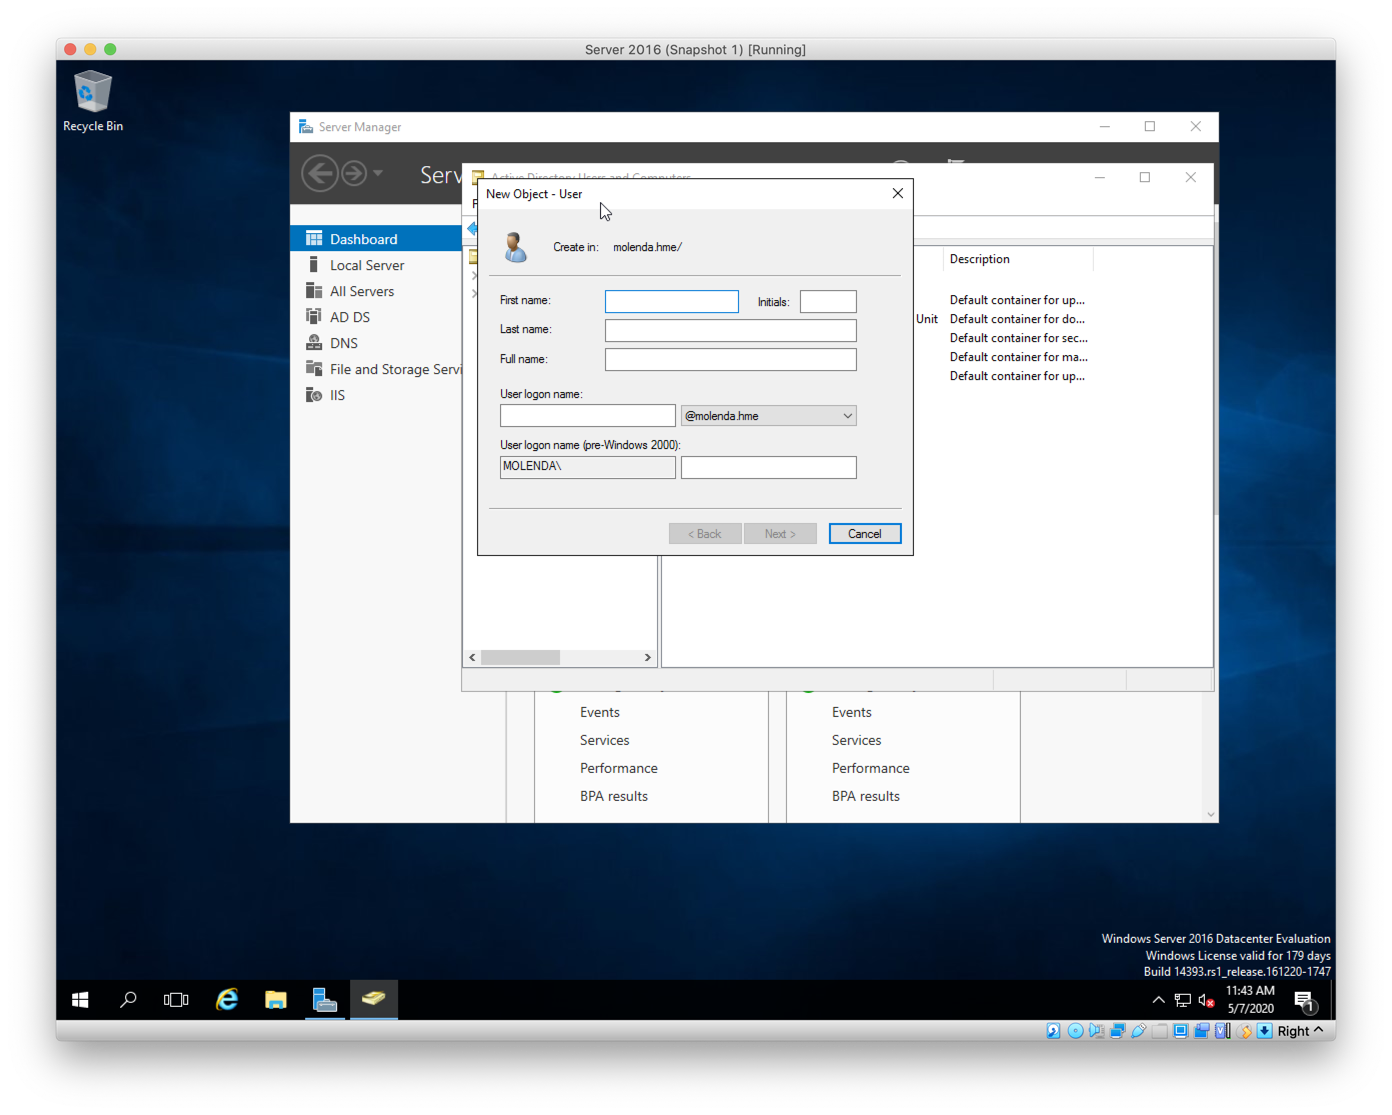
Figure D. Active Directory Users and Computers Dialog. This is the New User Dialog. You can see at the top that it says, “Create in: molenda.hme/“ so I know that this user is being created in the correct domain. Some organizations may have multiple domains across their organization.
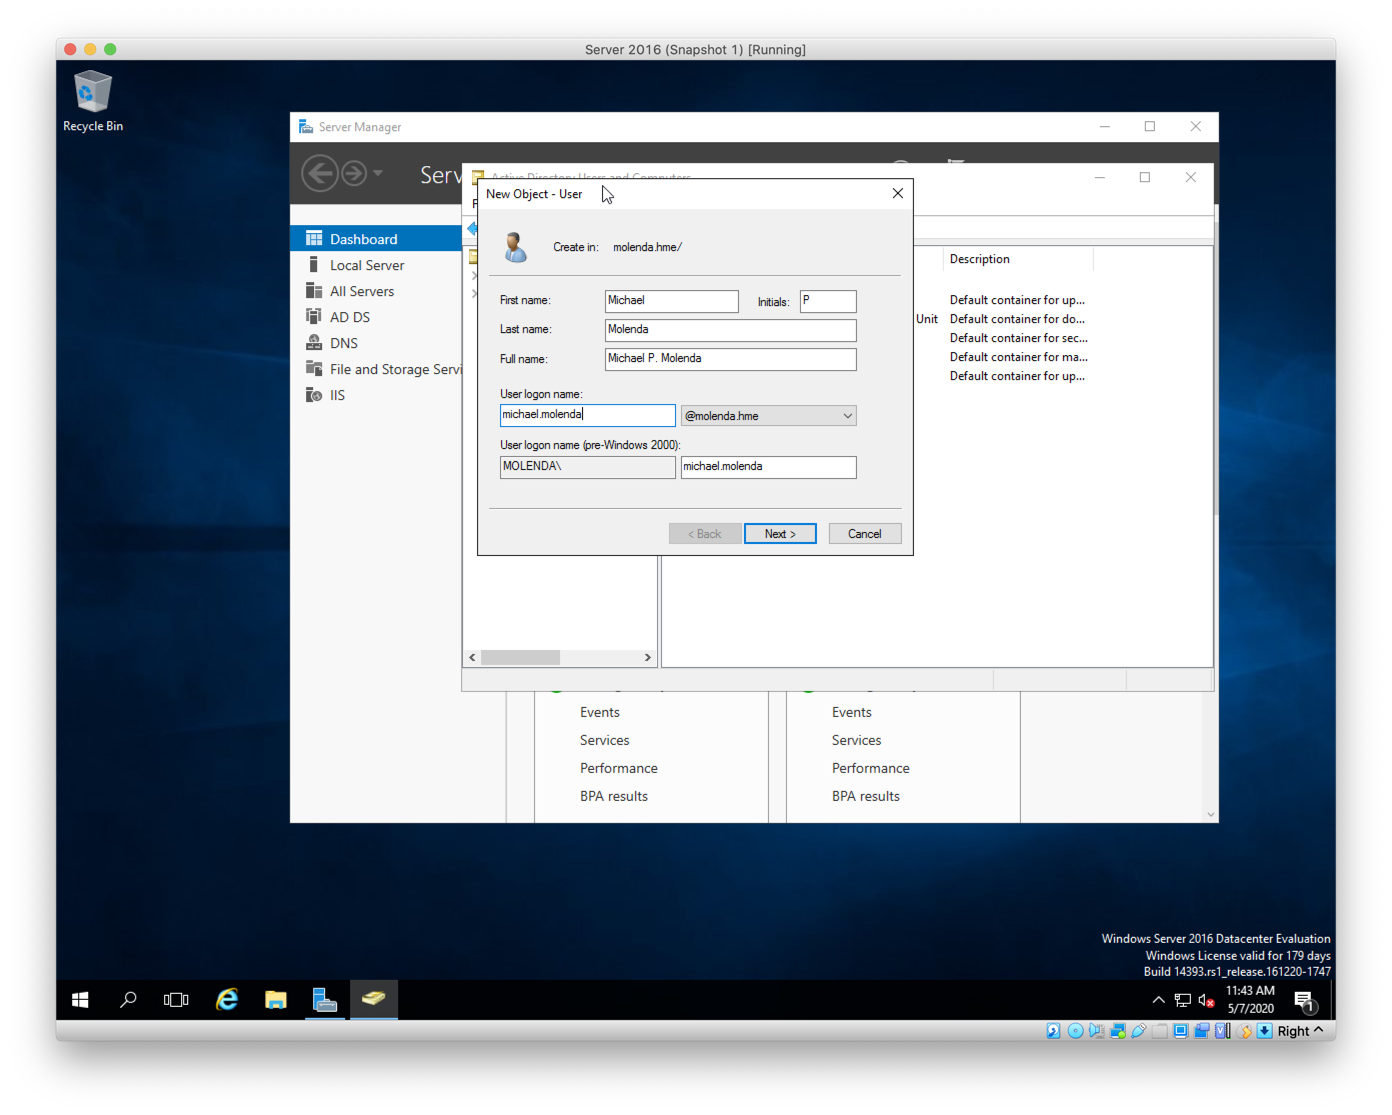
Figure E. Active Directory Users and Computers Dialog. From here, I will fill out new user’s name, login name (the format of which is determined by the organization. Some haver employee numbers, or use first initial+last name. Just need consistency). Once done, I click Next.
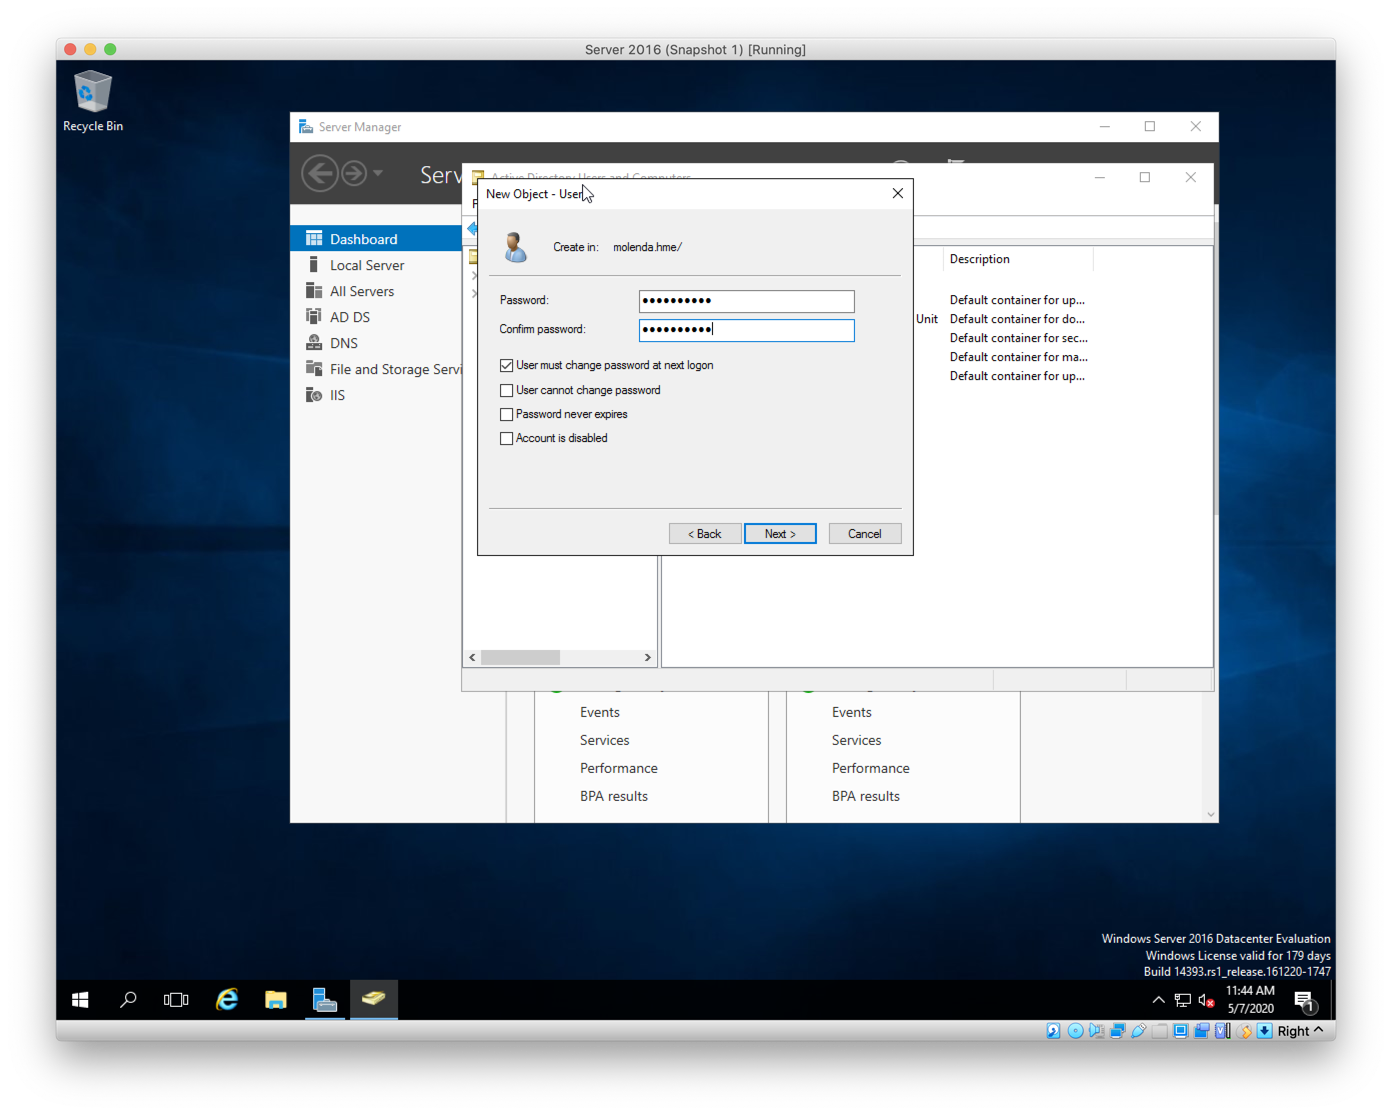
Figure F. Active Directory Users and Computers Dialog. After clicking Next, this is where I will assign a temporary password. Again, they format of the temporary password is determined by the organization. Some use initials+last 6 of social. It is good practice to not use the same temporary password for every new user as a nefarious individual could hack a new user’s account before the new user can log in and change the password. That is something that should be required, as it is here, to change the password at nest login. Once done, click Next.
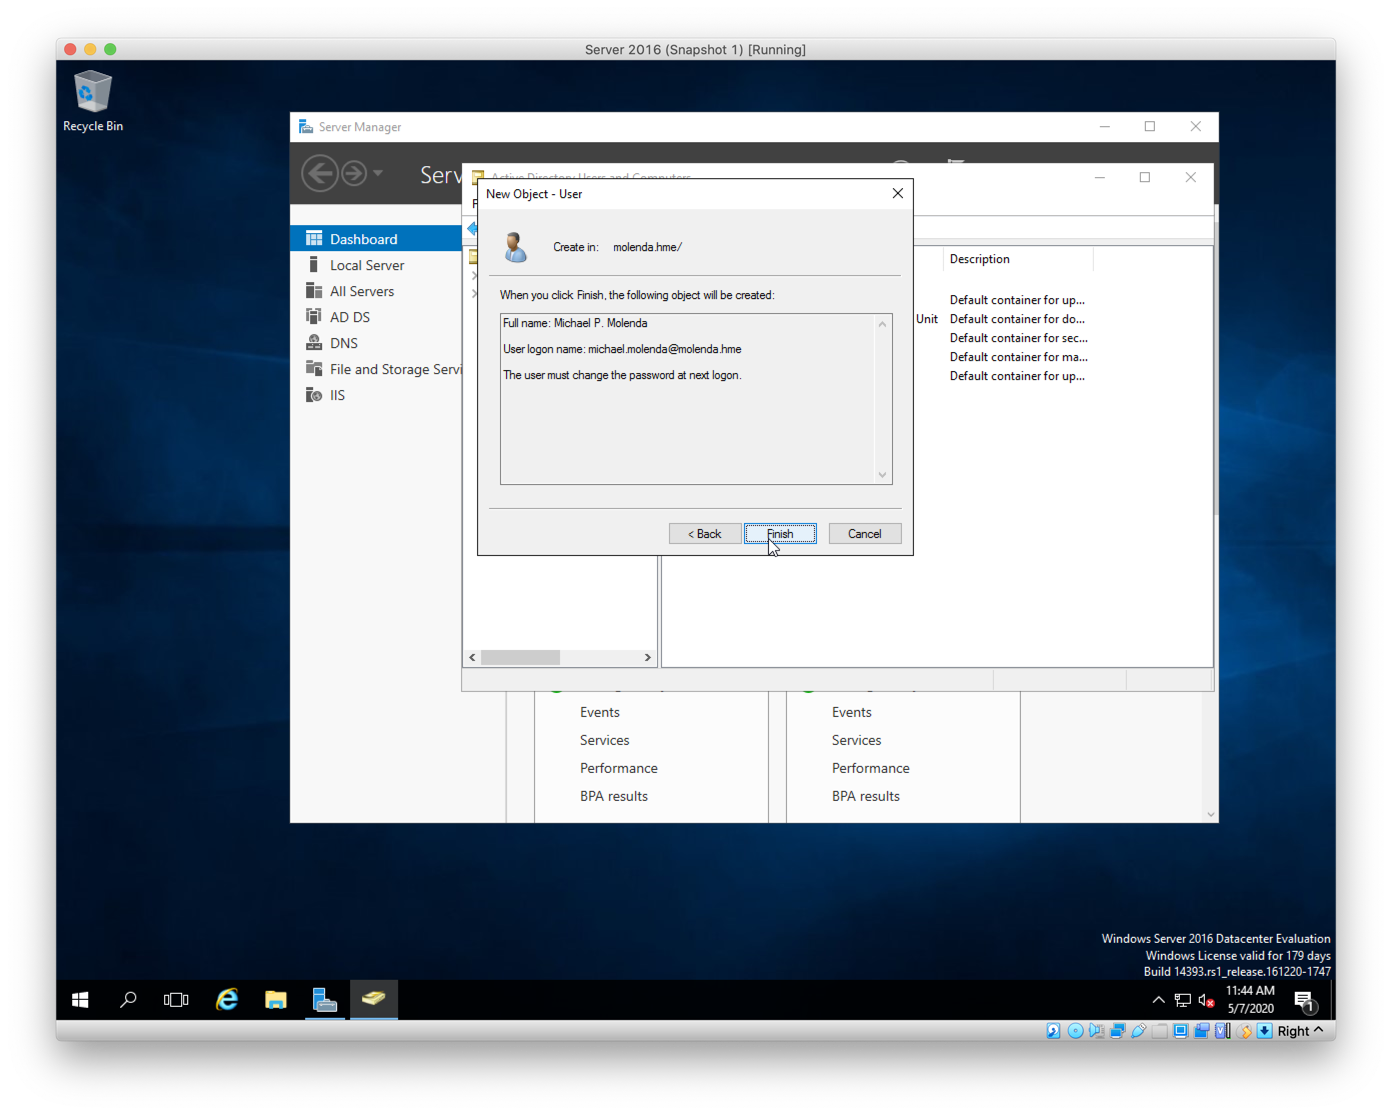
Figure G. Active Directory Users and Computers Dialog. Once I am satisfied with the settings for this new user, it’s time to save the user. Click Finish to create the user.
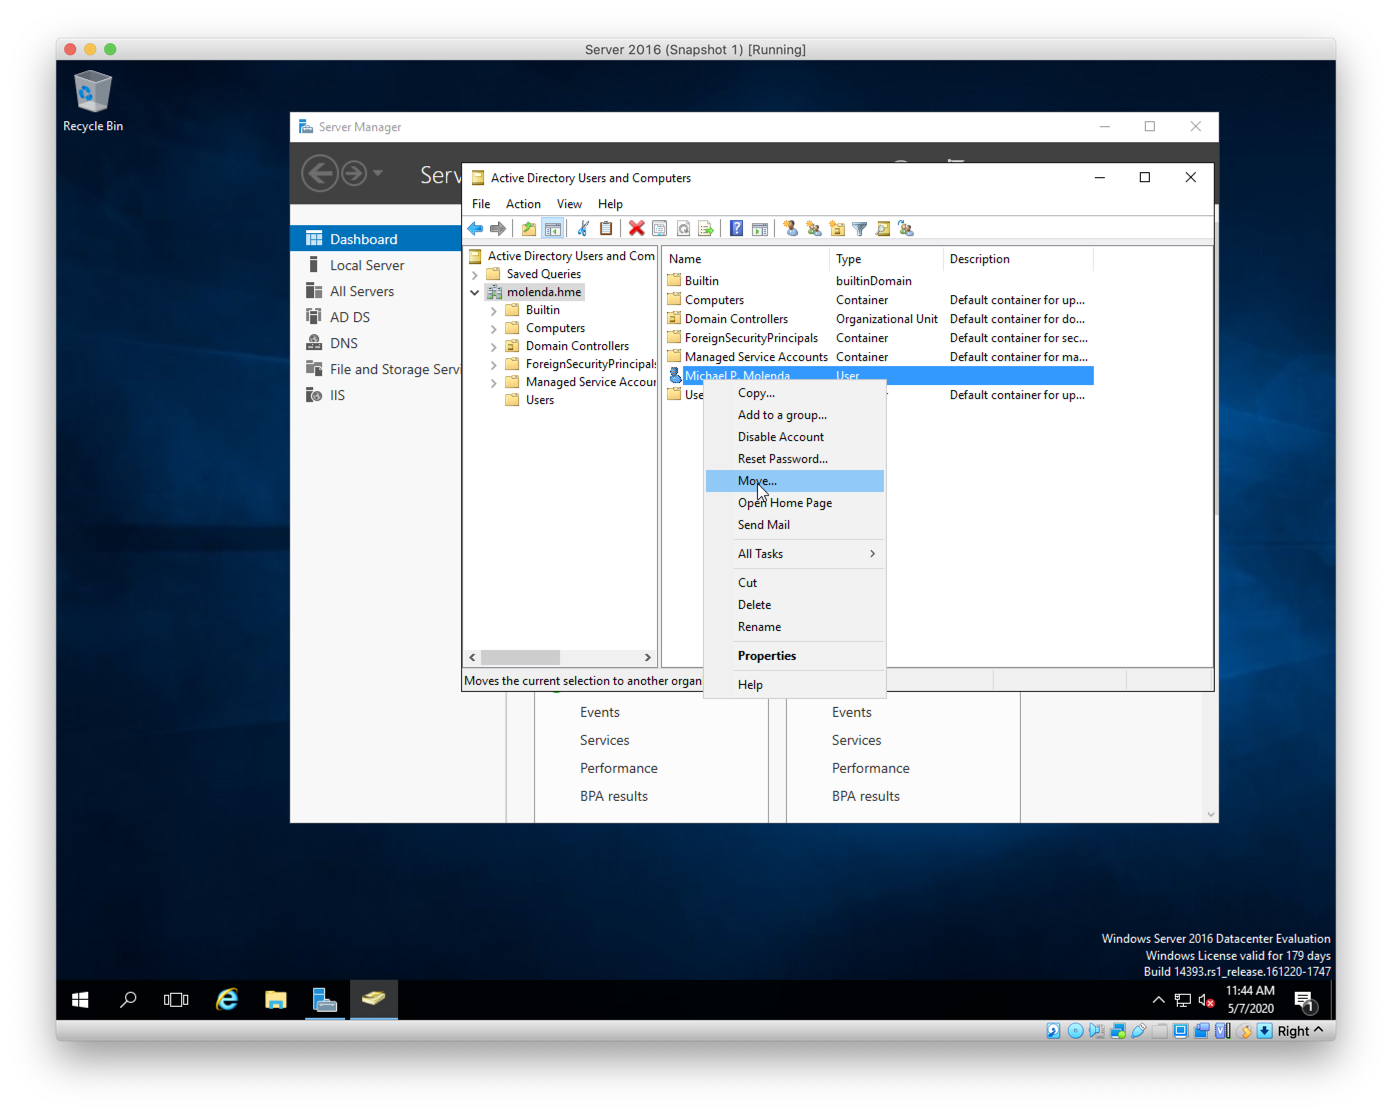
Figure H. Active Directory Users and Computers Dialog. In order to keep a good organization of users, computers, and other Active Directory objects (printers comes to mind), I am going to move this user to the built-in Users organizational unit. I will start by highlighting the user and then right clicking to bring up the contextual menu. Then, I will select Move….
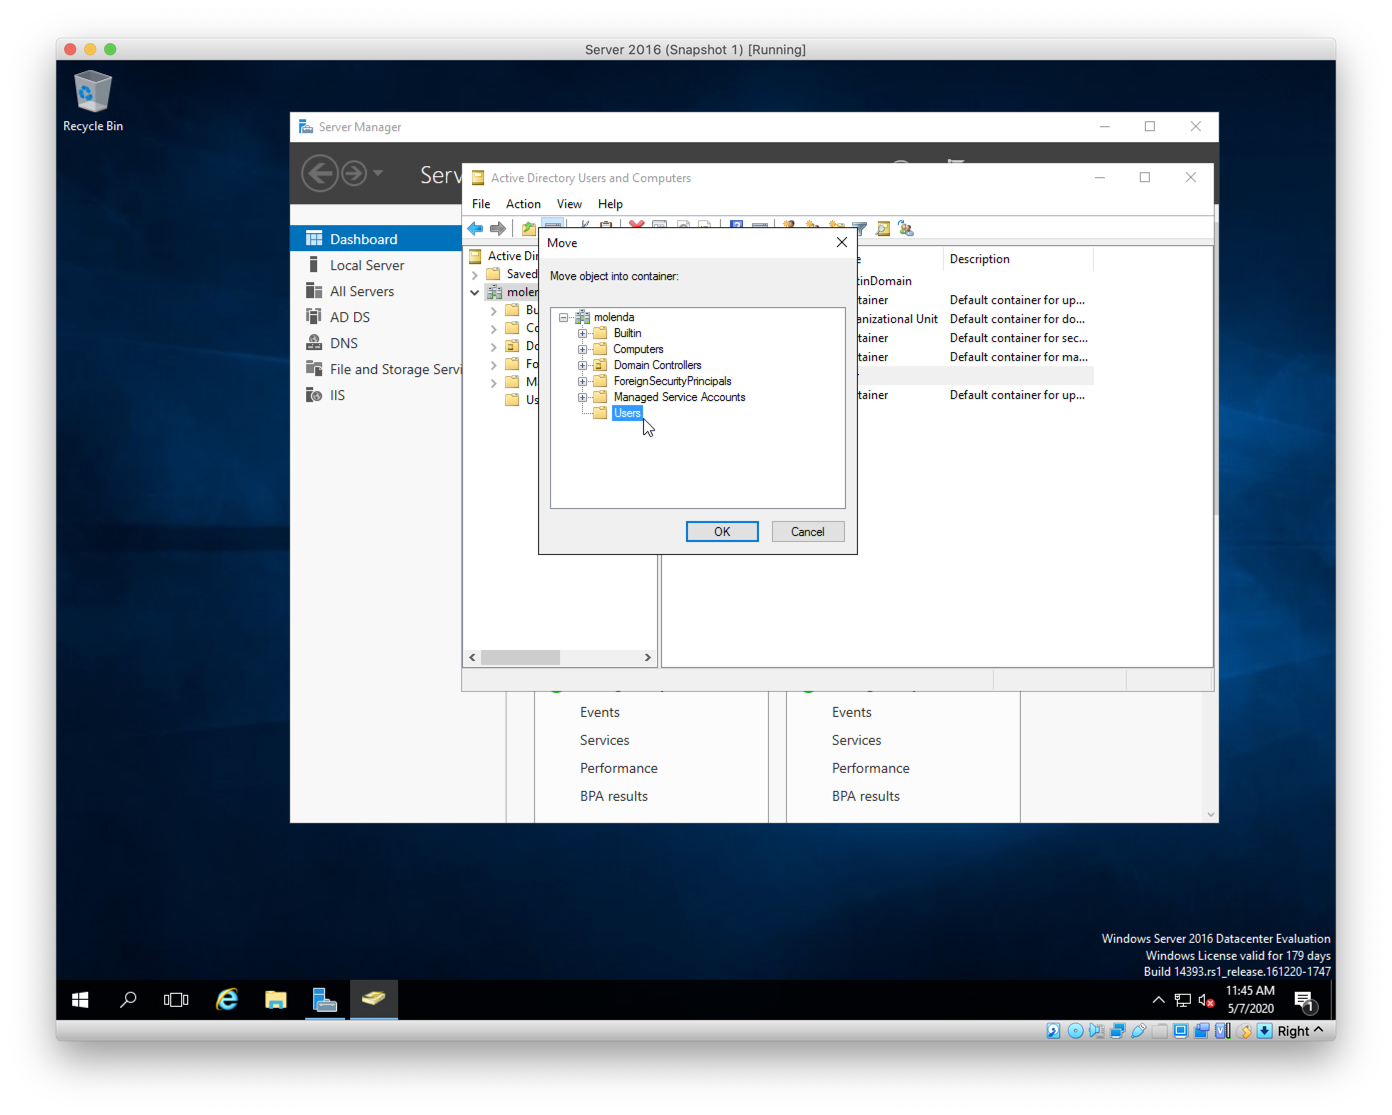
Figure I. Active Directory Users and Computers Dialog. Here I will select the container that I want the new user to be moved to. I have selected Users. Then to complete the move, click OK.
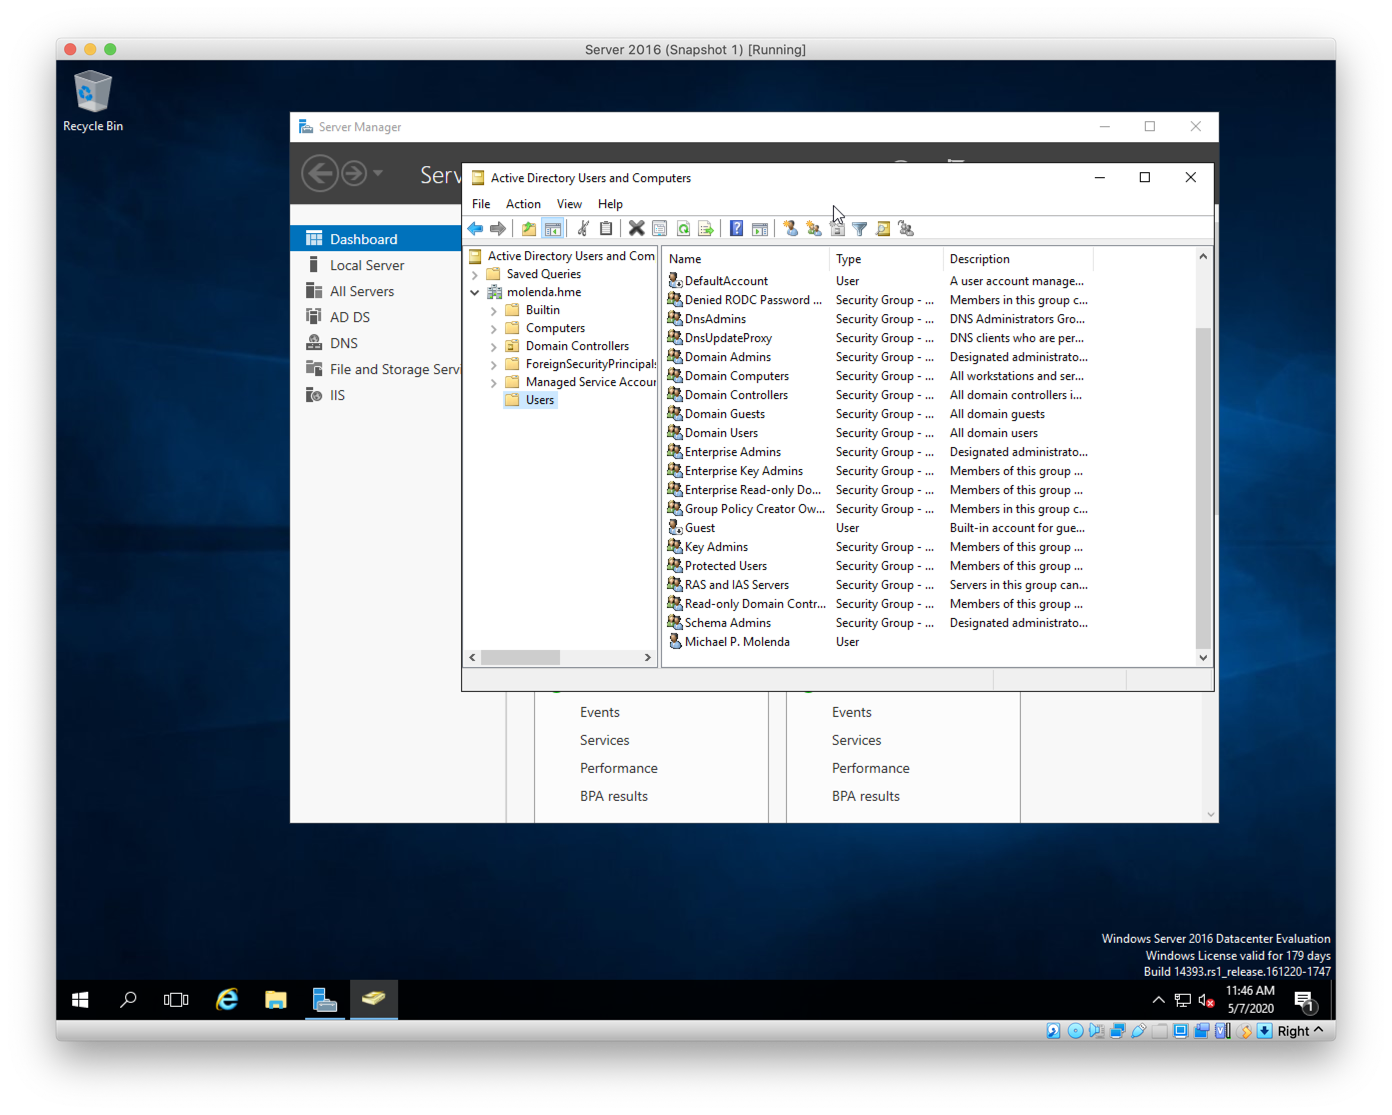
Figure J. Active Directory Users and Computers Dialog. Selecting Users from the left pane shows the contents of that container in the right pane. There are a couple of built-in users such as Guest. My user is also here as a result of the move. Also, many different built-in security groups are listed here. I am going to make my user a member of the Administrators group. Note, that I could make a new group for my user or used any of the other groups such as Domain Administrators, Domain User or Key Admin.
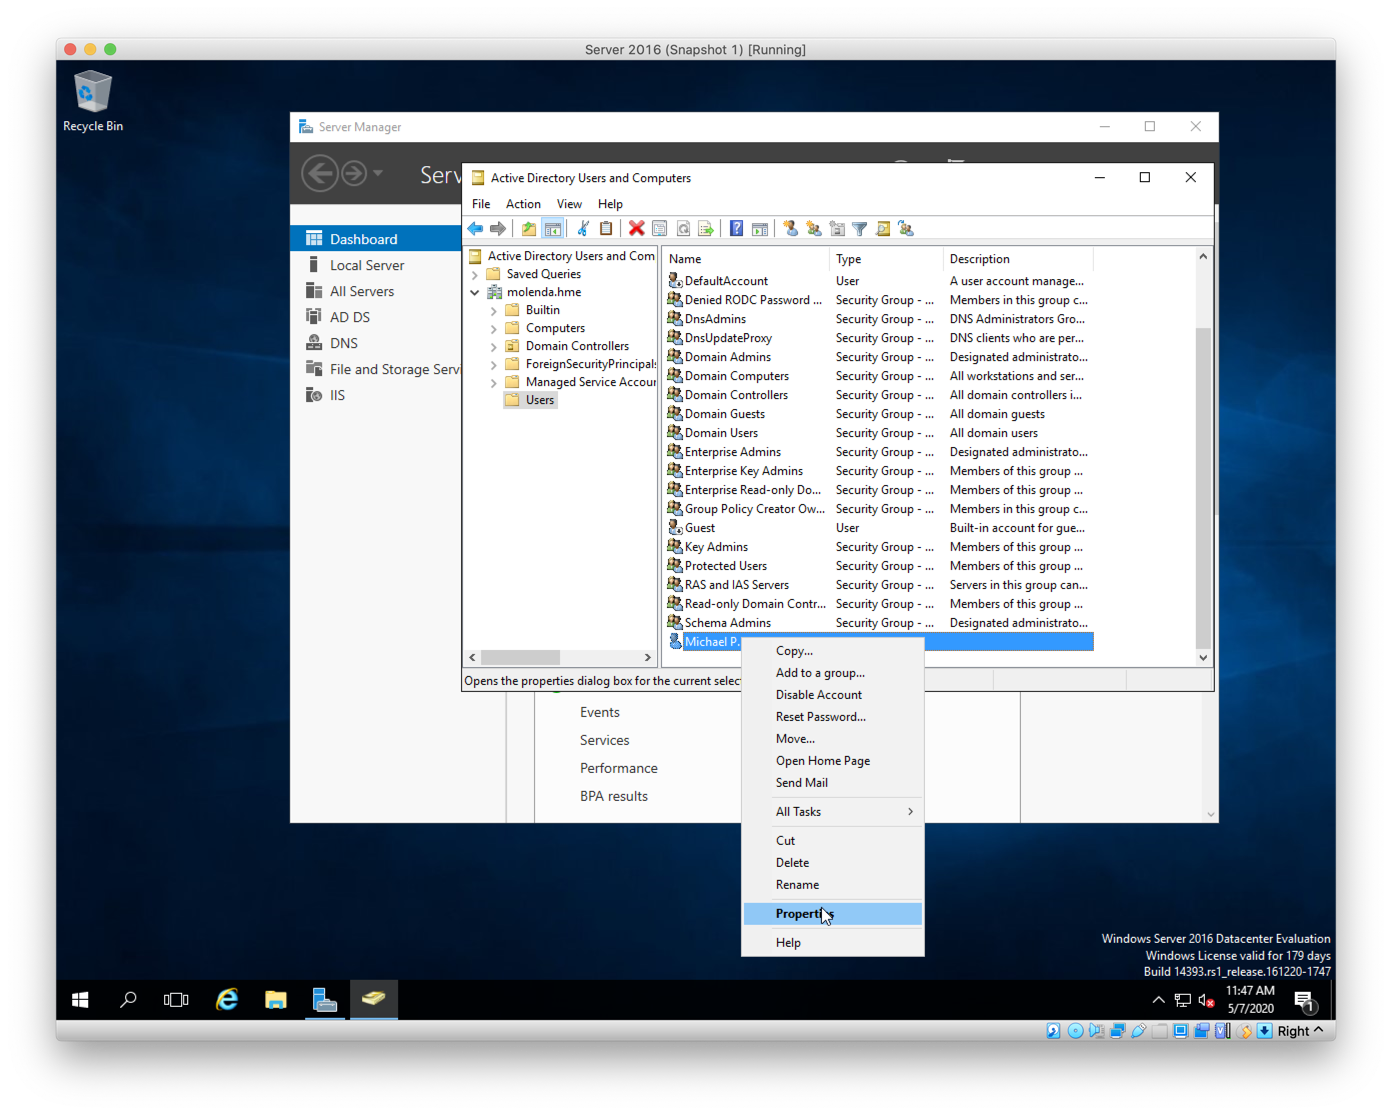
Figure K. Active Directory Users and Computers Dialog. I right click on my user and click Properties.
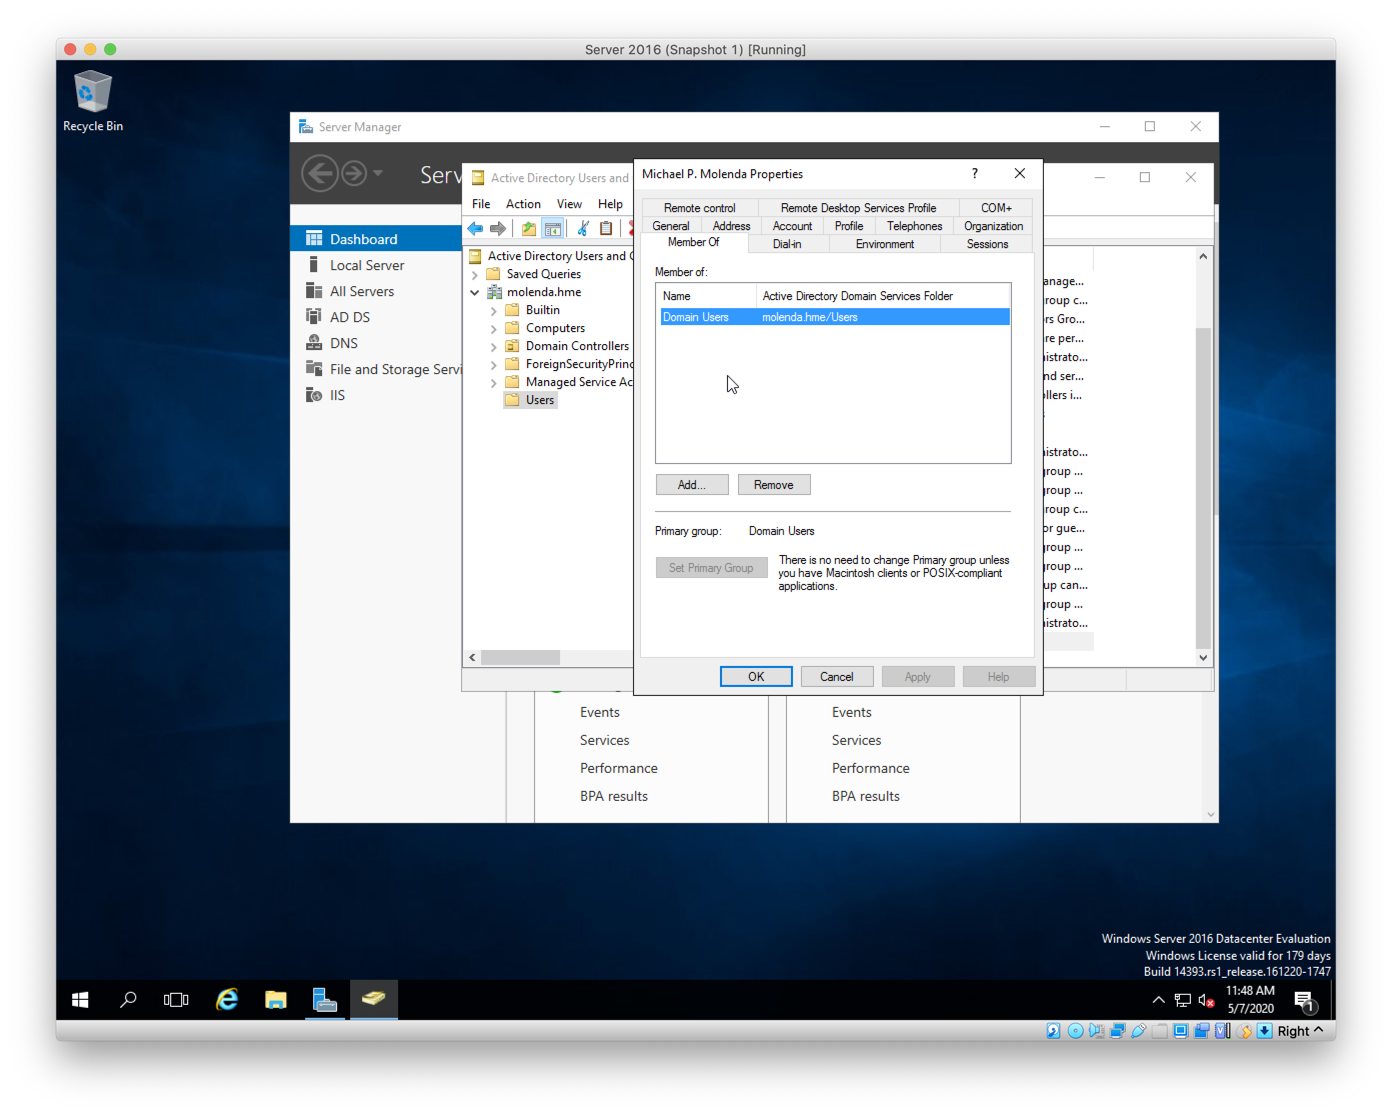
Figure L. Active Directory Users and Computers Dialog. This is the user properties dialog. There are a number of tabs here. I could add addresses and phone numbers. I can use this dialog to reset a password, but in this case, I am going to make my user a member of a group. I start by locating the Member of tab.
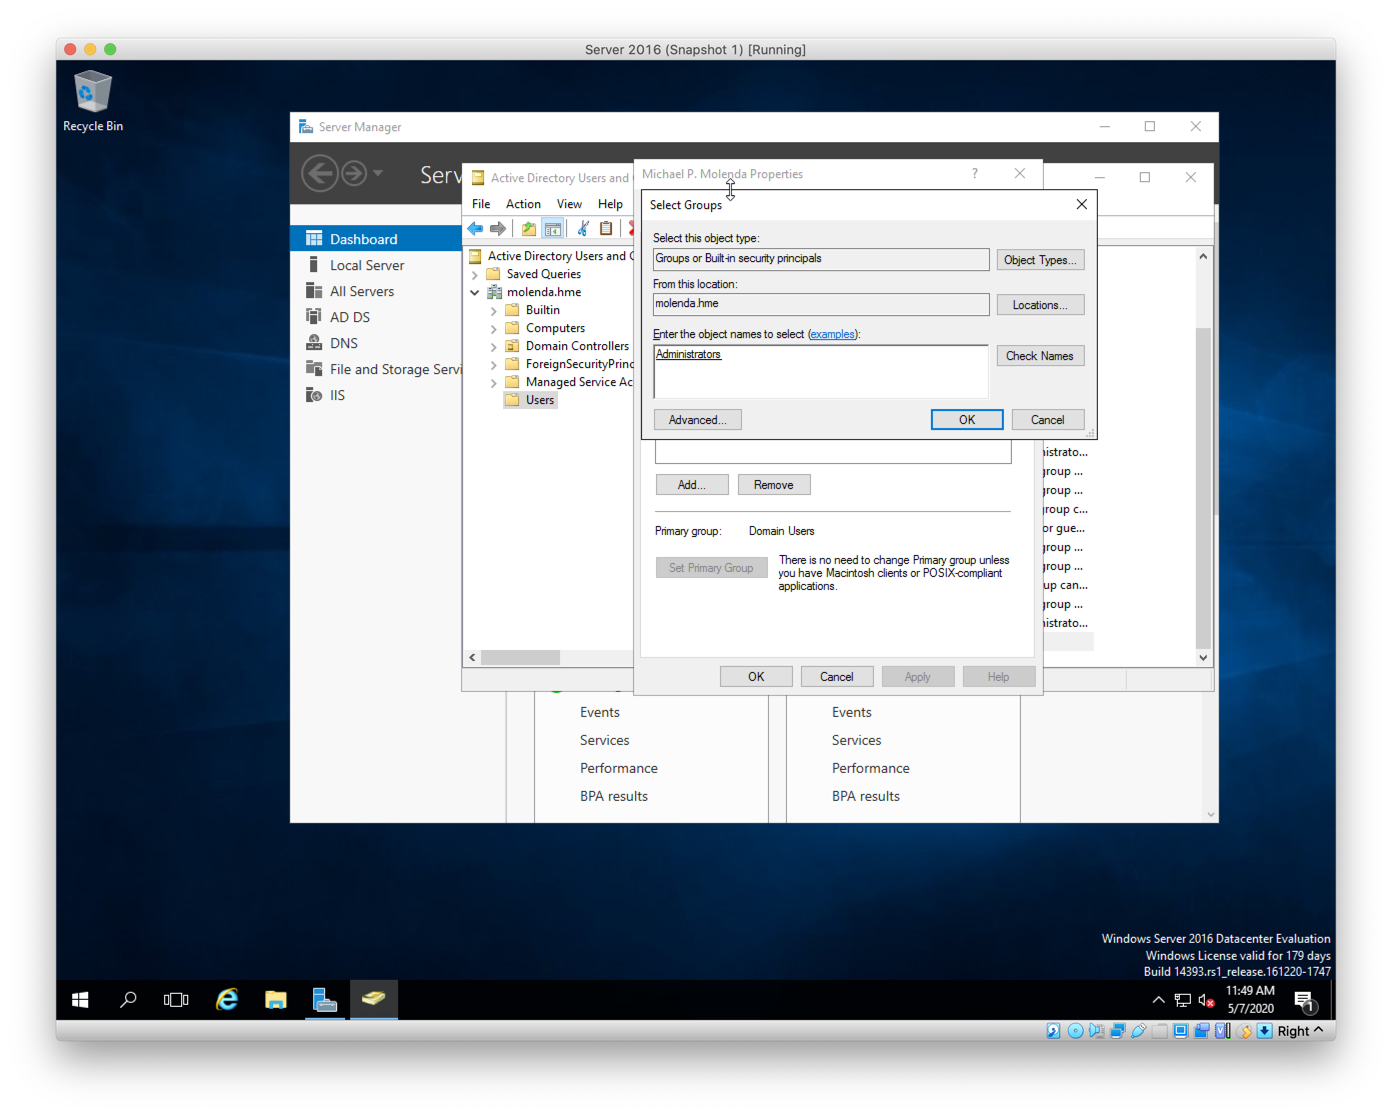
Figure M. Active Directory Users and Computers Dialog. Clicking on Add… will bring up the Select Groups dialog box. I entered in Administrators in the Enter the Object names to select box. I could (and did) click the Check Names box. This brings up a list of groups with similar names so that it is spelled correctly. If spelled incorrectly, the user will not be joined to the proper group. This could cause issues with my domain. That’s why I checked it before clicking OK.
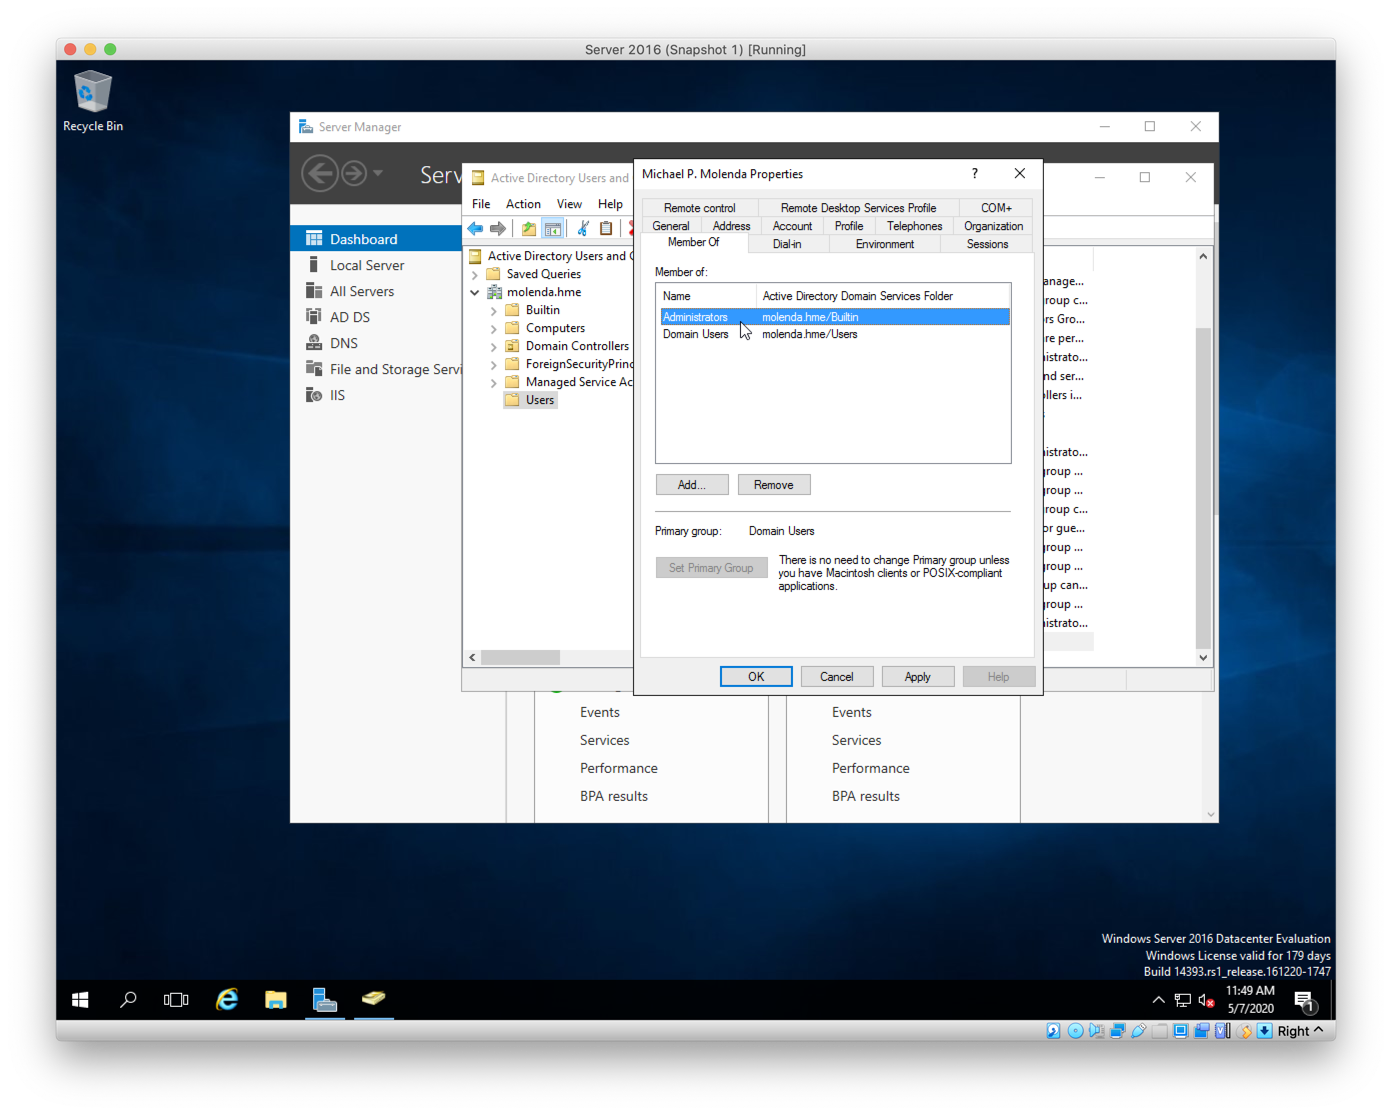
Figure N. Active Directory Users and Computers Dialog. I can see that my user is a member of the Administrators group. Once I have made all of the changed to my user, I click Next. And then, I re-booted my server
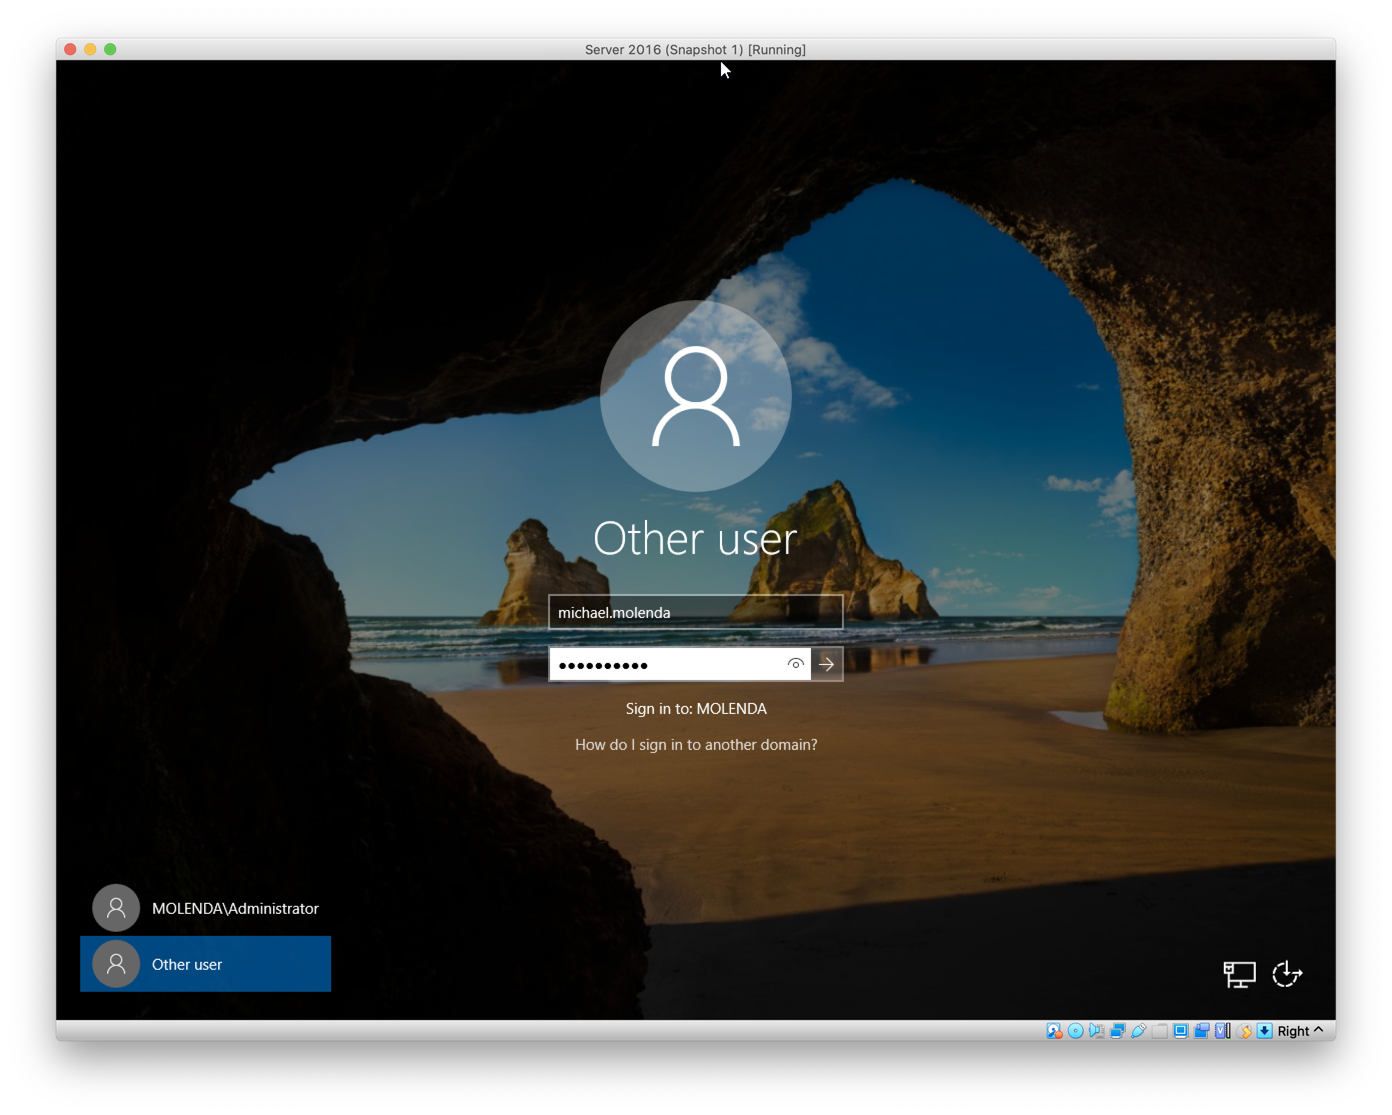
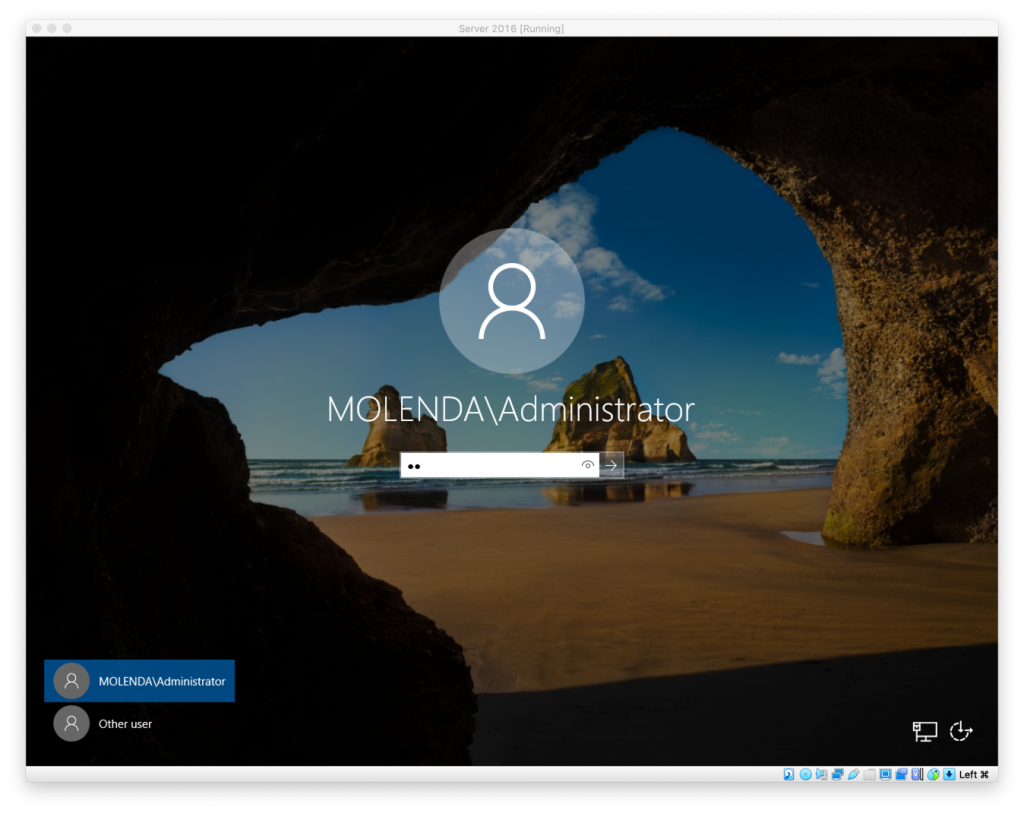
Figure O. Windows Server 2016 Login Screen. Now that there are multiple users in my domain, I will click on Other user, enter in my assigned user name and assigned temporary password to gain access to not only my desktop but to the domain.
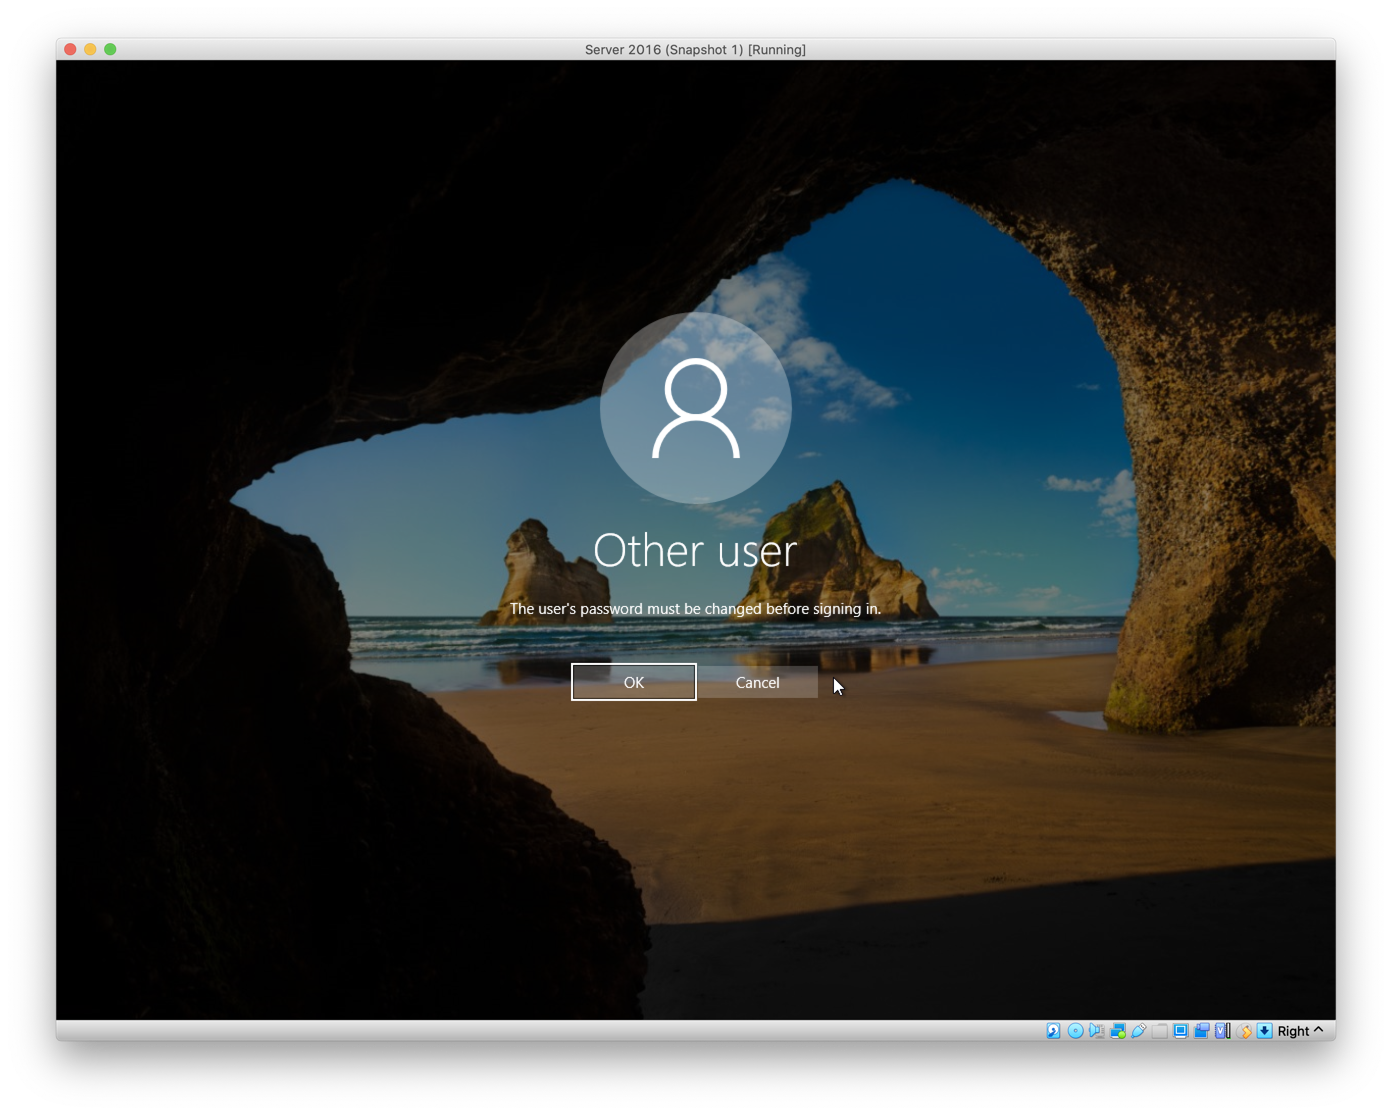
Figure P. Windows Server 2016 Login Screen. Remember when I checked or rather didn’t uncheck the checkbox for User must change password at next login, this is the result. It is saying that I have to change my password now.
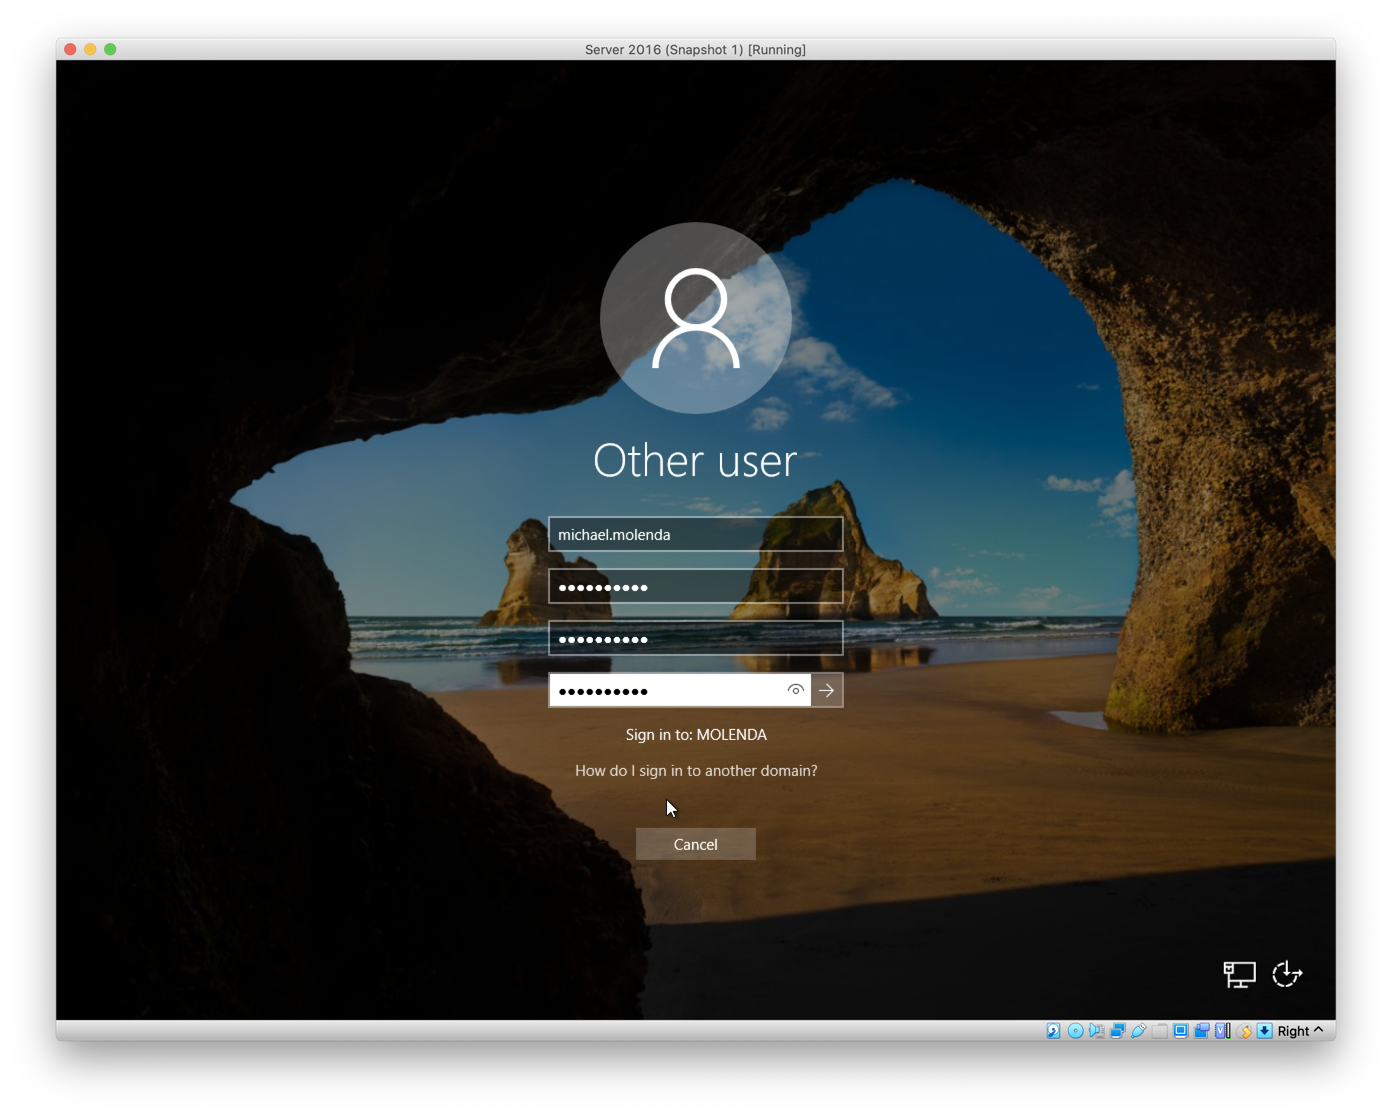
Figure Q. Windows Server 2016 Login Screen. Changing my password.
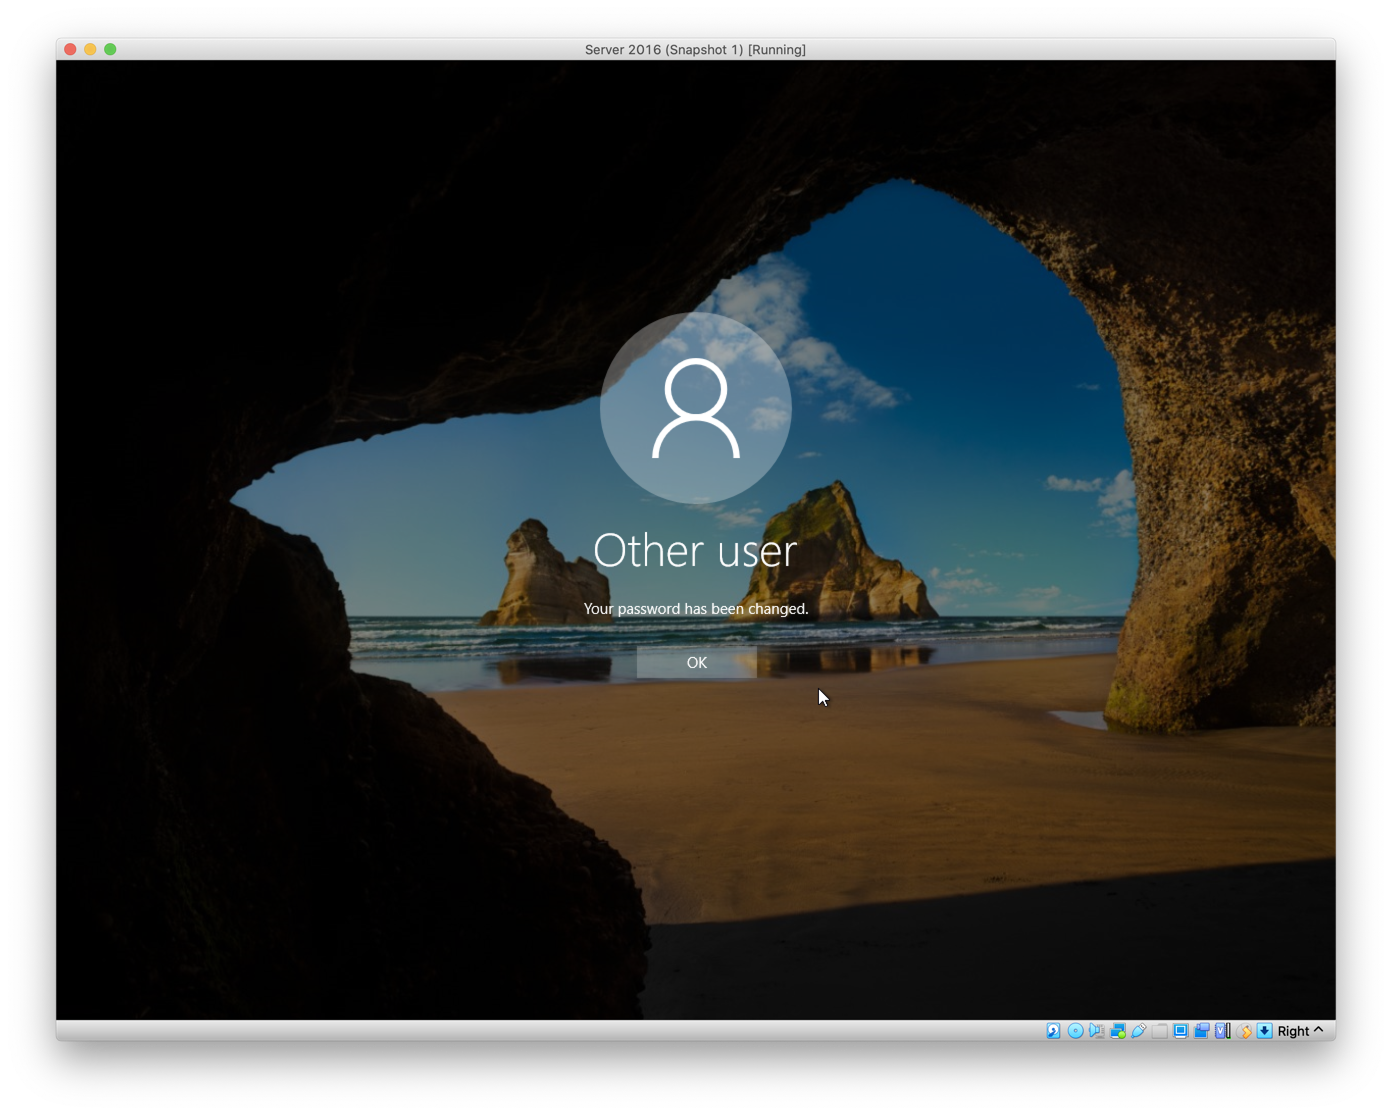
Figure R. Windows Server 2016 Login Screen. Password changed. I can now log into my server or my desktop.
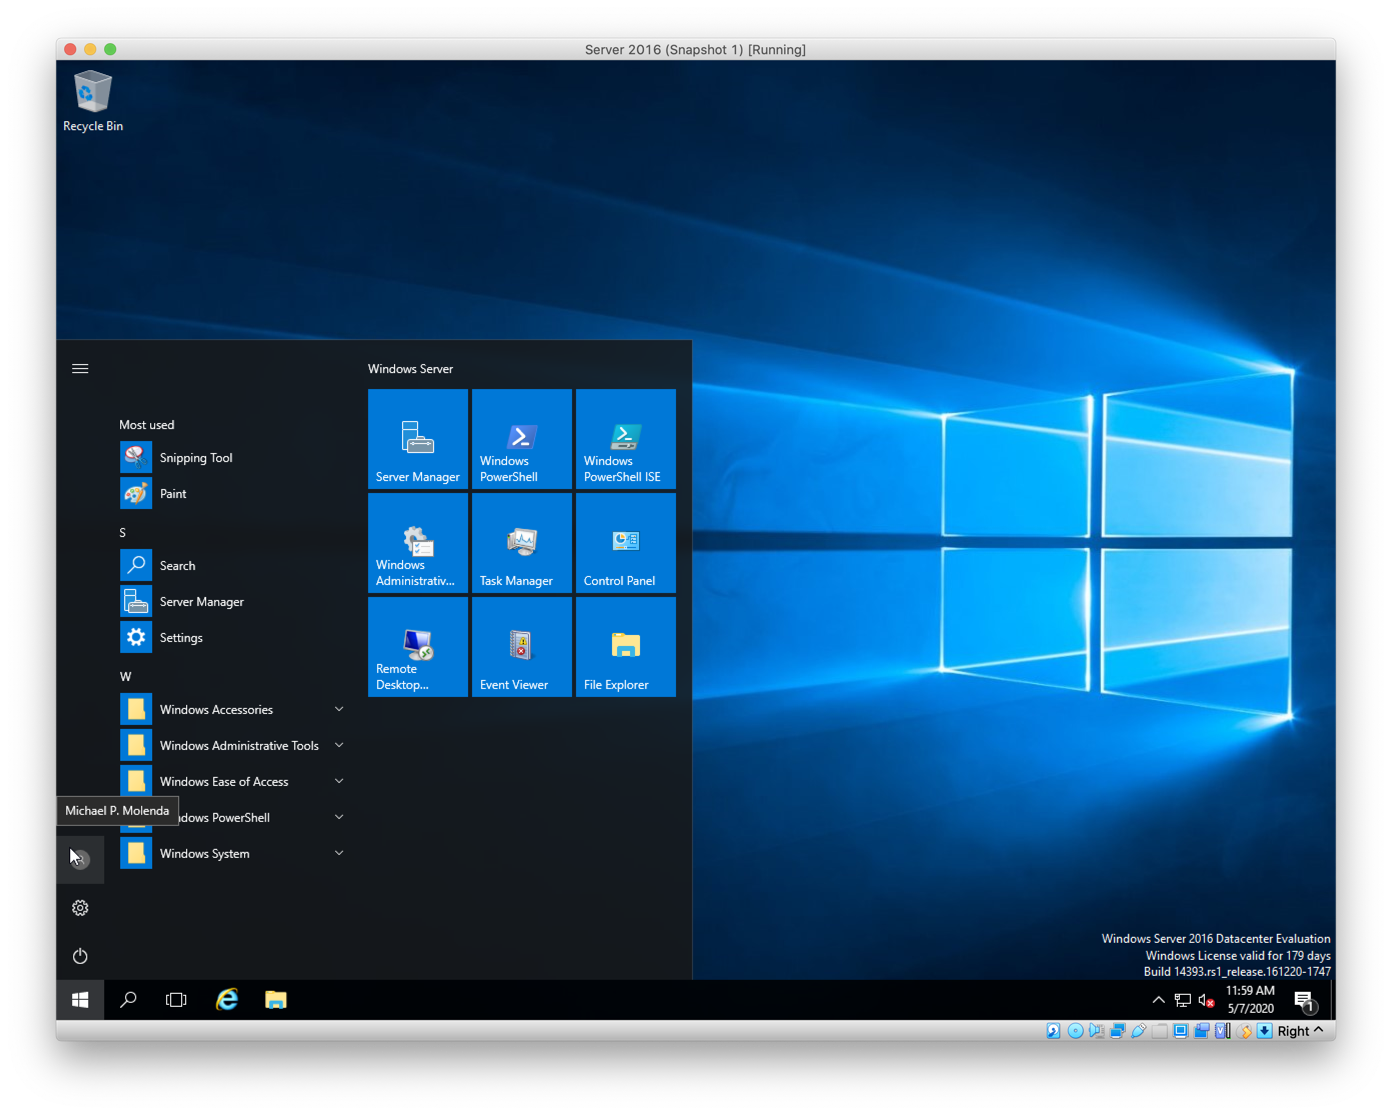
Figure S. Windows Server 2016. All logged in and ready to work. Just to show that this is not the built-in Administrator account, I have highlighted my user in the start menu.
I will be working with Active Directory more in my Virtual Machine. As I learn more, I will share my knowledge. I am a newbie at this but picking up very easily. I have found more YouTube videos that I will be checking out to increase my Active Directory knowledge. Thank you for reading to this point.
References:
Tutorial for Active Directory
