In order to create the Lab environment for Active Directory, the server must be promoted to a Domain Server. In this blog post, I am going to show how I promoted this server to a domain server while installing Active Directory Service. The first thing we must do is assign a static IP address. Severs are almost never on DHCP. They need a static address that the other computers can access permanently.
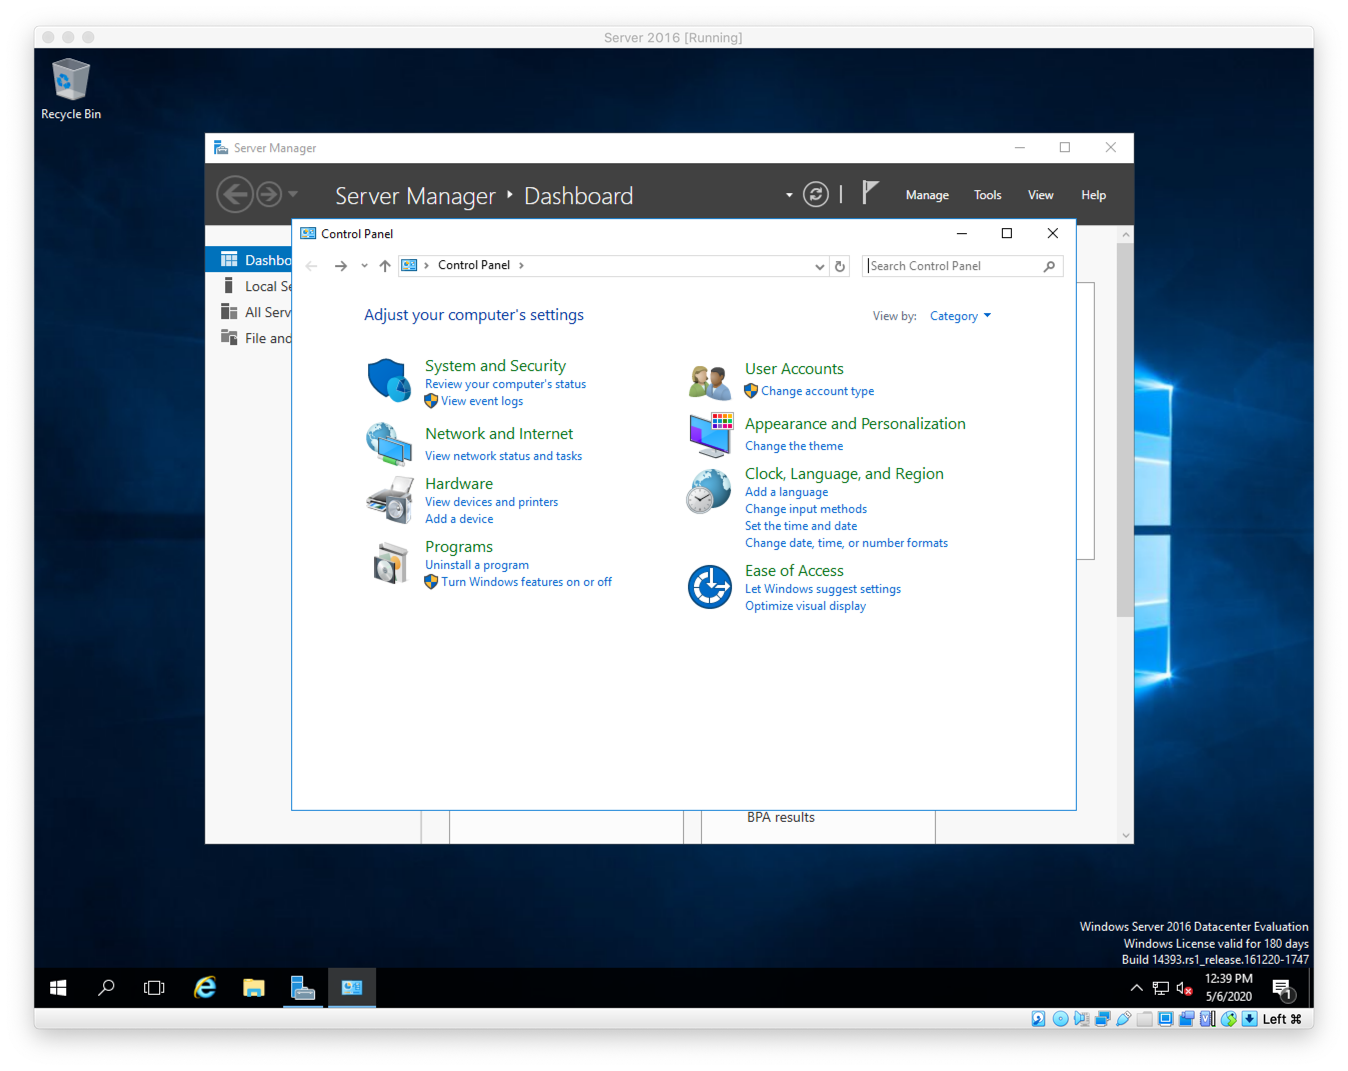
Figure A. Goto Control Panel
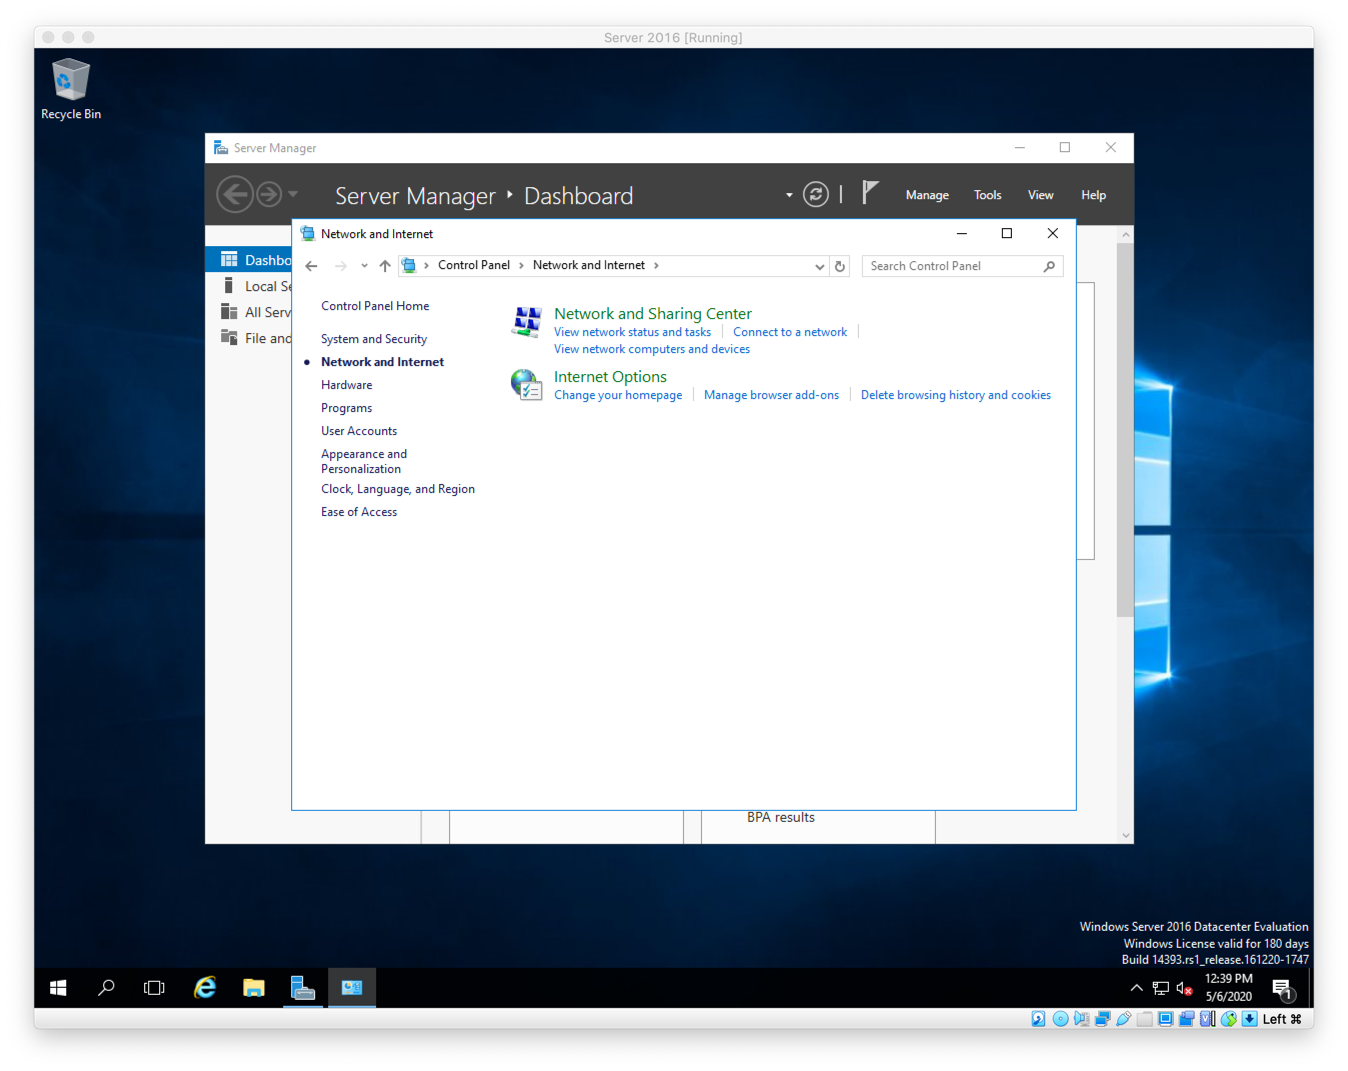
Figure B. Go to Network and Sharing Center
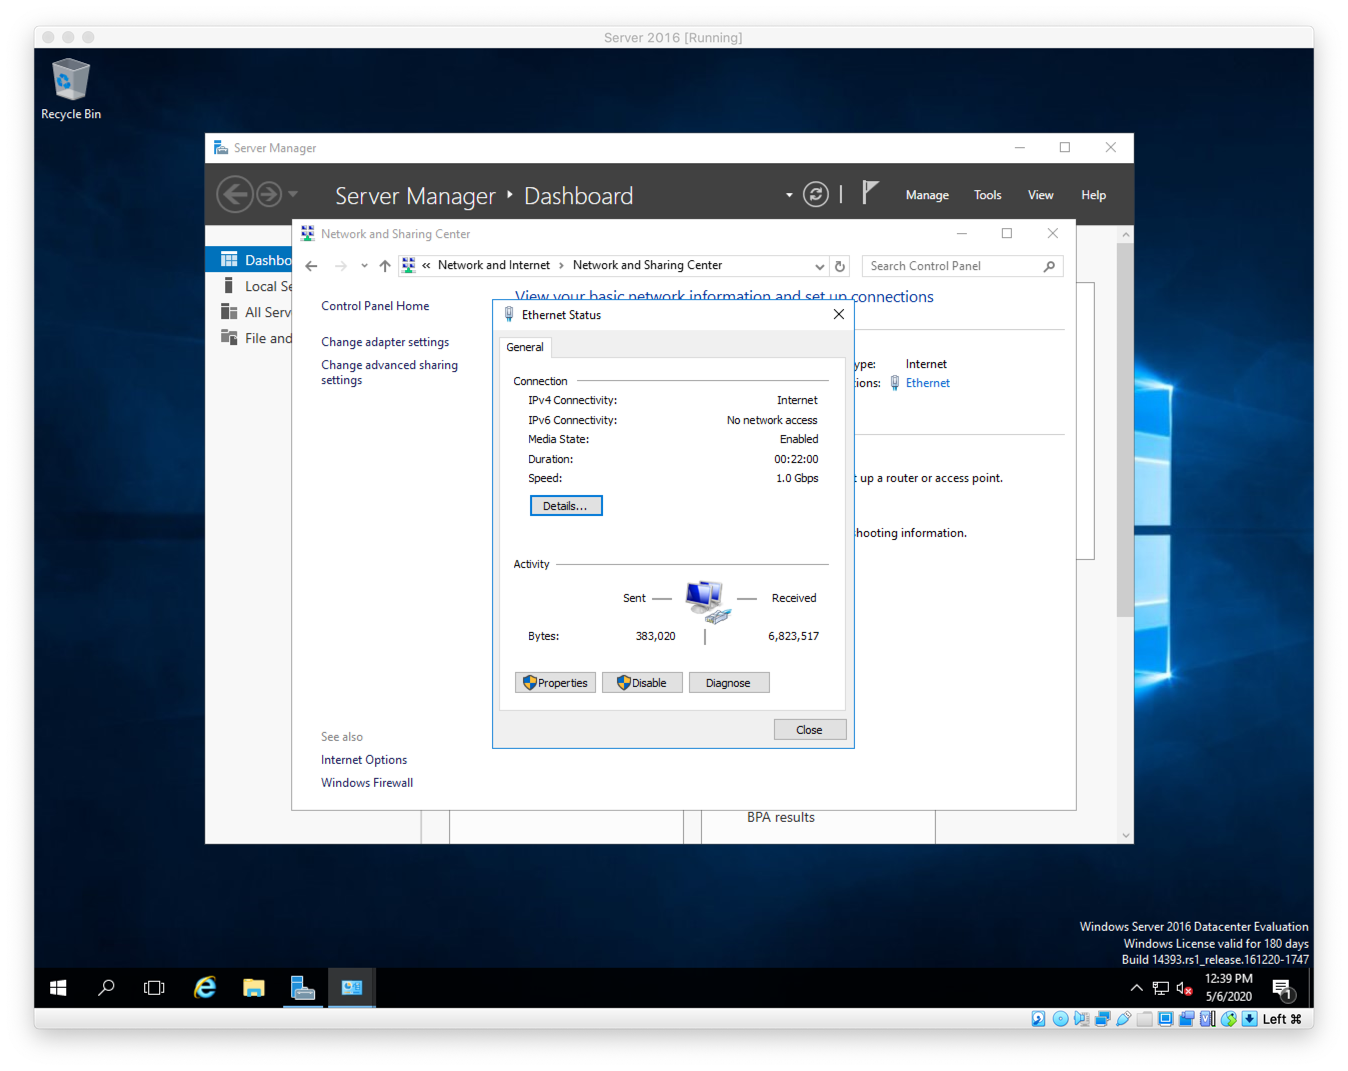
Figure C. Click on Ethernet. That brings up the Ethernet status dialog box.
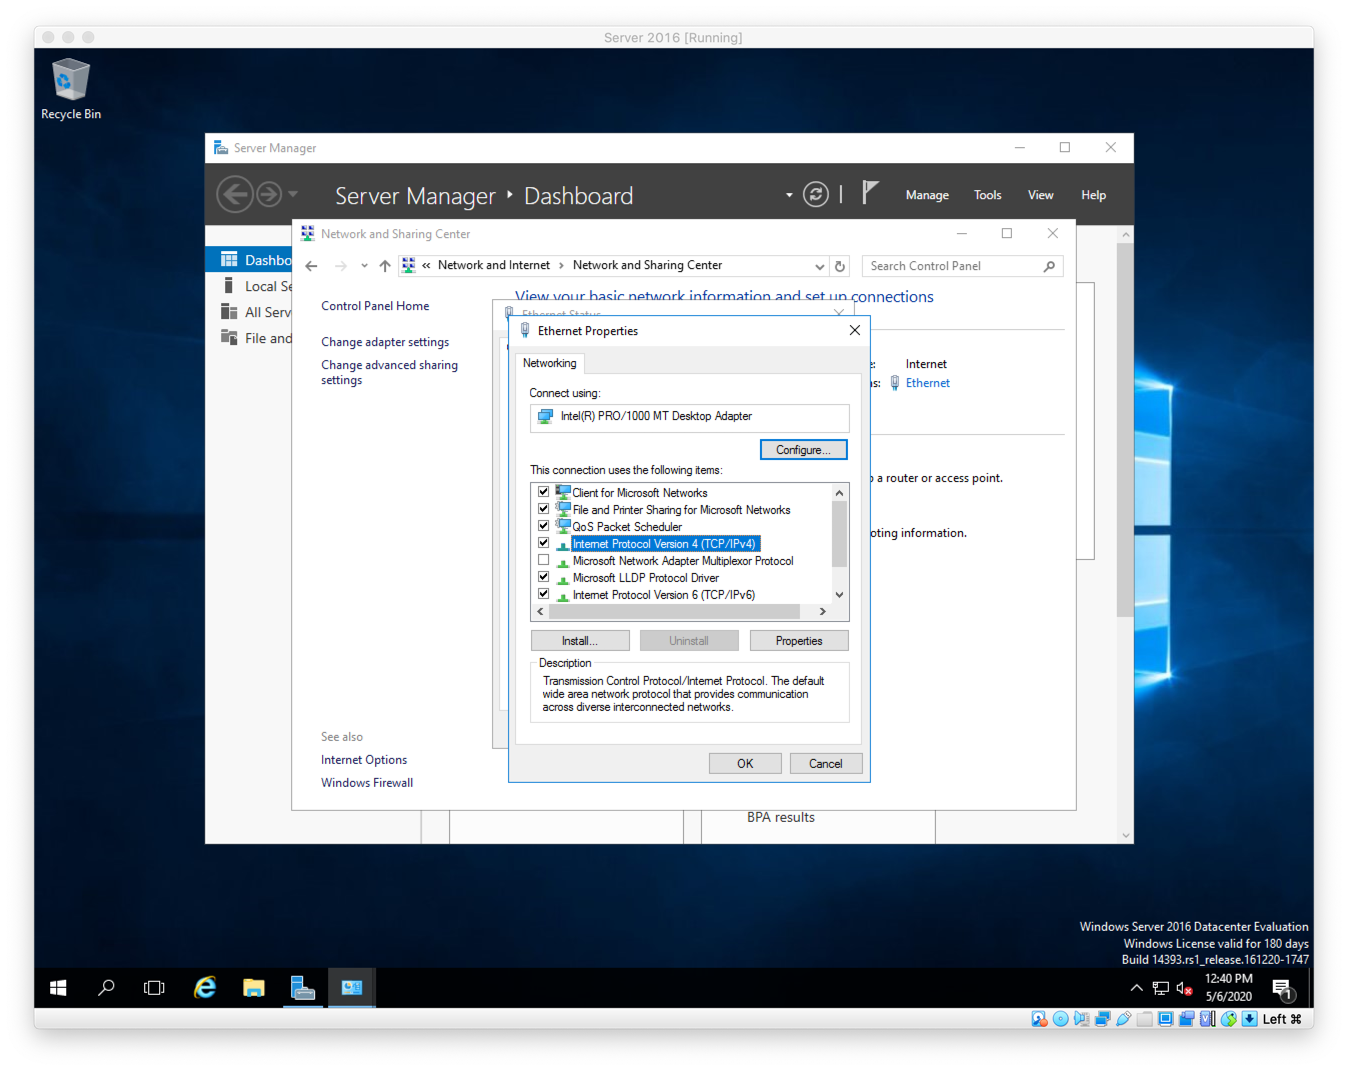
Figure D. Click the Properties button to bring up the Ethernet properties dialog box.
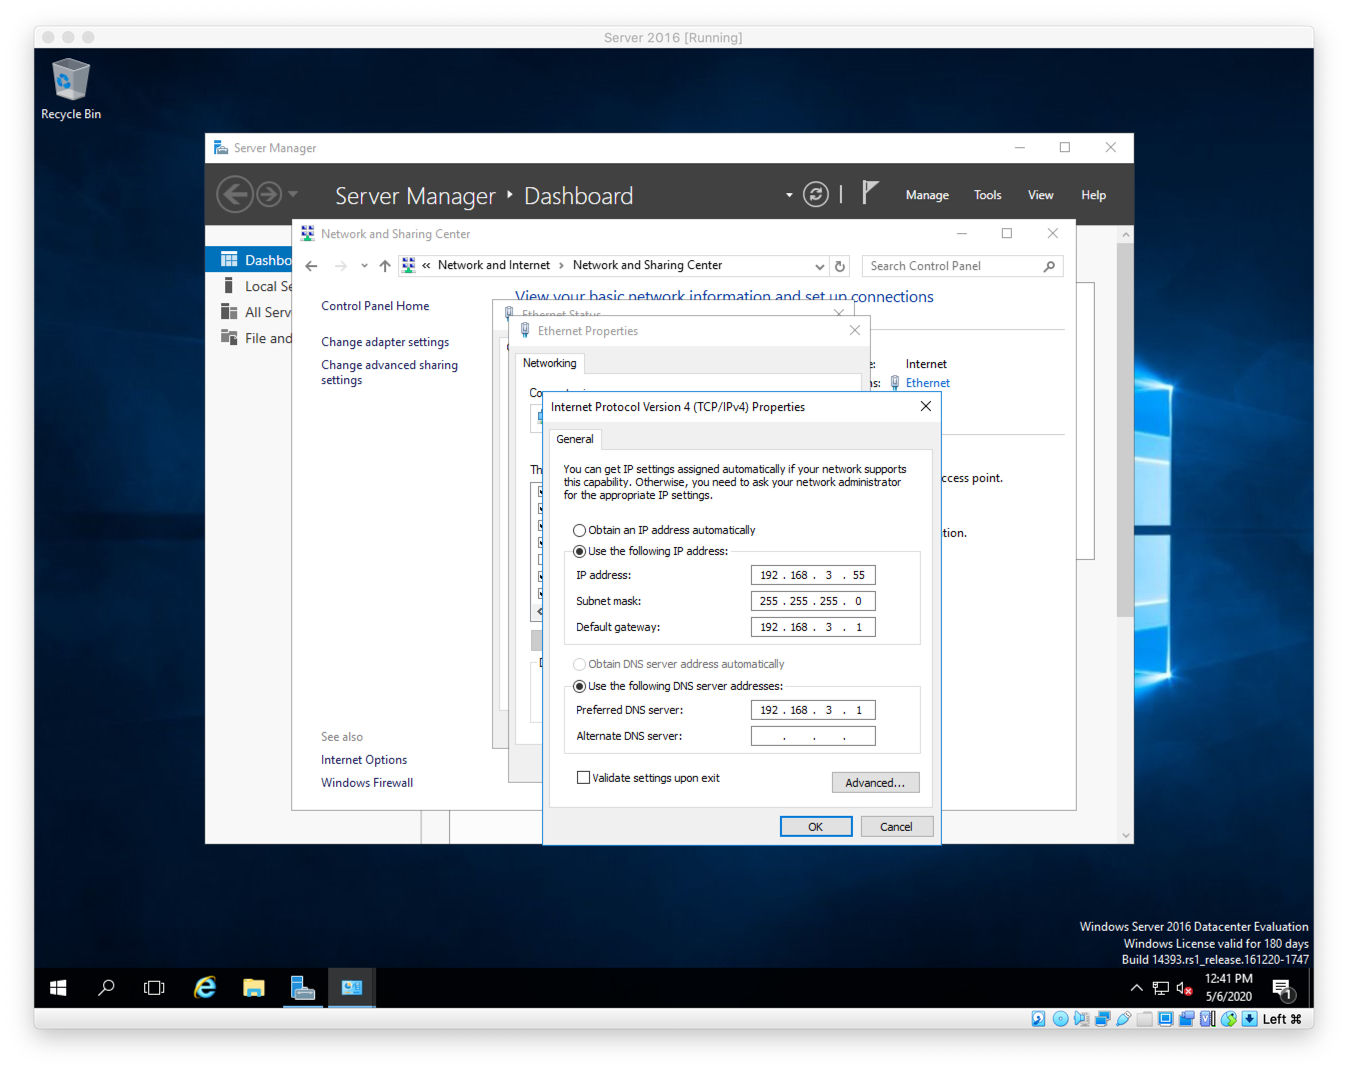
Figure E. Find and click on the Internet Protocol Version 4 (TCP/IPv4) option and then click on the Properties button. This brings up the Internet Protocol Version 4 (TCP/IPv4) Properties dialog box. Enter in a static IP address that is outside of your router’s DHCP range, fill in the submit mask, default gateway, and preferred DNS server. The latter of two should be your router’s IP address. Once done, click OK button. You will probably want to re-boot at this point so the IP configuration can be completed.
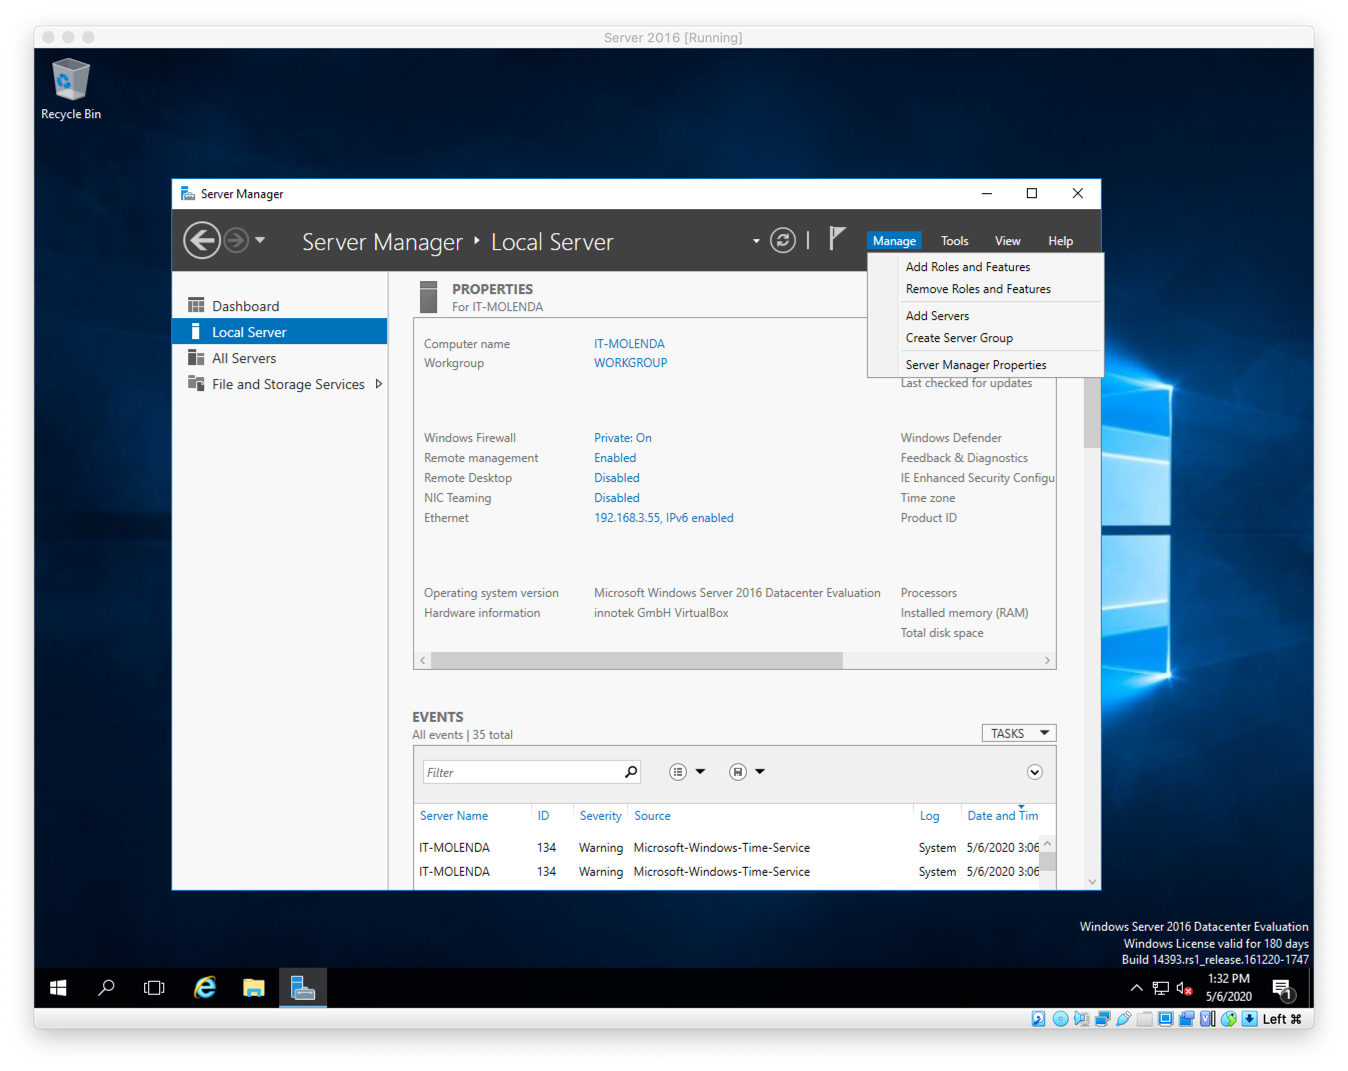
Figure F. Click Manage. Then, on Add Roles and Features.
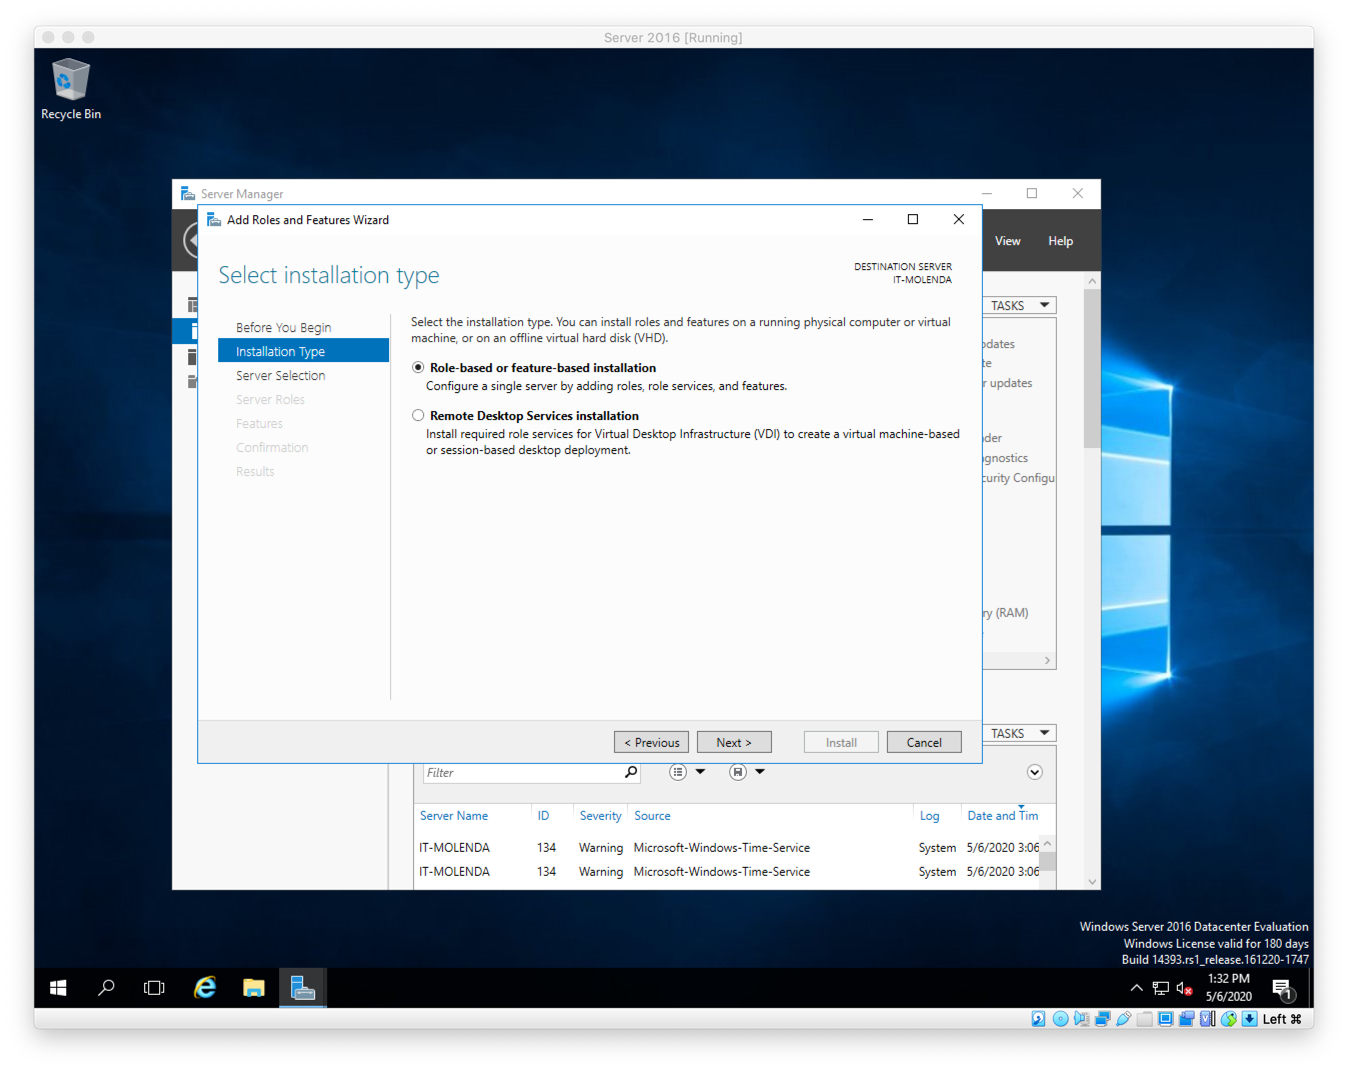
Figure G. This is the Add Roles and Features Wizard: Select Installation Type. For today’s activity, we are going to leave it on the default, Role-based or feature-based installation. And click Next.
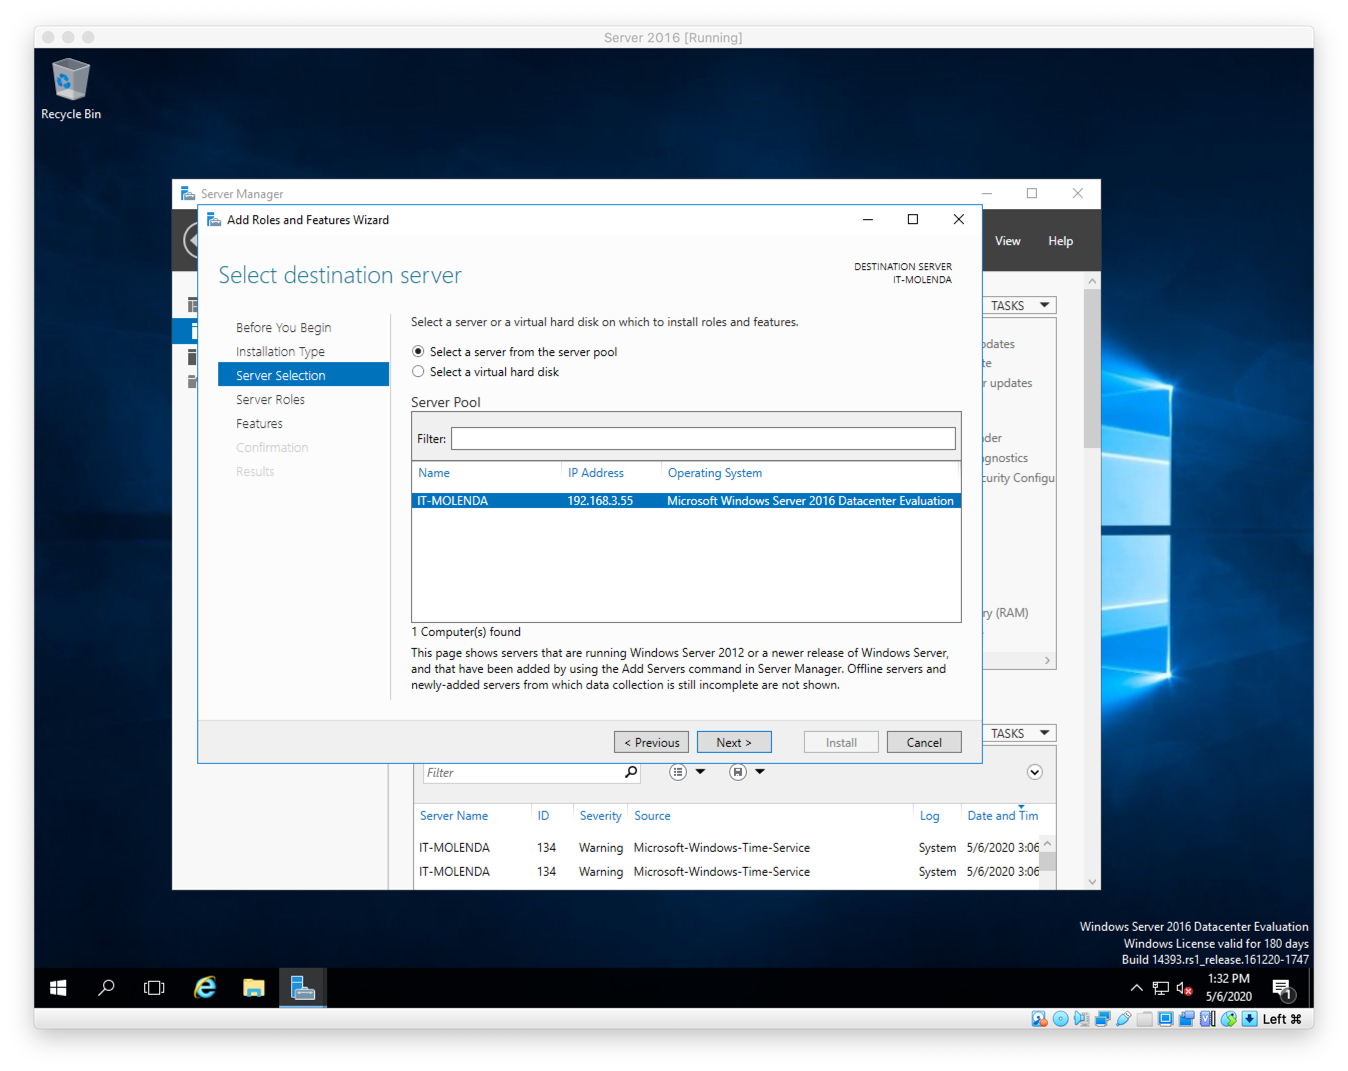
Figure H. This is the Add Roles and Features Wizard: Select destination sever. Keep the defaults here as I am going to install on this server. It is already highlighted in the Server Pool area. In a larger network, you could select other servers of this pool. Click Next.
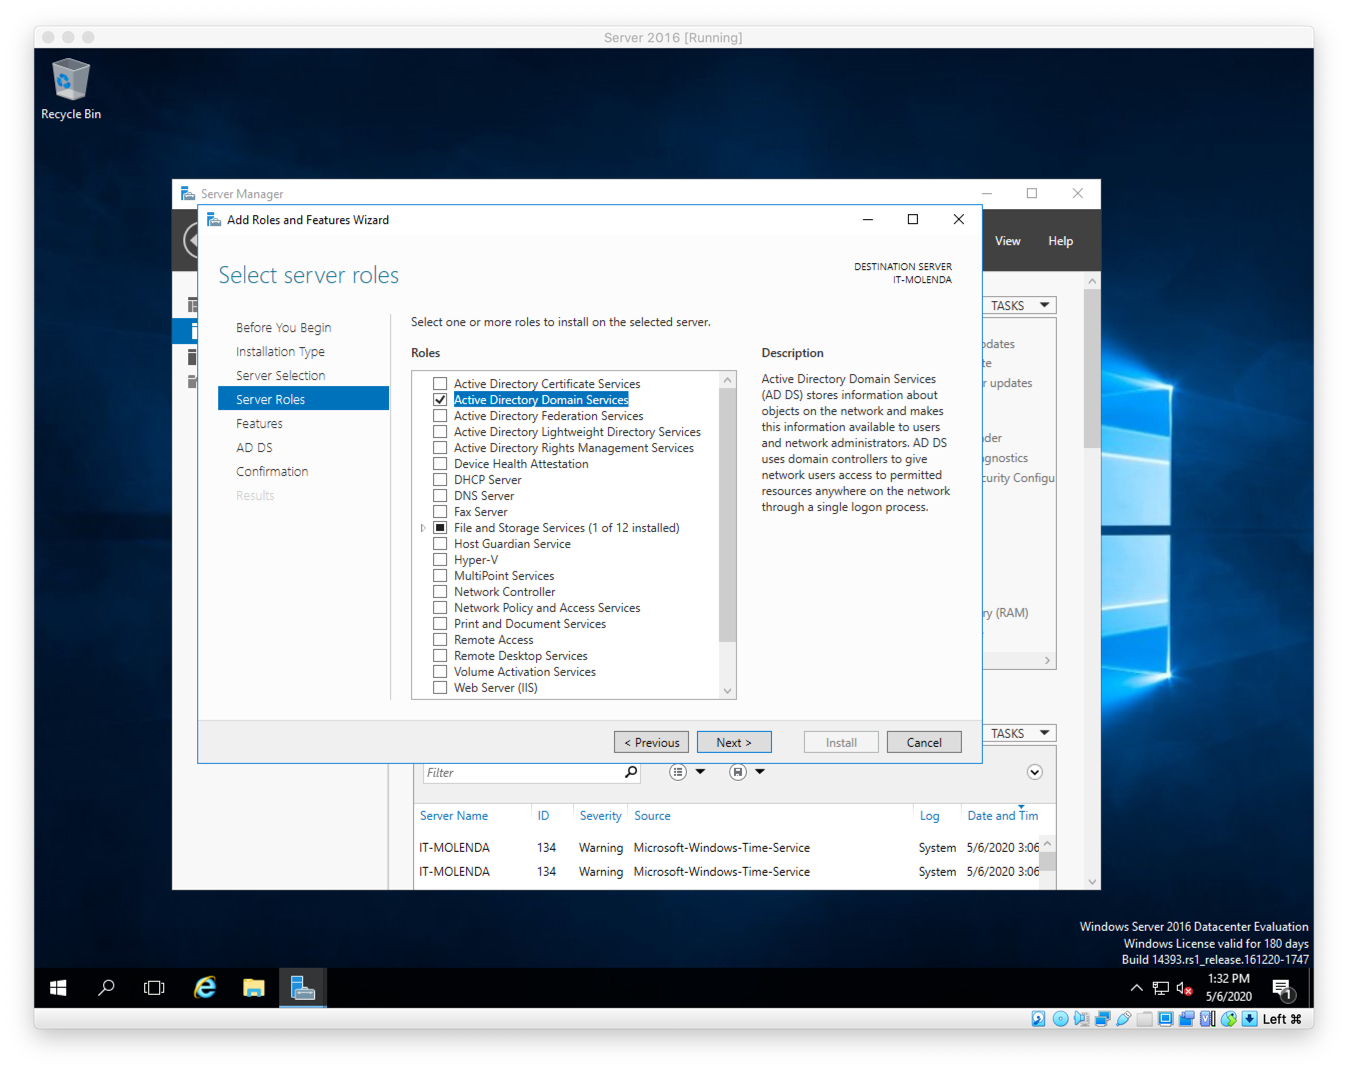
Figure I. This is the Add Roles and Features Wizard: Select server roles. Here you can select the role that you want for this server. In my case, Active Directory Domain Services should be check-marked and click Next.
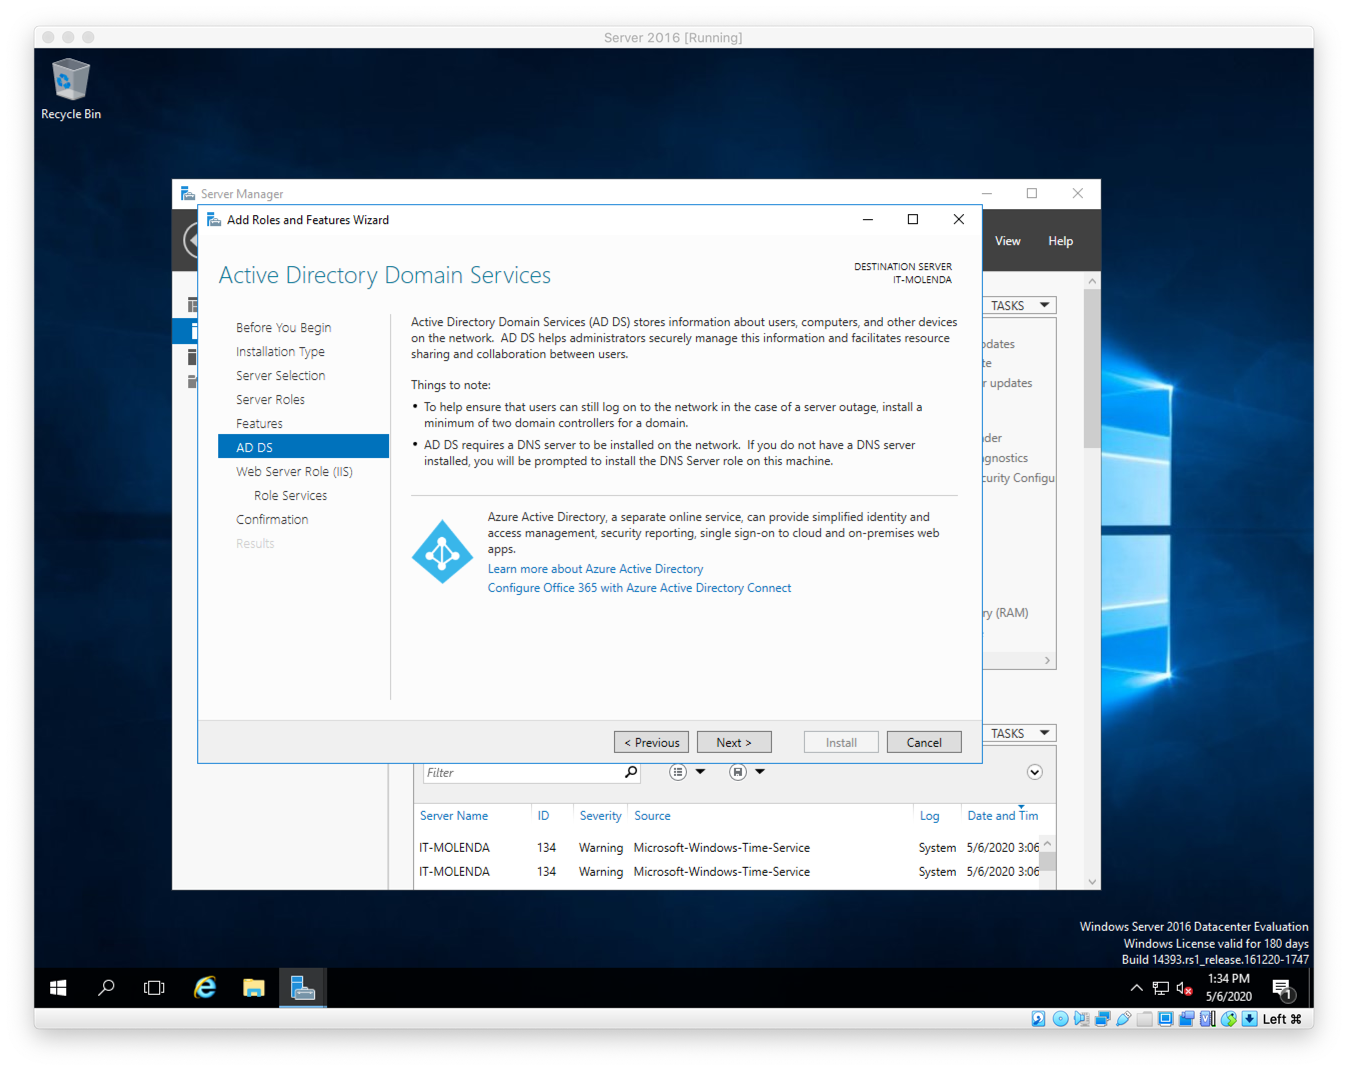
Figure J. This is the Add Roles and Features Wizard: Active Directory Domain Services. This is just an informational dialog. Click Next.
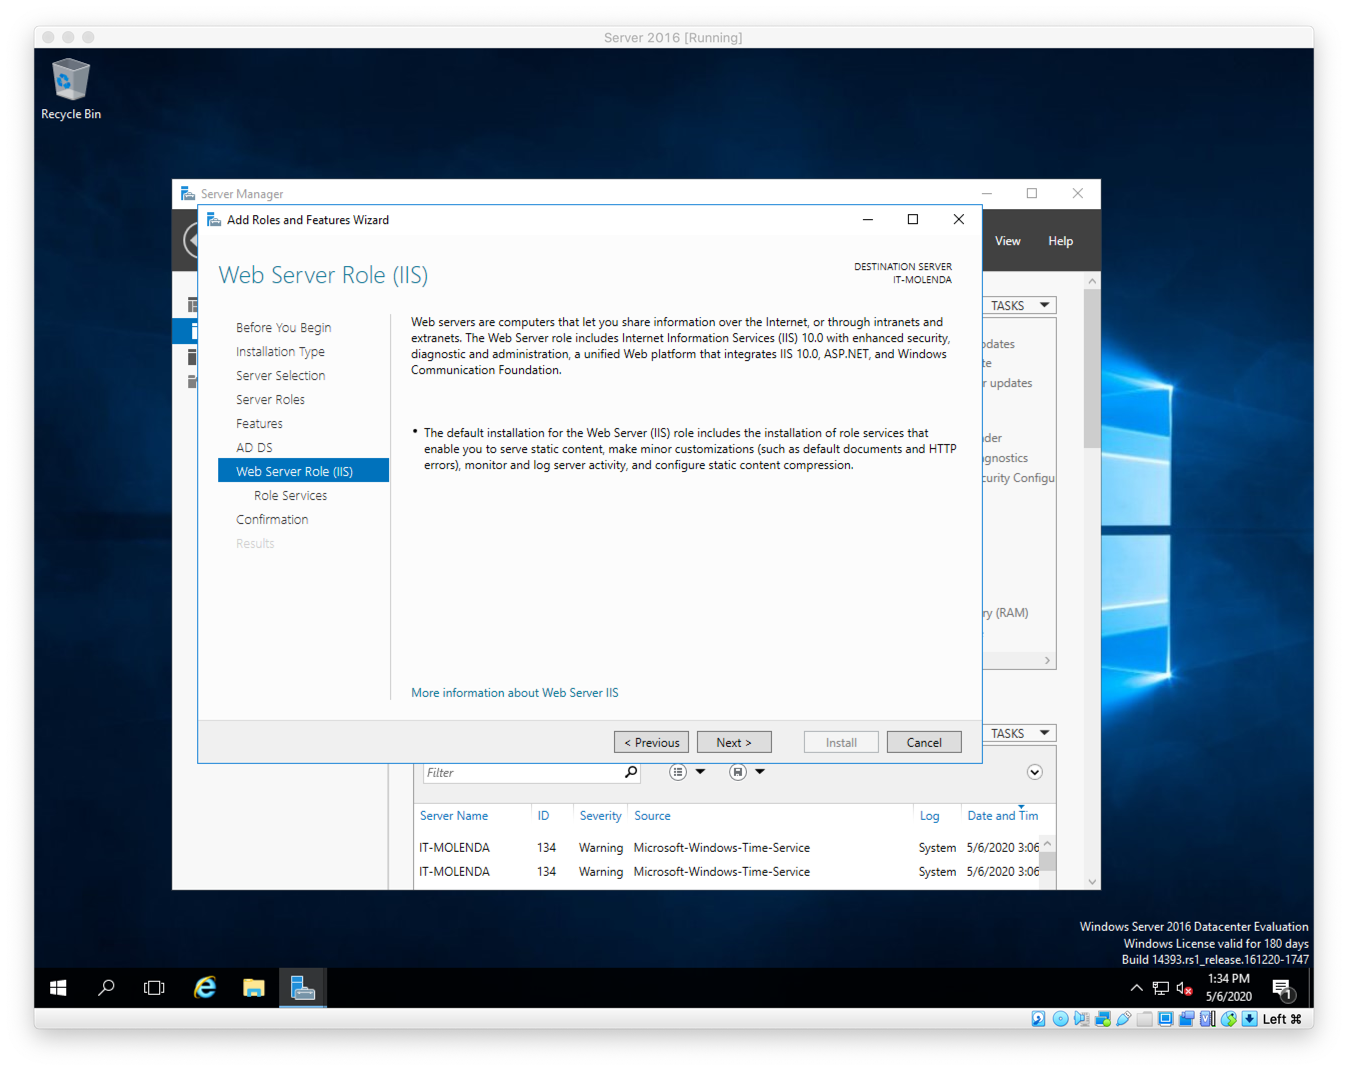
Figure K. This is the Add Roles and Features Wizard: Web Server Role (IIS). Another informational dialog. Click Next.
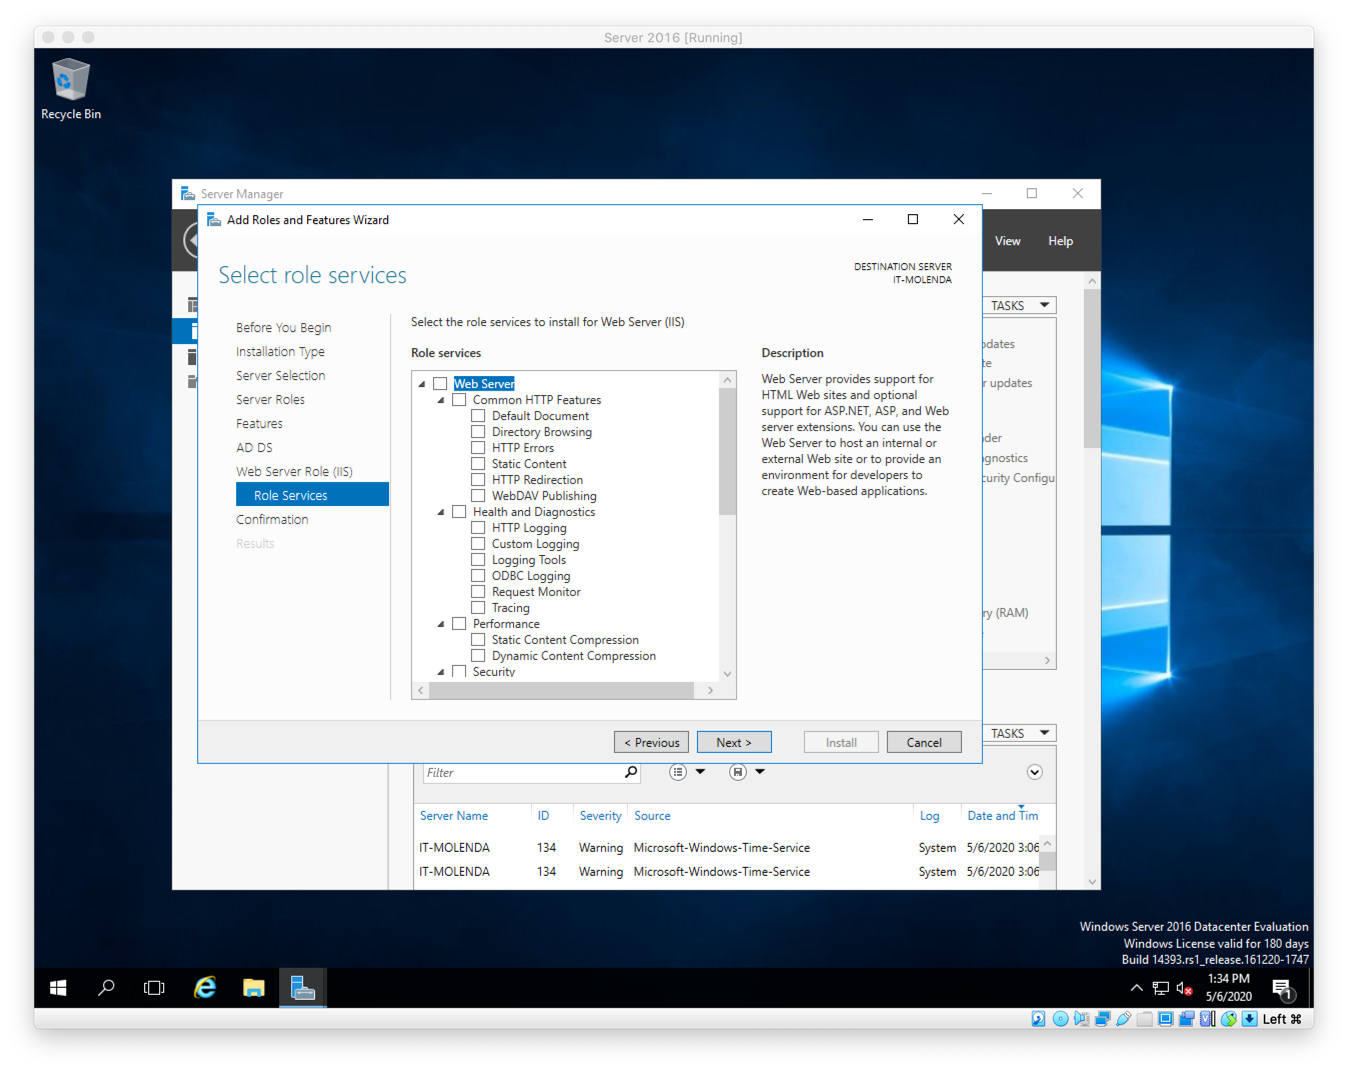
Figure L. This is the Add Roles and Features Wizard: Select role services. None to select here, click Next.
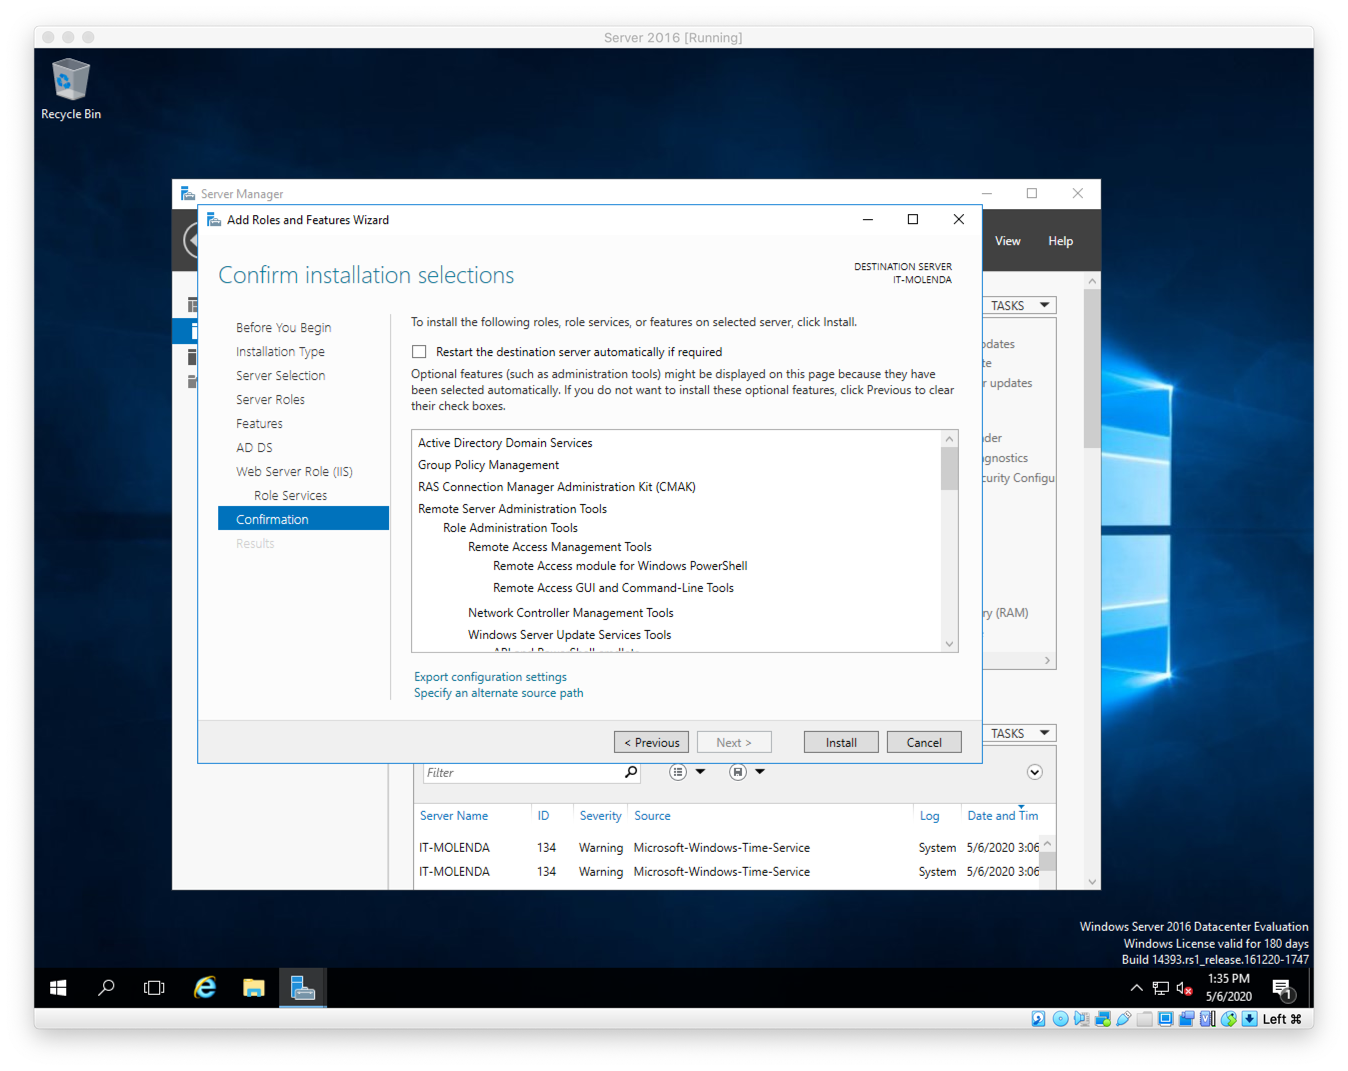
Figure M. This is the Add Roles and Features Wizard: Confirm installation selections. This shows what is to be installed. I selected a few other options. You can see them here. Once you have confirmed that this is correct, click Install.
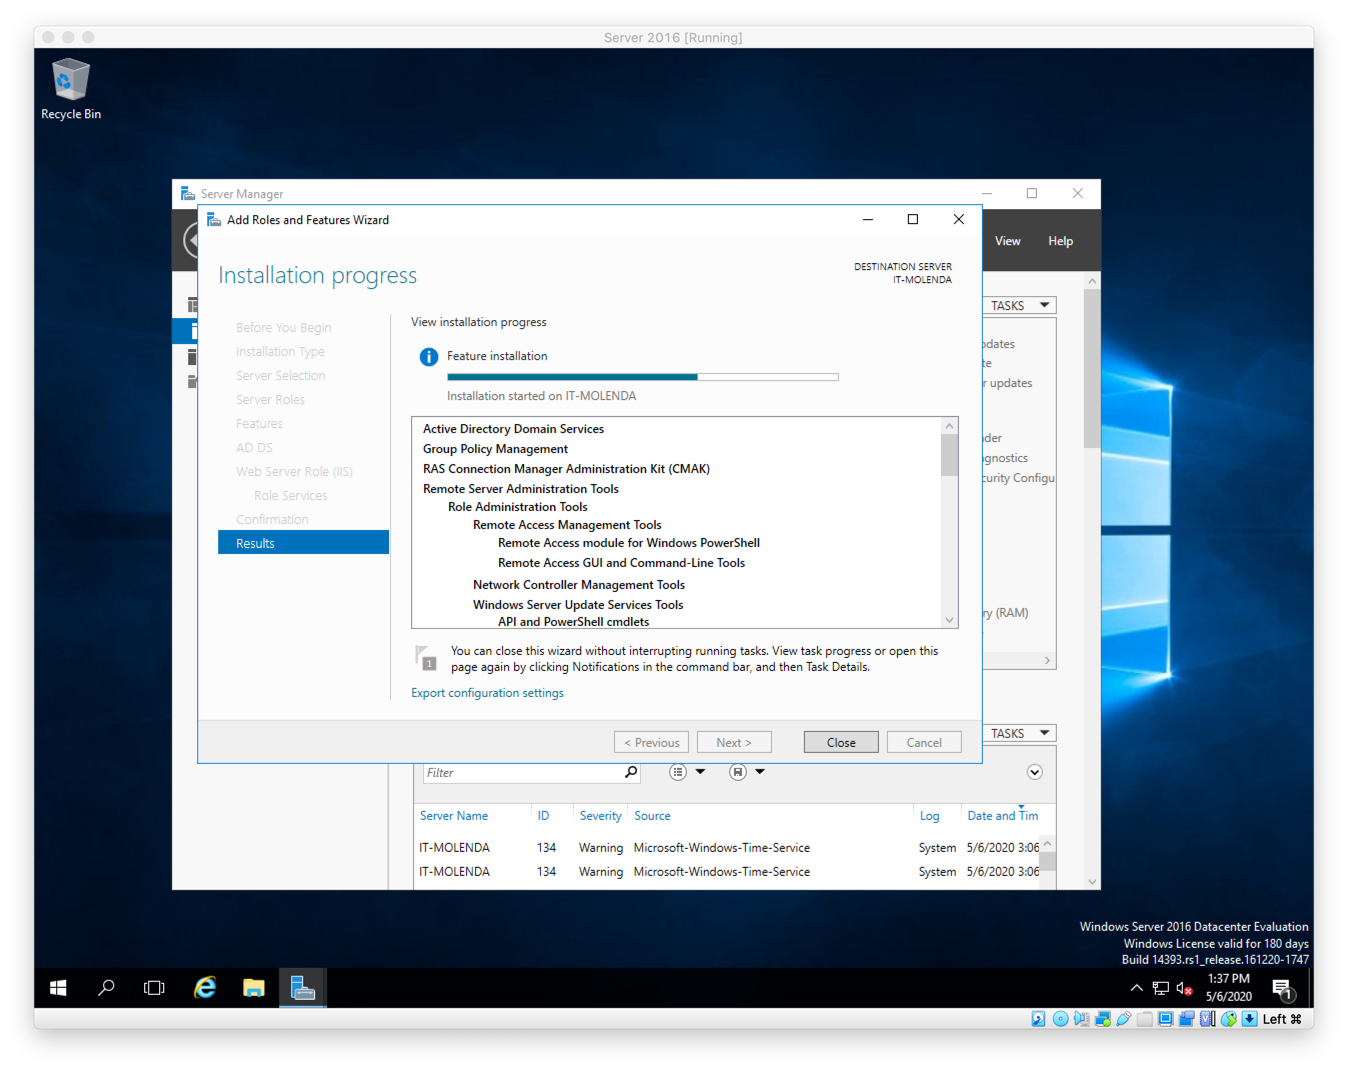
Figure N. This is the Add Roles and Features Wizard: Installation progress. When it is done, click Close.
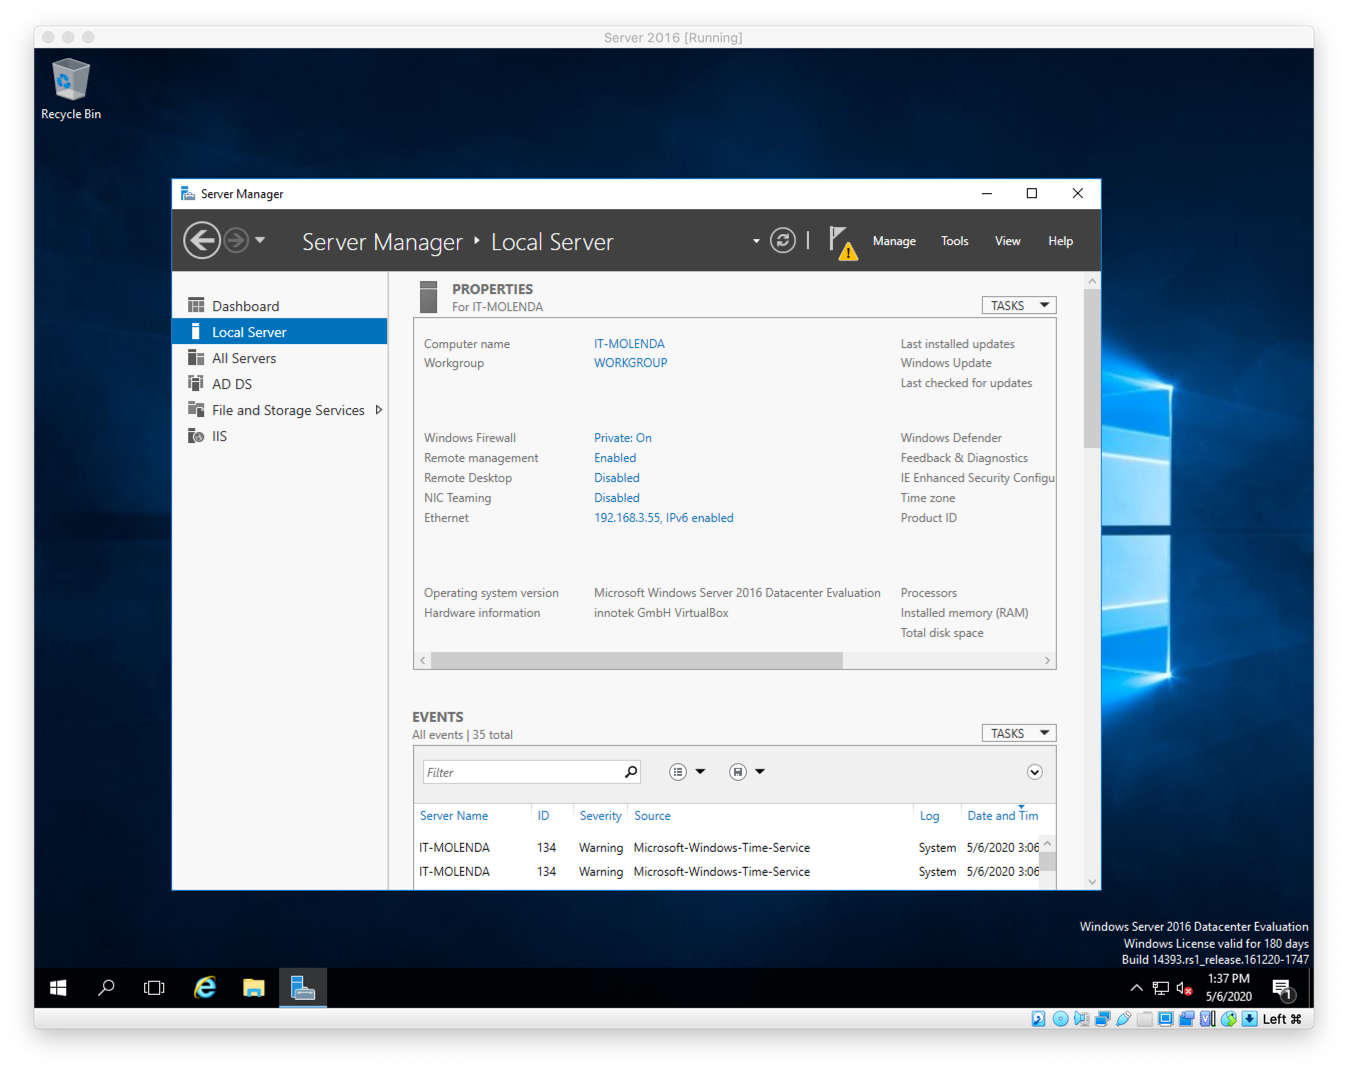
Figure O. We are done with this installation, but notice the yellow triangle with the ! In it? That means there is work yet to be done, or we can also call it a warning. Click on the flag and let’s see what comes up.
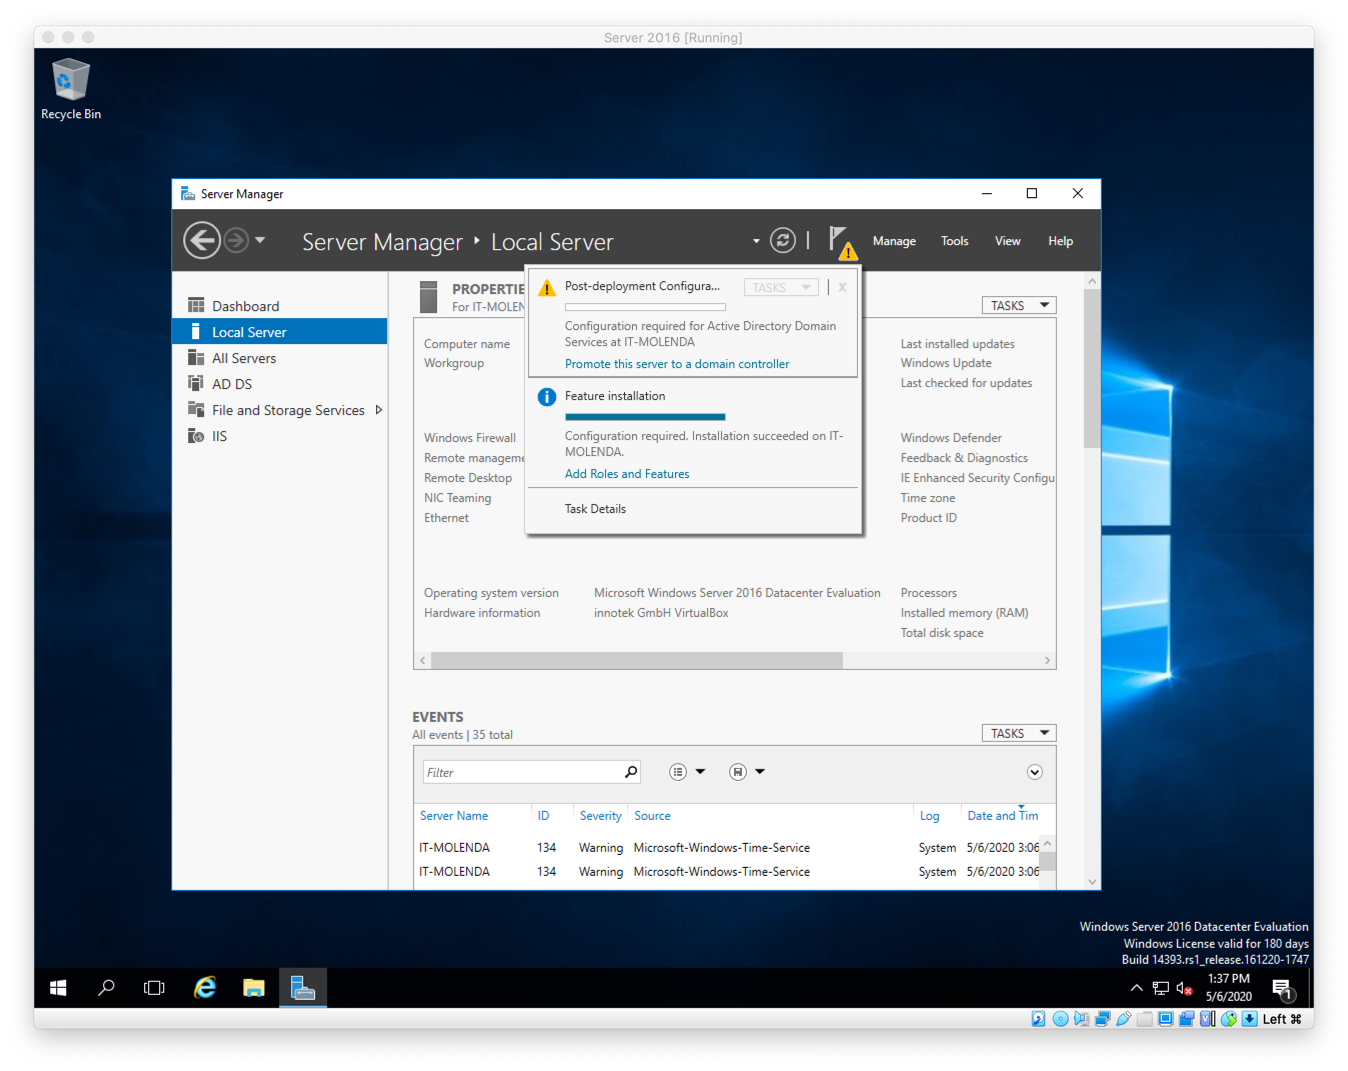
Figure P. We are now ready to promote this sever. Click on Promote this sever to a domain controller.
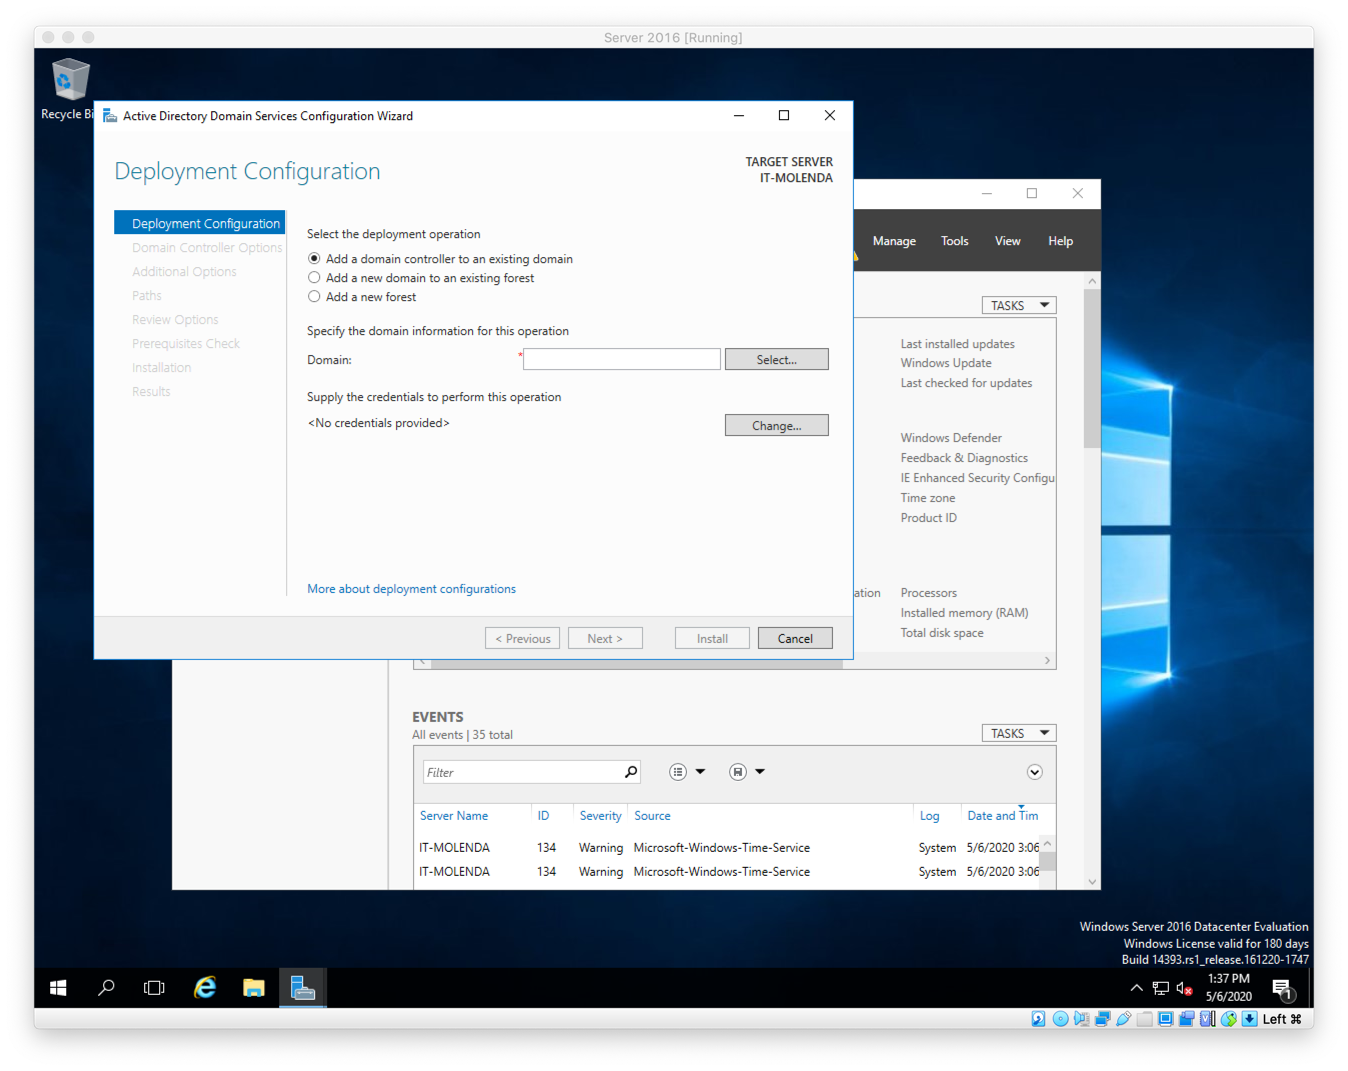
Figure Q. This is the Active Directory Services Configuration Wizard dialog. Here you have three options, If you are installing to an existing domain, keep the default. For this exercise, I will be selecting “Add a new forest.”
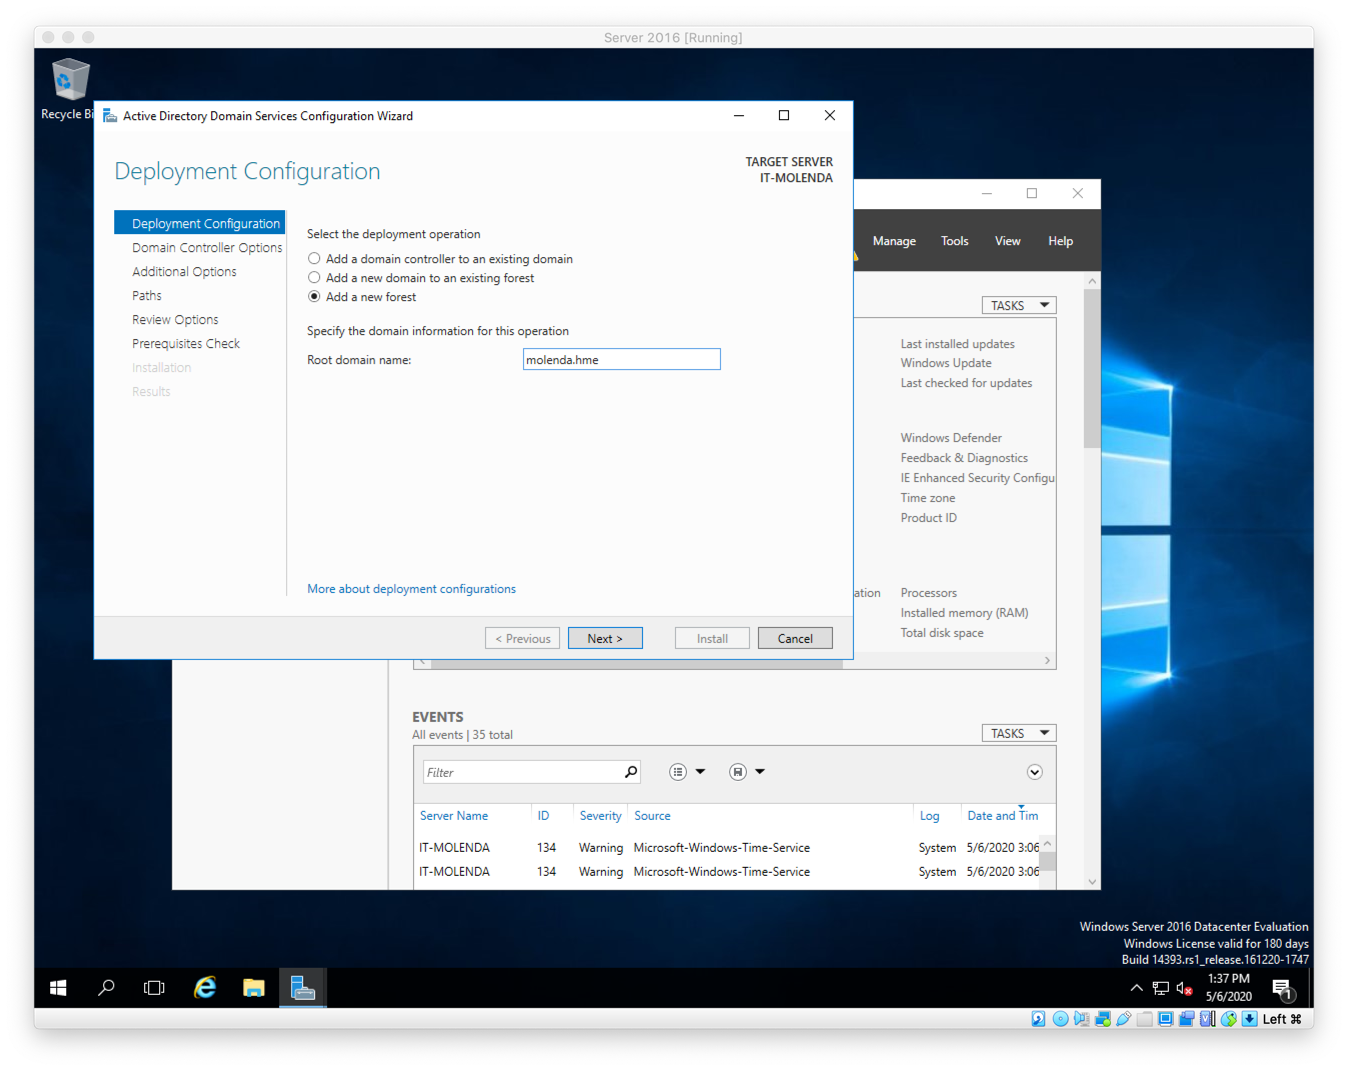
Figure R. This is the Active Directory Services Configuration Wizard: Deployment Configuration. I have now selected “Add a new forest” and for the root domain name, I created my own. “molenda.hme”. Click Next.
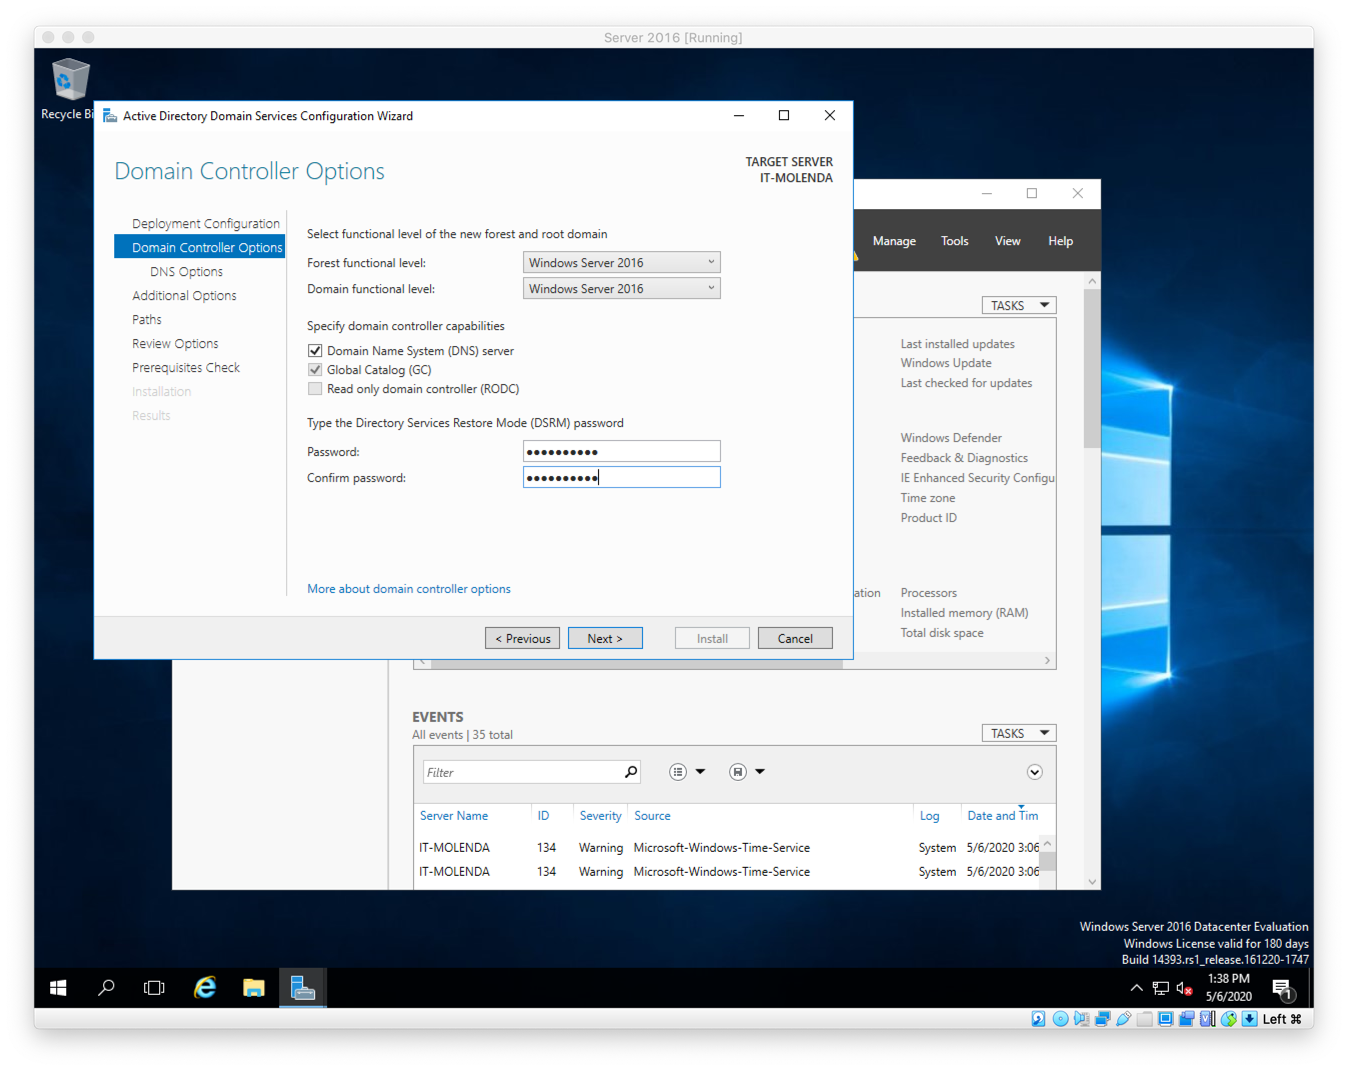
Figure Q. This is the Active Directory Services Configuration Wizard: Domain Controller Options. Here leave the defaults, and then supply a password. And click Next.
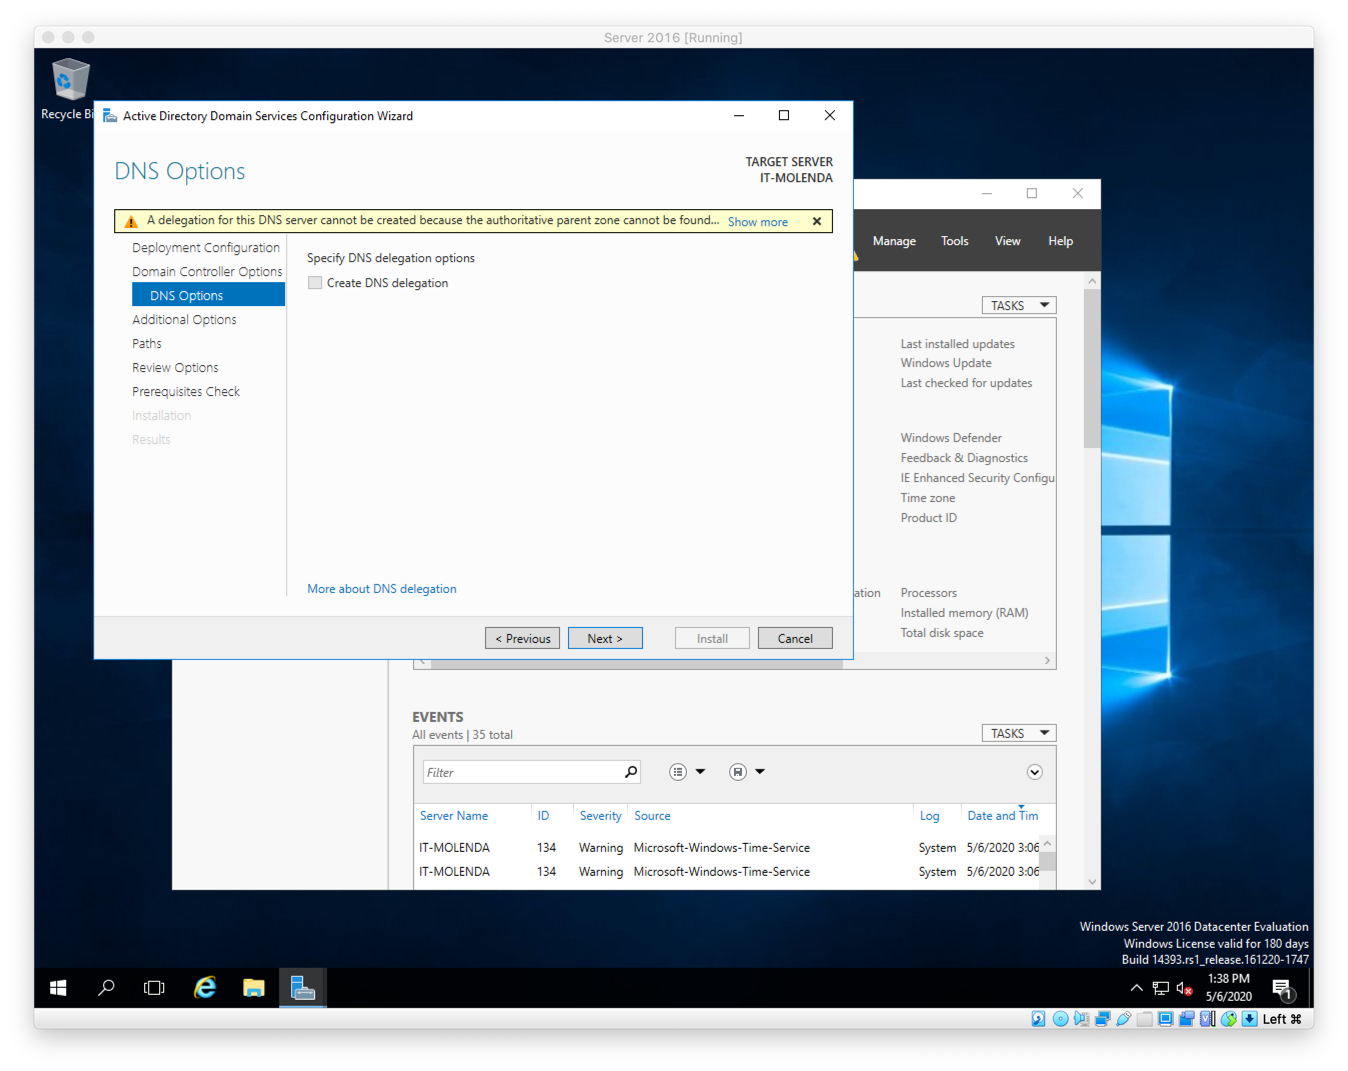
Figure R. This is the Active Directory Services Configuration Wizard: DNS Options. Nothing to change here. Click Next.
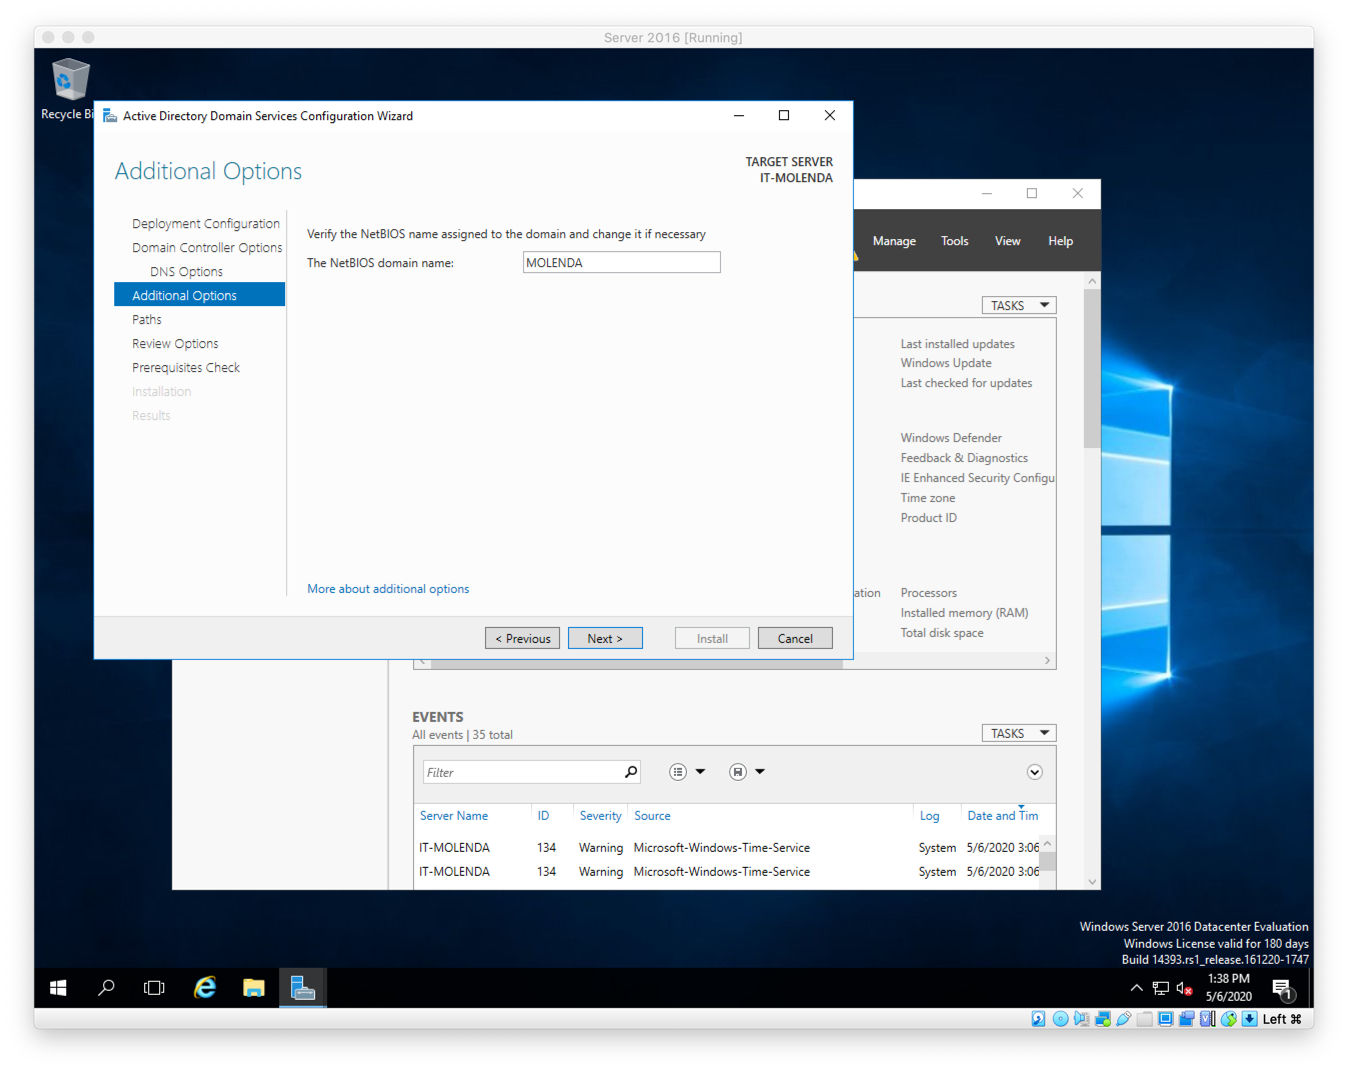
Figure S. This is the Active Directory Services Configuration Wizard: Additional options. The NetBIOS text box will autofill. Make sure it Isi correct and click Next.
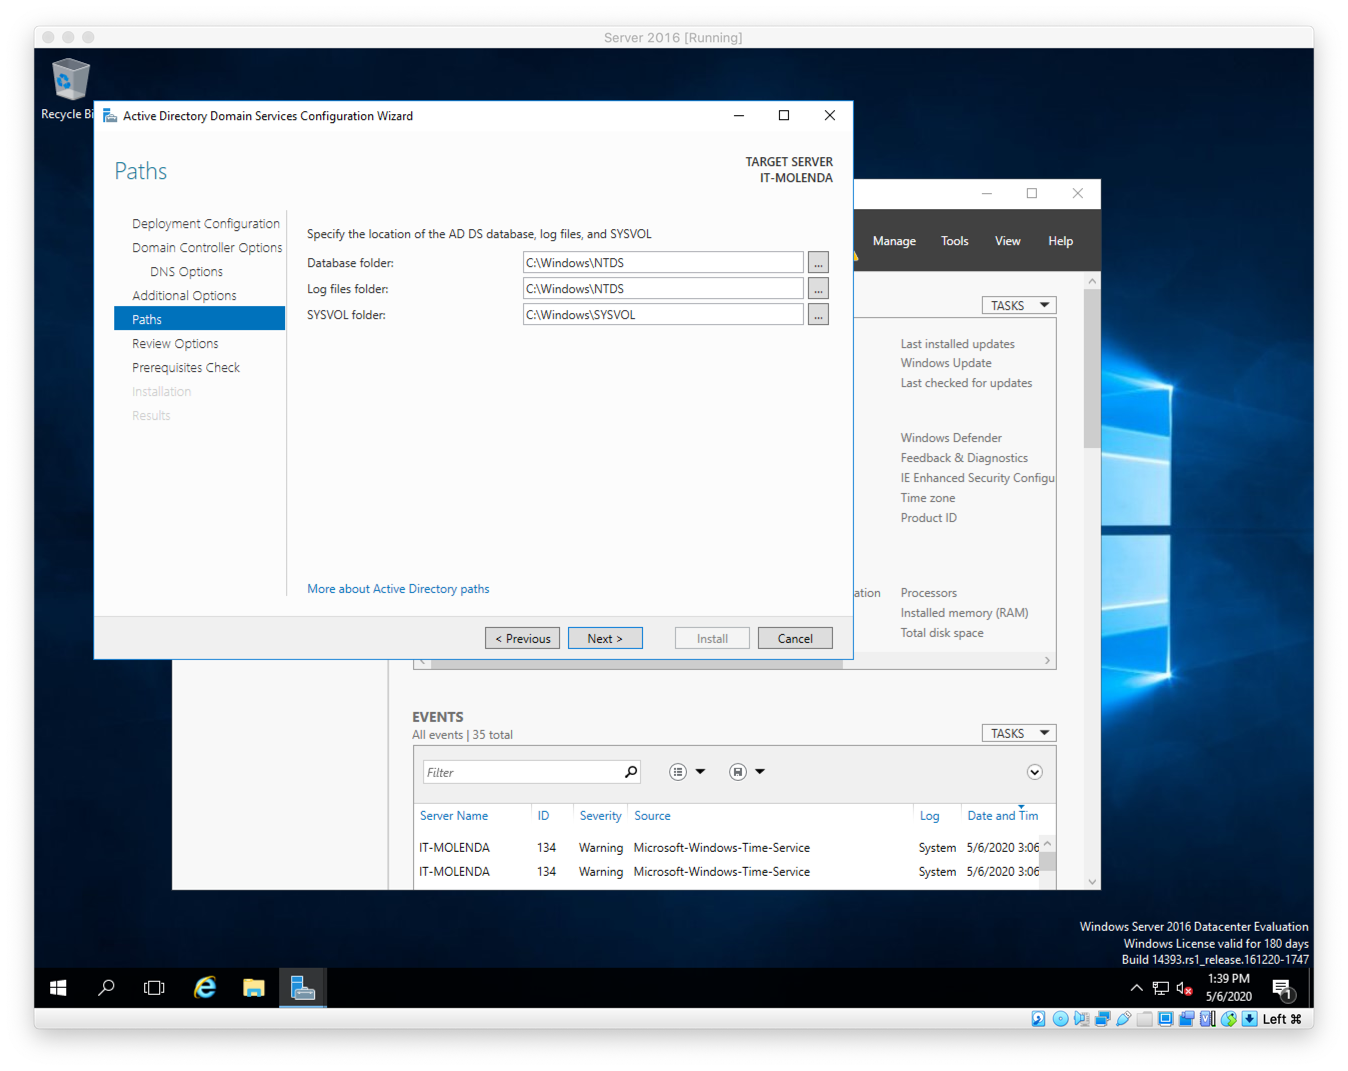
Figure T. This is the Active Directory Services Configuration Wizard: Paths. Unless you know a different set of paths for your organization, click Next and go on.
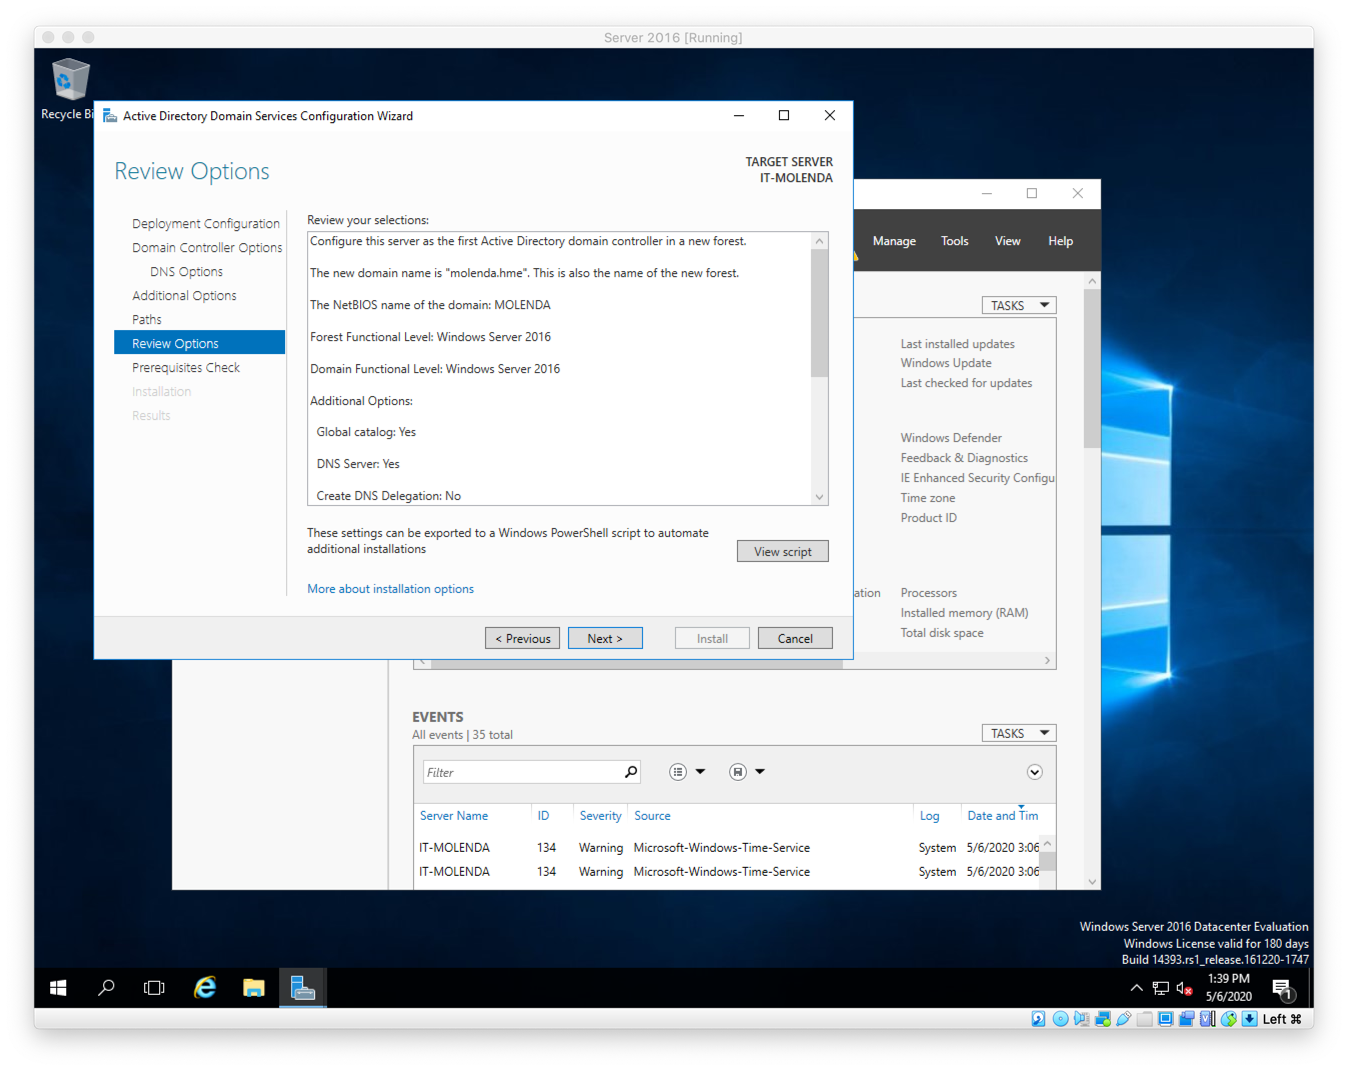
Figure U. This is the Active Directory Services Configuration Wizard: Review Options. Makes sure everything is correct and click Next. If not correct, click Previous and check your settings.
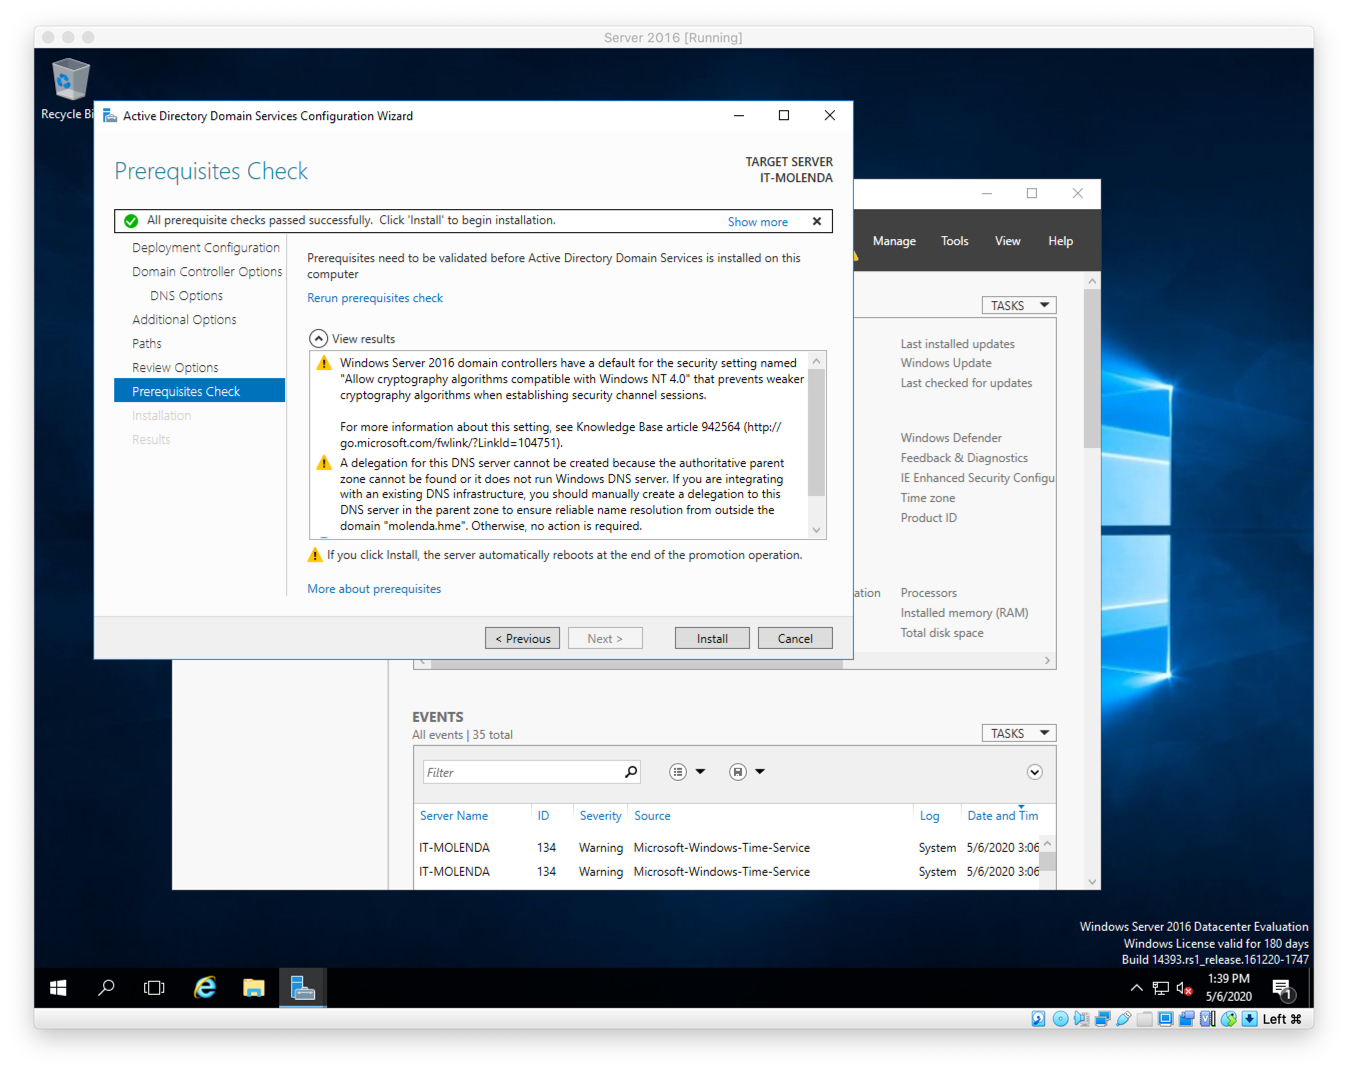
Figure V. This is the Active Directory Services Configuration Wizard: Prerequisites check. If the install button is not lit and is shows an error, you must correct before you can install (promote) this server to a Domain controller. Assuming all is correct, click Install. The server will pormpt you to reboot at this time. Do so.
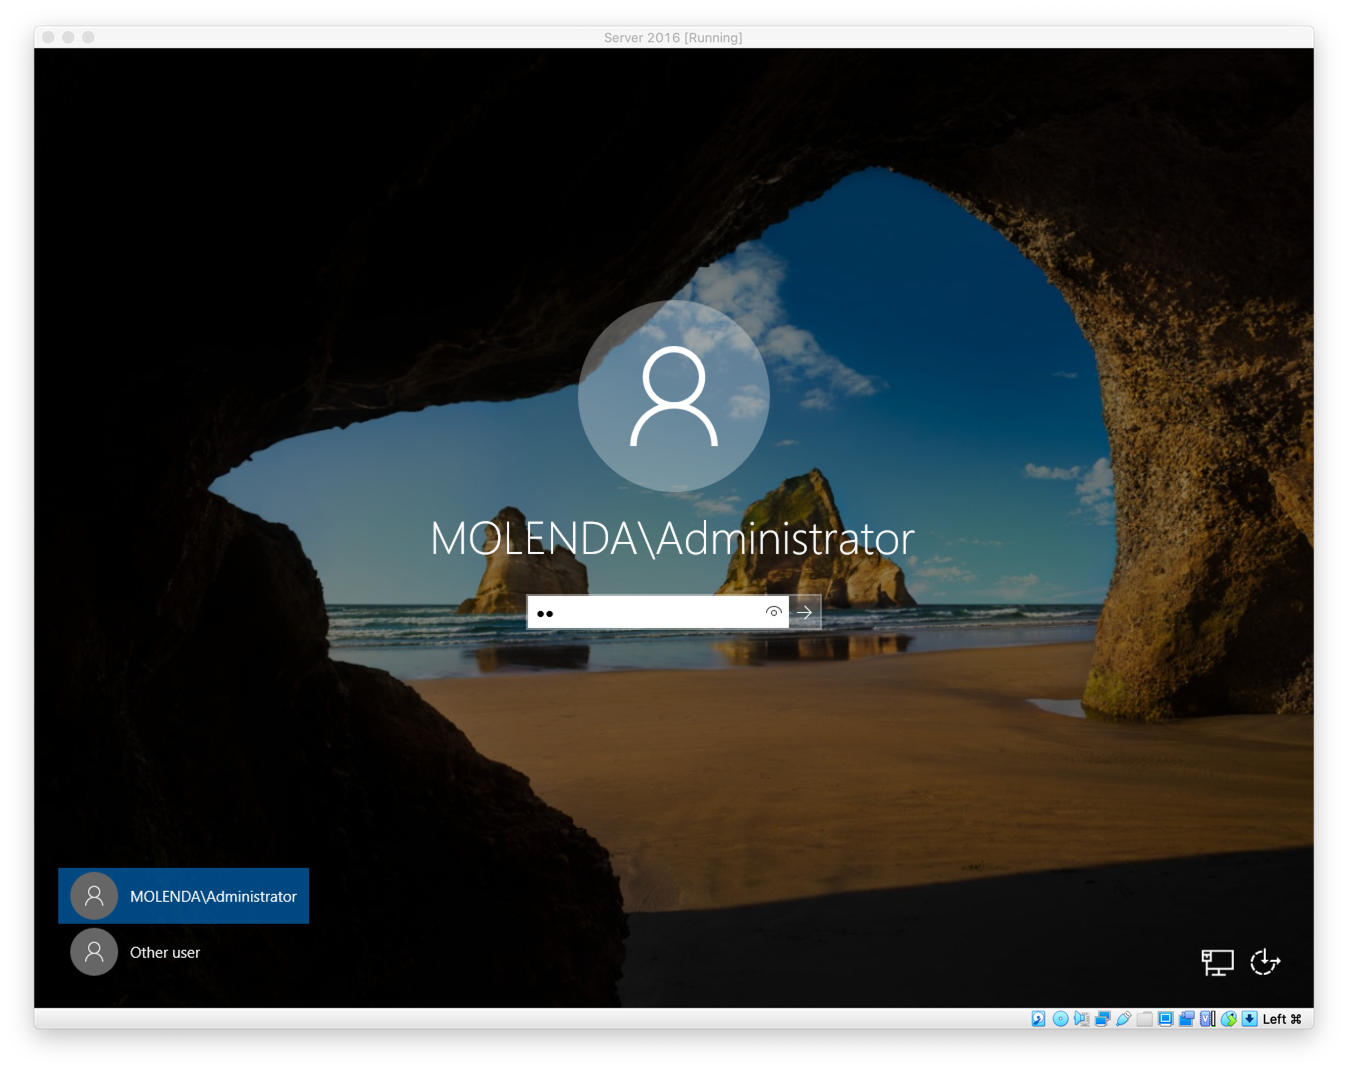
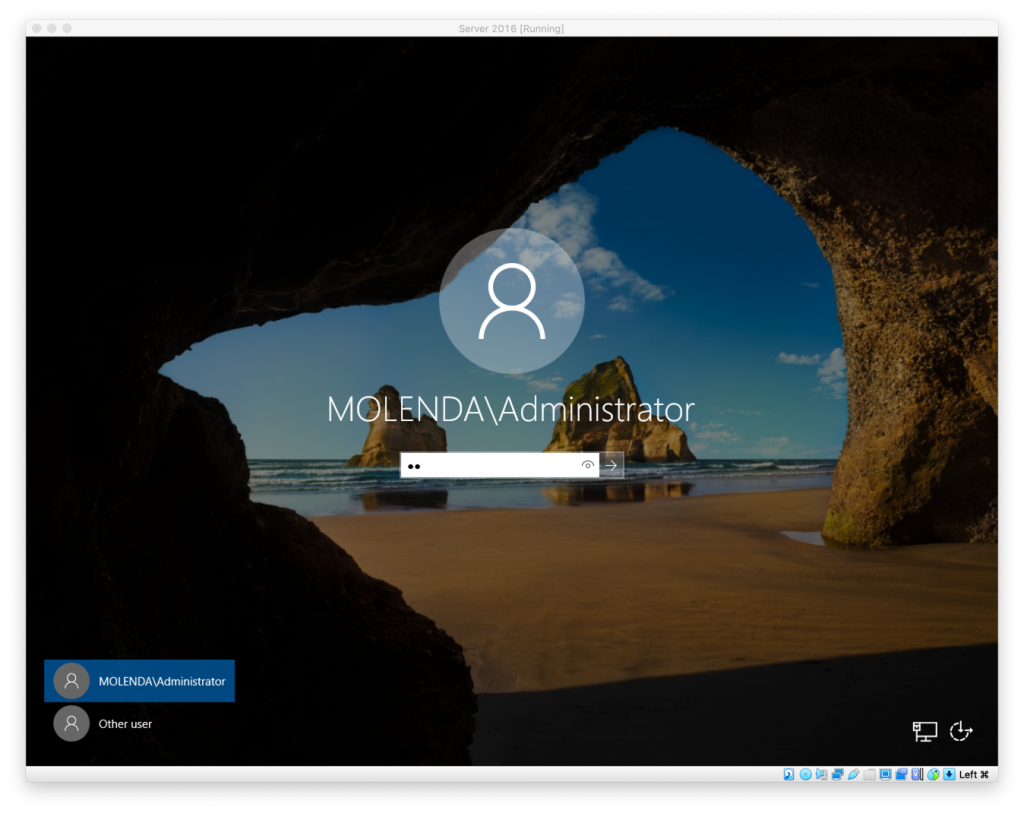
Figure V. If everything went as expected, the user logon screen should look like this. If not, something is still not right and you will have to go through the wizard again.
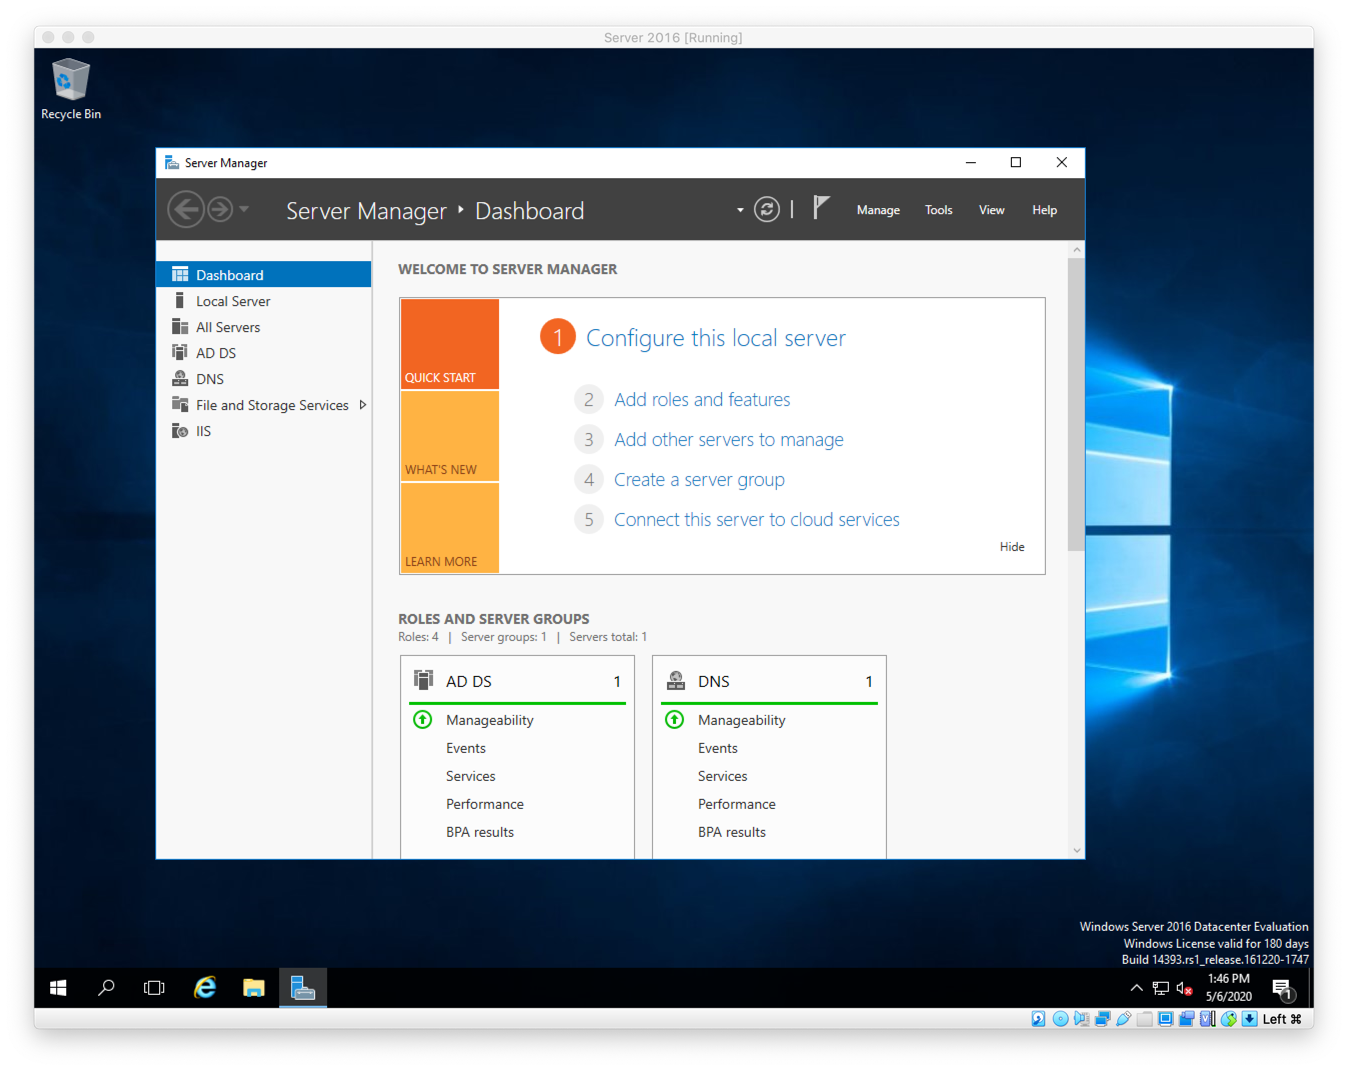
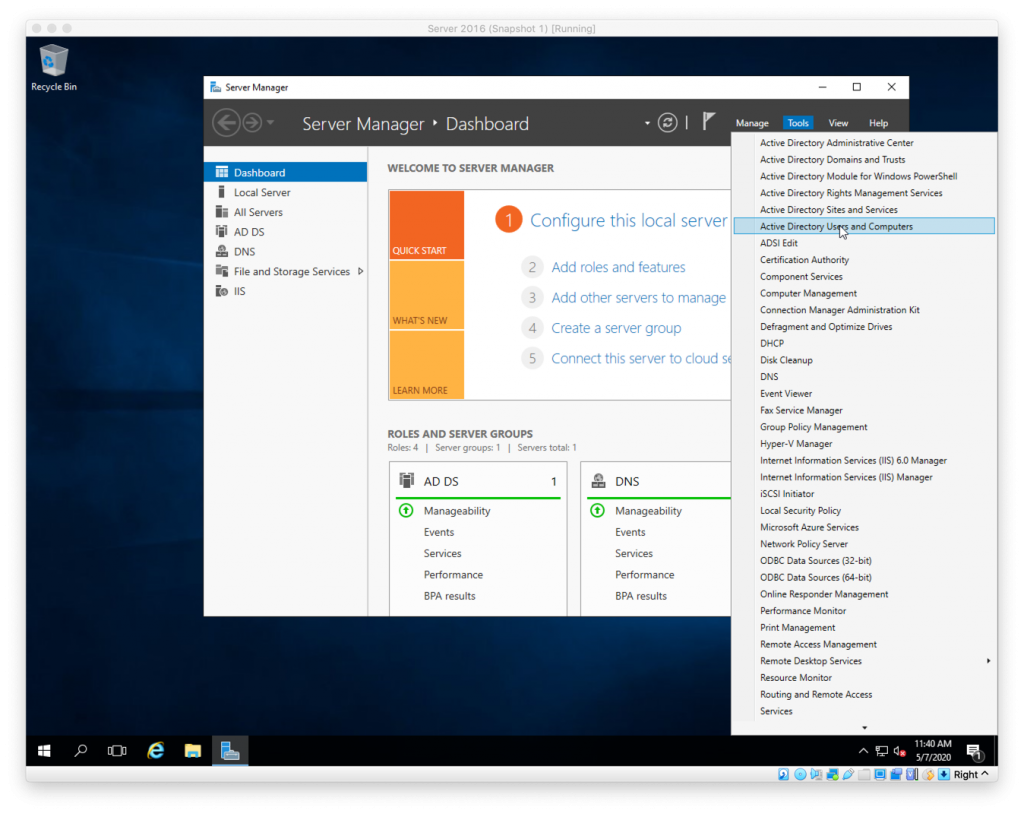
Figure X. The Server Manager will now show AD DS on your sidebar. That will confirm that Active Directory Directory Services have been installed. Now, you can enjoy learning about how Active Directory works and add some Users, Computers, and Printers to your lab server.
I had a bit of help from articles on the internet to help me along and I want to reference those who were instrumental in this project.
References:
https://www.hammer-software.com/how-to-install-remote-server-administration-tools-rsat-on-windows-server-2016/ – Install RSAT
https://www.tenforums.com/tutorials/51456-windows-server-2016-setup-local-domain-controller.html – Upgrade to domain controller
